Isaac Haines kit build log

Snakeoil

Well-Known Member
It pains me to read about the issues with the kit. I would have expected ToW, given their reputation, to have done a better job. I can see them not taking enough wood away, but taking too much or offsetting inlets is not acceptable.

On the positive side, I'm truly impressed with the work you did on the side panel. I know that was not a few minutes work. In spite of the issues, I suspect this is going to be a very pretty rifle when it's done.

The gap at the back of the rear barrel tang is probably something that grates on you. Do you have a plan to maybe modify the design to hide that gap. You know, some form of Ianization maybe? Maybe a piece of German silver or real silver inlet into the wood and into which initials could be engraved. I hesitate to make this suggestion because I know what it is like to have others make suggestions on something you are building. I was initially just asking if you were going to hide the gap in some ingenious way and kinda lost control and offered an idea. I'm sure you have already thought about this.
 

Ian

Notorious member
The tang has about .002" recoil gap when the barrel is in place, but the barrel worked forward in the tape which is what you see.

Regarding the stock, this is the sort of thing to be expected with kits, especially if you intend to build very close to an original example and probably have a better idea of what that is supposed to be than the patternmaker did. I am neither disappointed nor am complaining, only mentioning the little discrepancies as I go and how I deal with them so anyone following along might get something out of it.

The only other kit experience I have is with Investarms and Pecatonica, both of which tend to be rather generous with wood and vague on shape, thus giving the builder more leeway.
 
Last edited:

Ian

Notorious member
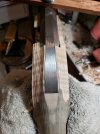
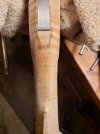
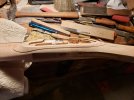
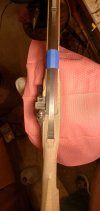
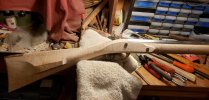
Side by side of before and after cheek work. The forward bias of the right cheek tail is apparent. I would like to have left about 3/32" more width at the back than I did but had to narrow more to make them even since the lock location prevented shortening the left side any more.

20240114_115842.jpg

20240124_214023.jpg

There was a generous amount of width, presumably for larger barrels, but the panel tails weren't long enough, the right shape, nor had any wood left for the beavertail mouldings so I narrowed everything including the wrist to make it happen.

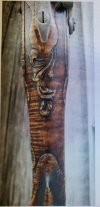
Here's an example of good wrist and panel architecture:

20240124_114731.jpg
 
Last edited:

JWFilips

Well-Known Member
Never built a kit gun that did not have a multitude of issues!

None of it goes together like one you build from scratch! That is because the" inlet barrel" on a scratch built gun, bases everything else on the inlet barrel that is exactly in the proper place! All measurements are done from that standard!

In a kit build; The "lock inlet" determines where everything goes which is total backwards!
On many of the kit builds I have done, many I have gone so far as the fill the lock mortice with a properly fitted & inletted piece of similar grained matching wood, To get the thing back to square one! That is why I have hundreds of pieces of curly maple in my wood store at the end of my shop. The worst part about it is I also have many types of gun woods too! The wood store takes up 1/3 of my shop.

I always say, "making a firelock from scratch is easier! It takes longer, but everything is in the right place without compromise"
Unfortunately, I probably have built more kit guns than scratch built custom gun because the average folks can afford them.
But I have made more money building scratch built custom guns which is probable 1/3 of my builds!
Regardless, everyone received a custom gun when I built them. I never could build a plain flintlock.
 

Ian

Notorious member
This kit is better than most but has the usual issues as a pre-inlet.

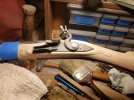
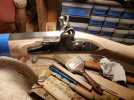
Did the lock panel mouldings tonight.
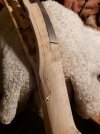
It is said that Isaac Haines probably stabbed in the lines for all his mouldings because of the perpendicular relief cuts. I am not that good and end up with little jagged cut marks where the stabs aren't all the same depth. Rocking and walking a radiused chisel doesn't work all that well for me either, so I use a 60⁰ vee hand chisel turned on its side and carve up against the lines with hand pressure, trying to get a continuous shaving. The tiniest defect sticks out like a sore thumb.

20240125_194638.jpg

20240125_215854.jpg

20240125_220854.jpg

20240125_220910.jpg

20240125_221219.jpg
 

Snakeoil

Well-Known Member
I am not that good
I would beg to differ. I'm seeing character coming out in this rifle that I never imagined when I was thinking about building it. Not being a true student of the muzzleloader pretty much drives my limitations. If I were to build one some day (very doubtful) this report would provide an excellent basis. I suspect that will be the case for others that find this build log.
 

Ian

Notorious member
Way past time to do a few chores, I was stalling doing the lock mouldings.

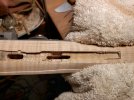
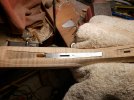
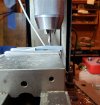
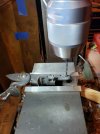
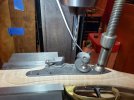
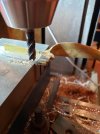
Trigger plate. Since the stock was already pre-inlet for the included one, I decided to use it. Will need to make a new trigger or weld a strip on top of this one so it can be pinned high enough to work correctly as previously discussed. The apprentice was working late last night installing the trigger guard and didn't get the end mill clear of the stock when cranking the X-axis for a test fit. I'll get to show him how to plug the little half-moon later :rolleyes:

20240127_172736.jpg

Couple tweaks on the anvil and some bluing and shaving wood and she plunks right in.

20240127_174803.jpg

Eyeball center and angle of the tang bolt, spot, drill tap size, countersink, and put the barrel in the stock.

20240127_180526.jpg

Drill through to the trigger plate and check the outcome.

20240127_181935.jpgContinue drilling through the plate at tap size, then remove plate and drill through bolt clearance size, replace the plate, clamp it tight, and tap through.

20240127_182852.jpg

Voila!

20240127_183746.jpg
 
Last edited:

Ian

Notorious member
Time to drill for the barrel pins. I detest huge pins like this kit came with (3/32") so I used 1/16" music wire.

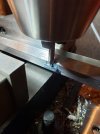
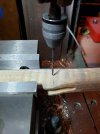
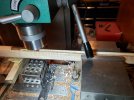
I like to put the barrel against the fixed mill vise jaw and set the X-axis with a pointer or center drill in the chuck, then mark the center of the barrel tenon on the outside of the stock, clamp barrel and stock together in the vise, align the Y-axis with the stock mark, and peck-drill all the way through. Afterward I slot the tenon on either side of the hole to allow movement from temperature and humidity changes.

20240127_195034.jpg

20240127_200457.jpg

Went ahead and drilled for the inlet pipe pins while I was at it using the same technique for locating the holes.

20240127_202538.jpg
 

Ian

Notorious member
With the barrel fastened in, it's time to drill for the lock bolts. Fortunately the lock was inlet perfectly in the vertical direction relative to the barrel so there was no issue locating the front bolt between the barrel and rammer channel.

Since there isn't much room on the bolster for the bolt hole, I drill it first rather than try to drill all the way through from the other side of the gun. Then I mark the front bolt location so it almost touches the bottom flat of the barrel and drill it too.

20240127_211837.jpg

Then I put the lock in the gun, gun in mill vise level, line up with the holes in the lock, and drill through the stock and tang.

20240127_212852.jpg

Then remove the lock and drill through the stick and tang again at bolt clearance size.

20240127_213810.jpg

Repeat on the front lock bolt, then clamp the lock in place and tap through from the opposite side.

20240127_214302.jpg

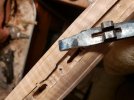
Now I can design the side plate. Fortunately the tabs on the trigger guard were cut long (actually the tabs were short but the mould maker added vents to them and cut the excess casting long leaving usable extra) so I could drill the front pin up high and hide it behind the side plate. Deepening the guard tab inlets for high pinning was how "the apprentice" damaged the bottom of the stock.

20240127_220148.jpg
 

Ian

Notorious member
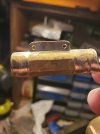
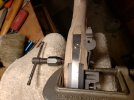
The only photo I took cleaning up the TG on the mill. I squared the ends, cleaned up the top flats, flattened the bottom, and thinned and squared up the tabs. Faster and more accurate than hand-filing. You can see the place where the tab of the pattern stopped and the vent was added to the mould, allowing me to clean it up as a longer tab. Kudos to the foundryman!

20240125_222925.jpg
 

Ian

Notorious member
I deburr flash holes with a 100 degree countersink. The center drills make too deep of a cone.
 

Ian

Notorious member
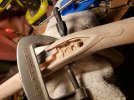
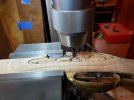
Rammer channel was a fuzz too shallow so I set up on the mill and cleaned it up, fading a bit to the right as the channel is off center from the barrel almost an eighth of an inch the entire length. Then I drilled the rammer hole the last 3/4" that the stock maker forgot to do (standard procedure).

20240128_193316.jpg


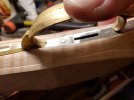
Then I put the forestock on a much-needed diet and got it profiled, symmetrical, and properly tapered and flared. Now I can start on the forestock mouldings. Since this is extra-wavy wood and discretion is the better part of valor I think I'll make me one of those moulding planes that guides off the rammer channel rather than try to score a straight line with a pocketknife and relieve it with a chisel.

20240128_205228.jpg

The sheet brass I ordered should be here later this week and then I'll make the nose cap.
 

Snakeoil

Well-Known Member
You continue to impress me. Bummer about that apprentice. I've done similar rookie mistakes and all you can do is reset to gain your focus and carry on. Whining about it accomplishes nothing. Although I suspect there were a few choice works for the lad when it happened.

I'm not sure I understand about drilling the last 3/4 inch for the rammer hole. I assume this is the hole that continues on past the ramrod pipe. You must have a drill brazed or welding to a long rod in order to accomplish this. I can't imagine another way to do it.

Interesting technique for drill the screw hole for the rear barrel tang. What I was taught to do was decide where you want the hole to come out in the trigger plate. Then center drill the hole in the trigger plate. Now set up a center in a vise on the drill press table and align the point with a similar center in the drill chuck or quilll taper. Lock everything down tight. Now, with the trigger plate and barrel in the stock, mount the trigger place centerdrilled hole on the center in the vise and simply drill thru the tang. It will perfectly align the two holes and of course the hole thru the stock.

Looking forward to the tiny Dutchman you'll put into that apprentice oops. I think others will be interested as well. No Plastic Wood I assume. ;)