Lyman/Ideal 45 lubesizer manual and cleanup instructions

JonB

Halcyon member
Introduction: Lyman hasn't made the 45 lubesizer since the early 1960s, yet it remains one of the favorite lubesizers for many of us bullet casters. Notice that the manual calls it a No. 45 Ideal Bullet Lubricator and Sizer, but the company name is Lyman (Successors of Ideal).

digital photos of an original manual

Front of sheet


Back of sheet


click on these for full size, large file, to upload to your computer, if you wish.


Examination:
What to look for when examining and/or purchasing a 45.

fullfrontviewRed45.jpg


fullhandlesideviewRed45.jpg


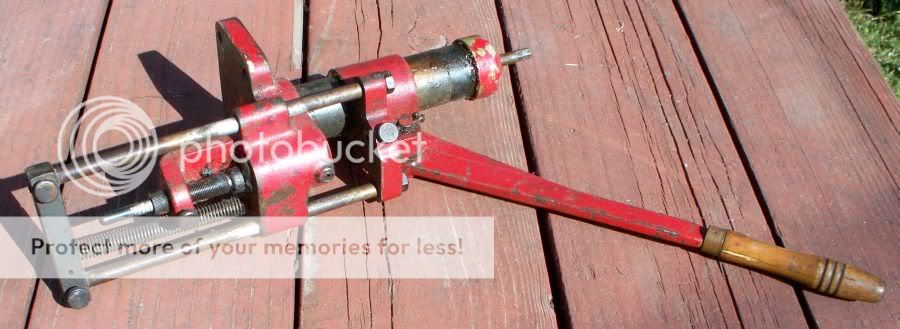
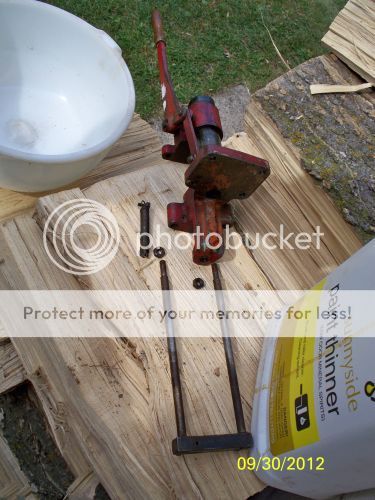
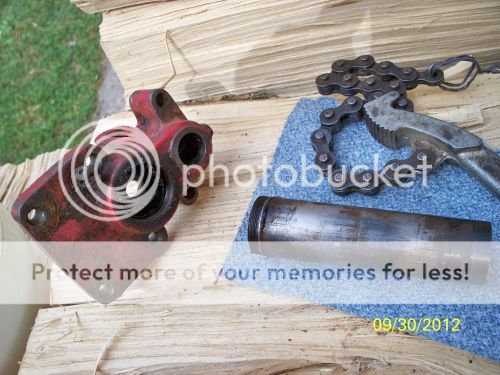
This unit was bought at a local gunshow, it was complete, except for no wrench or no top punch, but there is a .358 die installed...Bonus ! that's worth about $15.

undersideviewRed45showingoriginalorange.jpg


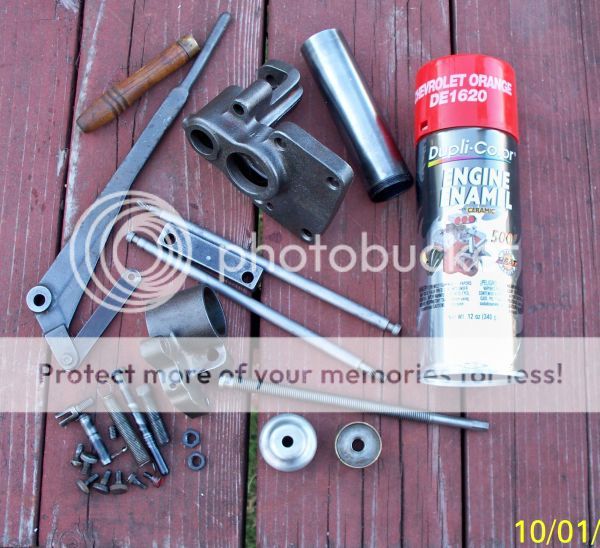
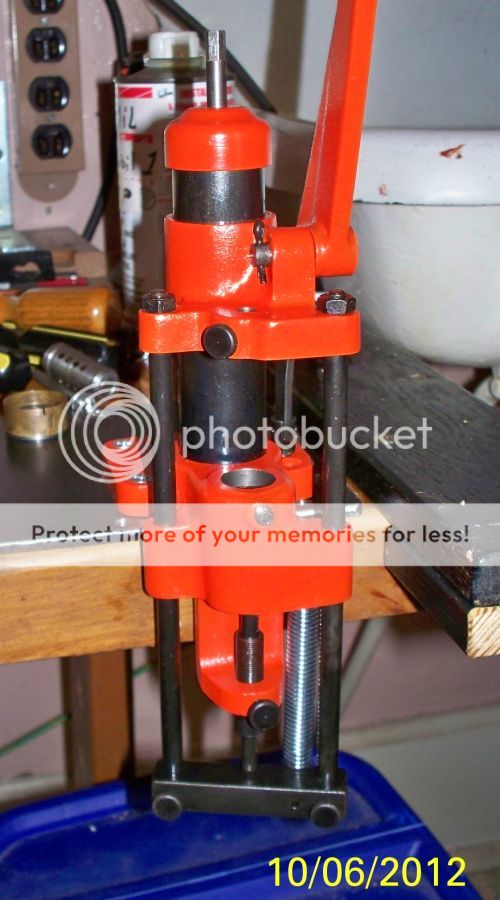
The Red color isn't original, Lyman painted them all orange, to my knowledge anyway.

fullbackviewRed45.jpg


topcapremovedviewRed45.jpg


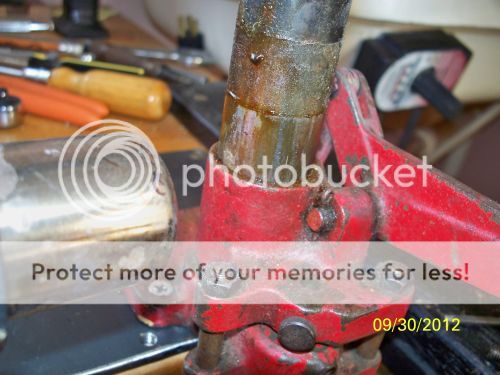
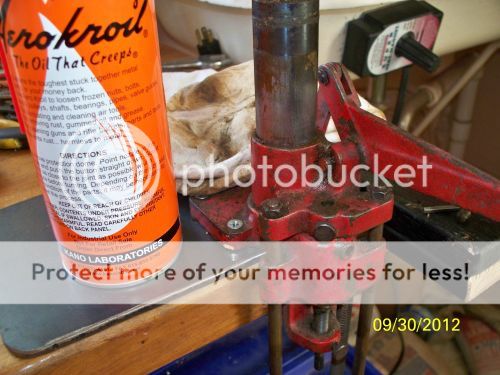
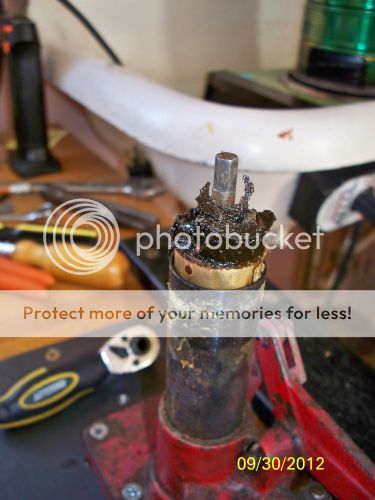
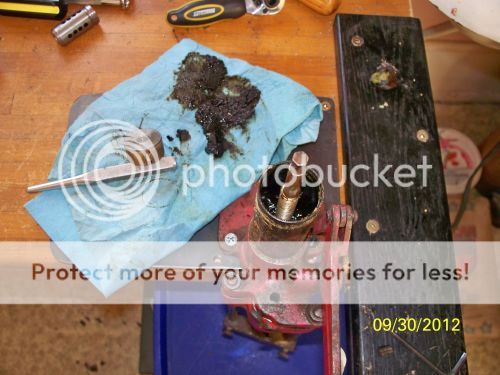
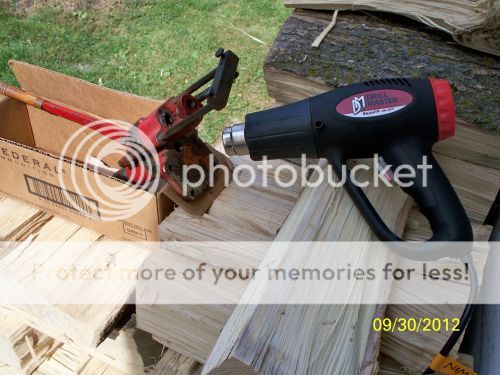
The top cast iron piece that is suppose to slide on the reservoir tube was stuck (glued with old lube), So I couldn't check the function when I was buying this and if there was a top punch and die installed, I could have checked the alignment(if it wasn't stuck). From the looks inside the reservoir, the lube has leaked past the pressure nut, So I assume it hasn't been upgraded to the O-ring style pressure nut (used on the 450 and 4500, which does work with the 45) which should eliminate that leaking.

btw, in hindsight, for inspection purposes at the time of purchase, I could have (and should have) warmed the reservoir tube up with my hand, to get the lube to loosen it's grip and maybe borrowed a top punch from the vendor and checked for function and alignment, that would have been a smart thing to have done.


lefthandtightnesstestviewRed45.jpg


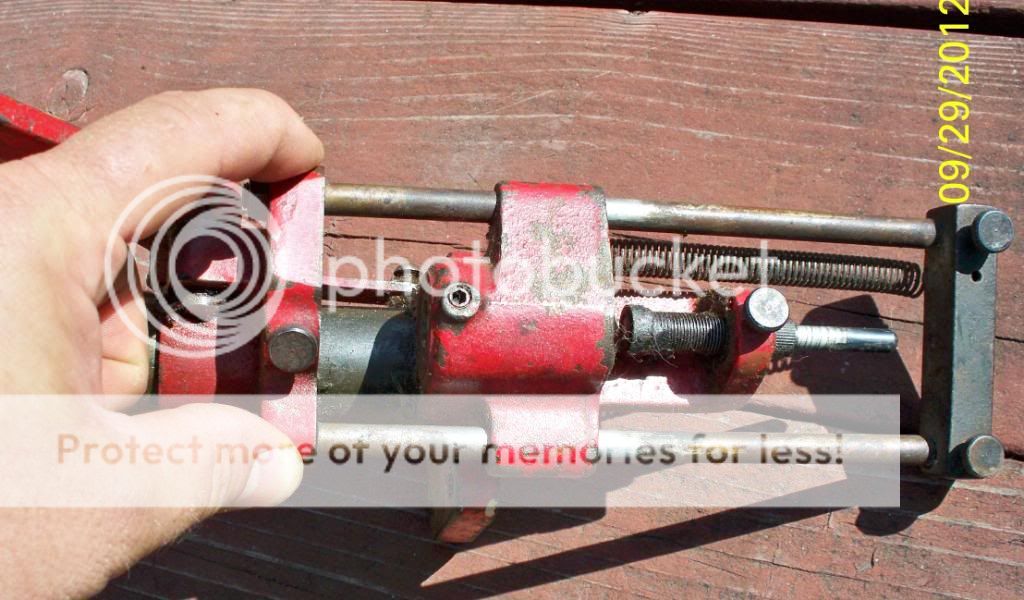
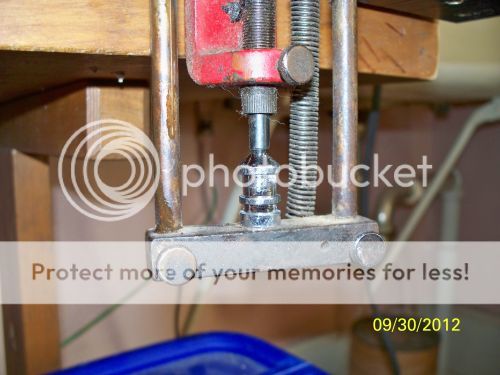
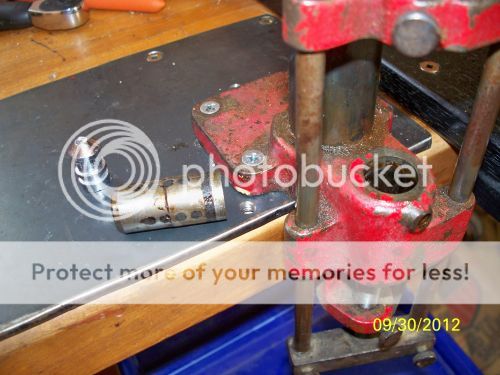
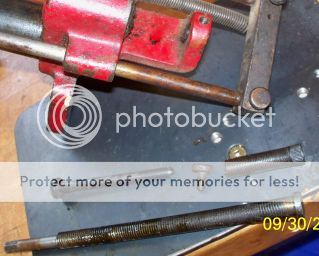
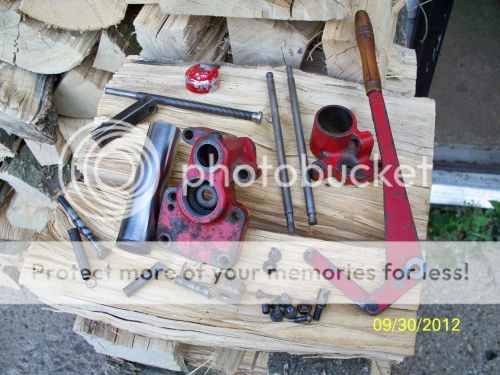
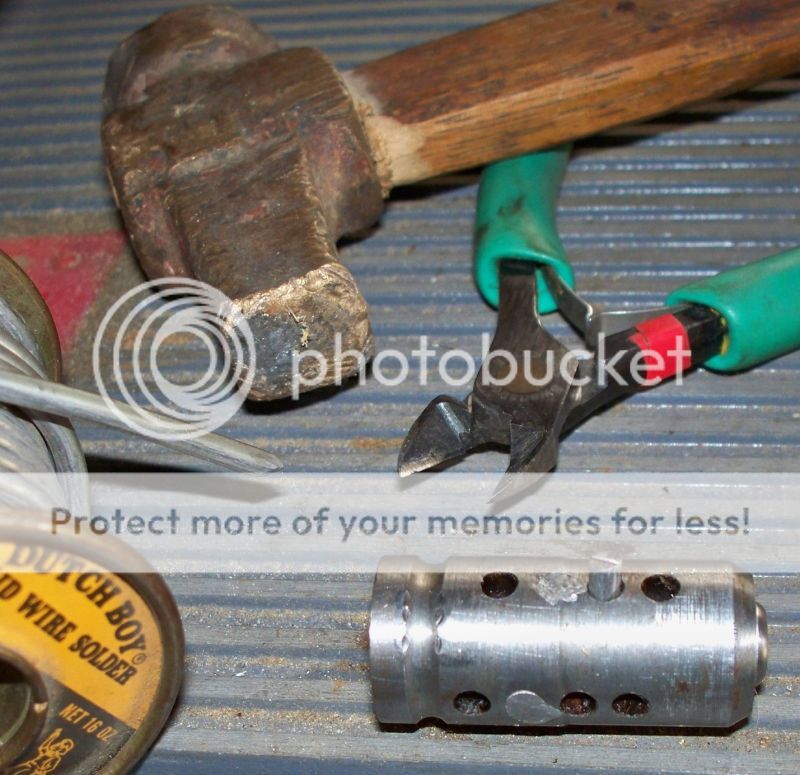
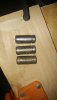
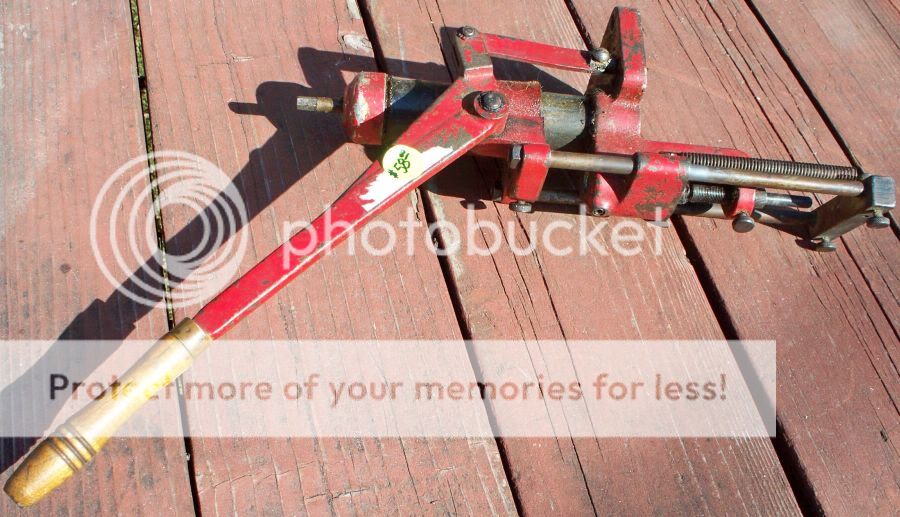
Another thing to check for when buying a #45 lubesizer, is if the slide rods or the cast iron parts are worn from excessive use without proper lubrication. Remember it's over 50 years old. Grab the upper piece with the left hand as shown above and grab the lower piece with the right hand as shown below, with the upper piece lowered most or all of the way, try to twist them. It should NOT move, it should be tight. If the upper piece is raised up all the way, there maybe a little movement and that's OK, but it's better if there isn't any, if the slide rod nuts are not tight, that can also cause this same looseness I am describing, so tighten them if needed and try twisting again.

Stating the obvious here, good alignment and tight fitting cast iron parts (to the slide rods) are important for sizing bullets concentrically and uniformly with the 45.

righthandtightnesstestviewRed45.jpg


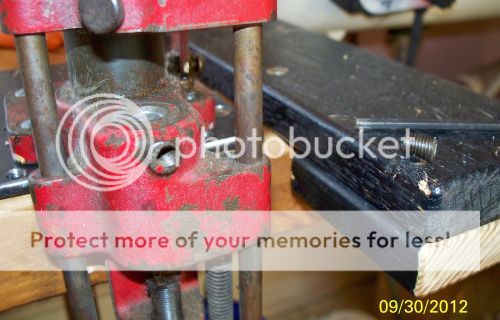
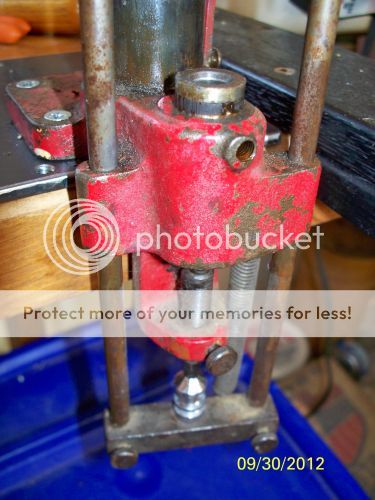
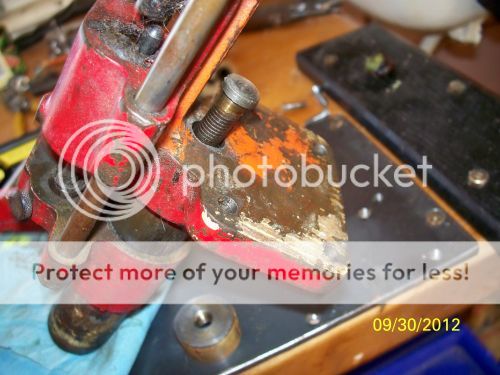
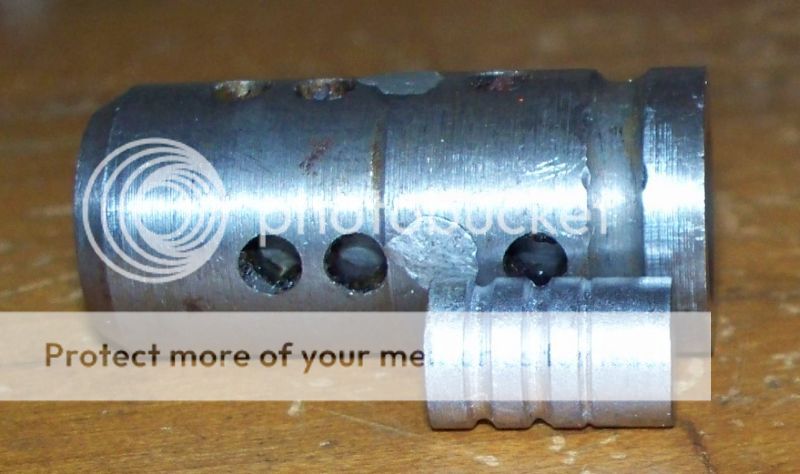
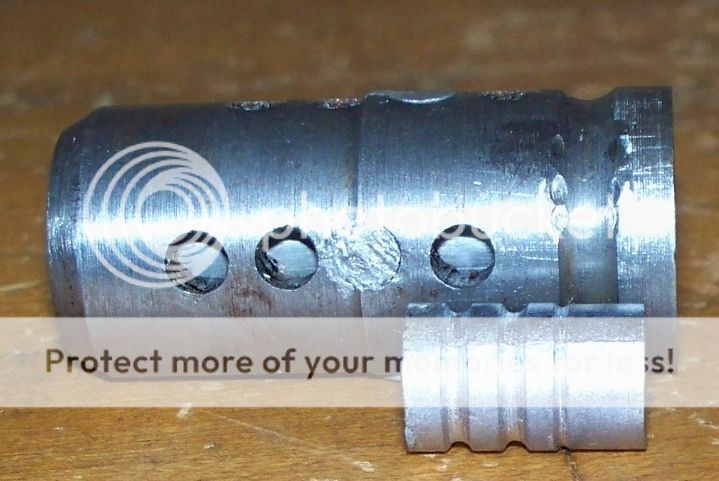
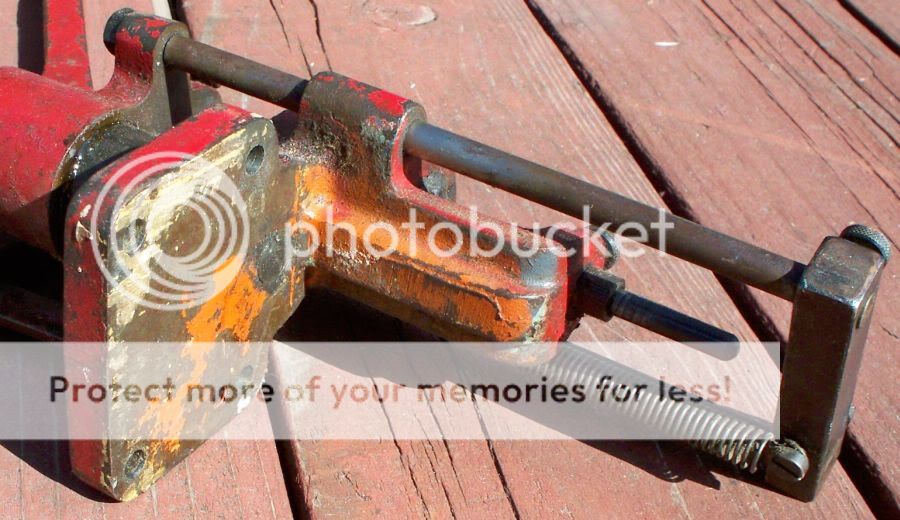
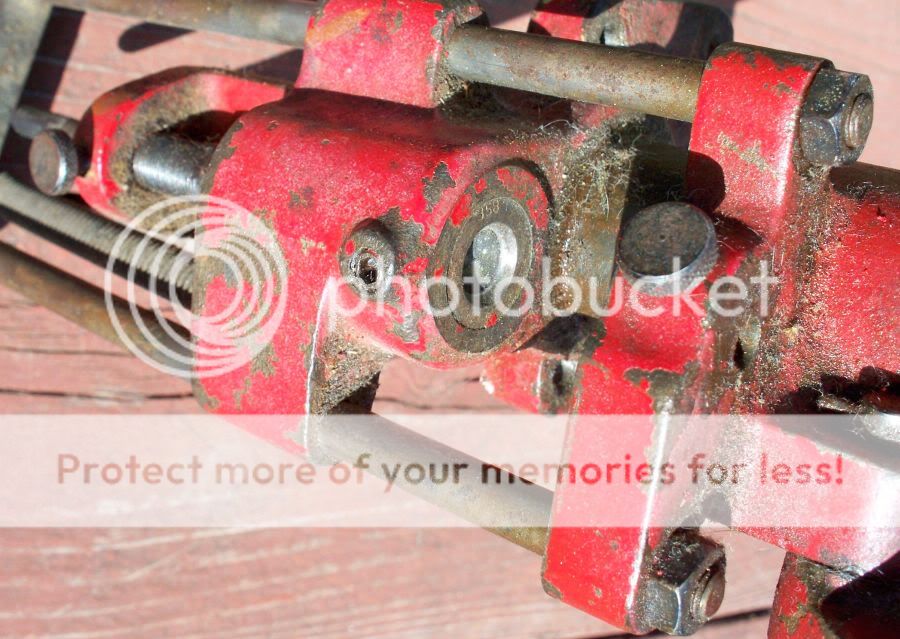
Another common problem to look for when purchasing a 45, is a crack in the lower cast iron piece, between the die setscrew and the die. This is caused by over tightening. As you can imagine it'd be difficult or impossible to fix (for the average handyman anyway), maybe a skilled welder could braze that cast iron? Photo below shows a close up of the area in question. This one is NOT cracked.

closeupdiesetscrewviewRed45.jpg
 
Last edited:

JonB

Halcyon member
Disassembly

The first step is to remove the Die. It is much easier to remove the die when the press is mounted to a bench. Heat up the area around the die with a heat gun, lamp, or the sun. Also, in this case the reservoir tube needed to be heated as there was old lube that basically glued the mechanism tight. This is some different kind of lube, heat didn't totally melt it. I completely removed the setscrew as I plan to completely disassemble the press, but isn't normally needed for just removing a die, to install another die.

1diesetscrewremoved.jpg


2heat.jpg


This die is being a little stubborn. I suspect it has to do with the lube not wanting to totally melt like a typical beeswax based lube. I soak the die area with kroil hoping that will loosen up the Lube (Ed's Red or mineral spirits should work too).

3clean.jpg


Another trick/safety measure is to put a pure lead bullet or ingot under the depth control pin and gently tap (with a dead blow hammer or lead hammer) the bottom bar that the boolit is sitting on. Still applying heat. The pure lead bullet should absorb some of the shock and hopefully avoid damaging other parts of the press.

4pureleadboolit.jpg


5pushup.jpg


Once the die moves a little bit, just raising the handle should push the die the rest of the way out.

6removed.jpg


Now remove the pressure nut by turning the pressure screw clockwise (if looking down at the top of the press). If you can see the pressure nut, it should be rising and not turning...if it is not rising and is just turning around, you have a problem. Usually this is just from the lube reservoir being heated and the warm lube acts like a lubricant, if this is the case the press must be cooled. Wait til it returns to room temp. The Lube will stiffen up and you should be able to remove the pressure nut. If that doesn't work, you probably have some mechanical problem, like damaged threads or if the pressure nut has bottomed out at the end of the threads of the pressure screw, that can lock it up. If the threads are damaged...good luck !?! If the nut is bottomed out, COLD is your friend, try putting the press into the freezer for an hour or two. The first instinct is to wedge a screwdriver between the reservoir tube and the pressure nut...BUT DON'T !!! You're just going to damage things.

7unscrewpressurenut.jpg


Once the pressure nut is this far out, it should just lift off the pressure screw.

8liftoff.jpg


9outandoff.jpg


Now the pressure screw can be removed. It can just be pushed out. If it's being stubborn, heat it up a little bit. If you still can't remove it, Gently tap it with a dead blow or Lead hammer while heat is applied.

10pushpressurescrewout.jpg
 
Last edited:

JonB

Halcyon member
Disassembly continued:

Now that the die, pressure nut, and pressure screw have been removed, the depth control assembly can be removed...the parts are shown below.

11removedepthcntlassy.jpg


Now the Lube can be removed. Some folks boil it out, I tried it once, and I failed to wait til everything cooled so the lube would solidify on the top of the water, so I had a big mess when I removed the hot/warm sizer from the hot/warm water, the hot/warm lube floating on top decided to cling to the sizer like static cling, then trying to wipe off the hot/warm lube off the hot/warm sizer was an incredibly big chore ! So I haven't tried it again, but since others have been successful, I guess it works?

I use a heatgun, it works well for me. I do this outside, and prop the sizer in a cardboard box to catch all the lube. I'm not trying to save the lube, just get it out and throw it away (or use it for flux).

12heatmeltlube.jpg


OK, whatever this lube is? portions of it ain't melting! Maybe the lube ingredients have separated? But I am skeptical of that. I think someone filled it with a soft black grease (maybe Lyman super moly?), but there are deposits of a very hard lube in the bottom of the reservoir and in the bottom cast iron piece, obviously plugging it up, and that is probably why there was grease coming out of the top...the last person that tried to use this sizer surely failed to make it work.

So I removed all the soft grease with a screwdriver. Then paper towels wrapped on the screwdriver to get any residue so I could get a better idea of how much of the hard deposits were in there. Well there was plenty. I will try soaking all the parts with hard deposits in mineral spirits once it's all completely disassembled.

13lubewoulntmelt.jpg


Now the slide rods and spring can be removed and the upper cast iron piece can be removed too.

14removeslideandspring.jpg


I wasn't originally wasn't going to remove the lube reservoir tube from the lower cast iron piece because it is a difficult task and is easy to damage the tube, and also the threads are super fine and can easily be crossed were reassembling.

16removereserviortube.jpg


I put all the parts into the bowl and covered then with mineral spirits. I let it sit for a few hours. The hard deposits softened some, so I picked them out with wooden chop sticks, so I wouldn't scratch things up. It took a while and maybe if I was patient enough to let the parts soak for a day or two, it would have been easier ?

17aftersoakingandscrubbing.jpg


Well, I got this far, I might as well remove all the paint and try to repaint it with some Chevy engine paint.

I will remove all the bluing and break out the cold blue solution. I've never got a nice dark blue/black finish like the original finish from cold bluing, but it'll at least be a uniform dark grey and provide some rust protection for the metal.

18paintremoved.jpg


After completely decreasing all the parts, I used some heavy automotive wheel bearing grease on all the threaded areas and where the die inserts and where the slides slide through. After the paint cured, it was easy to remove the paint from those greased areas. I used birchwood-casey cold blue on all the other parts (except the new spring). I applied it many times, although it looks pretty good in the photos, it's still dark grey "in person".

paintedandcoldbluedparts.jpg


frontview-1.jpg


I really dislike the original SMALL wooden handle, so I found a chunk of stag horn to replace that...a guy has to personalize a project somehow, right ?

antlerhandle.jpg
 
Last edited:

JonB

Halcyon member
Old style Dies

A couple helpful hints for adjusting a "old style" (large port) Lyman die for a troublesome boolit design.

Before I install a lubesizer die, I will "eye up" the lube grooves to the holes in the Die and get an idea how far the boolit has to enter the die. Then only small adjustments are needed to get it perfect. These older style dies have stagered rows of holes, so even this double lube groove Wad cutter boolit I use in this example only needs one row of holes.

These older style dies have larger holes than newer ones and can be troublesome, meaning they are more likely to allow Lube to get under the base of the boolit or fill the crimp groove. Plugging some of the holes is one answer (Ian posted about this a long time ago and it works great for me).

Find some solid solder, lead free seems to work best, but 50/50 should probably work too. It must be solid and NOT flux core. I insert a piece as shown in the third photo and rivet it, to fill the hole. Ideally you should leave a "head" on the outside, but even just a ridge on one side seems to be enough, plus the old dies are a bit larger and there isn't much clearance when inserting the riveted die into the lubesizer.

holeallignmentI.jpg


The die has been rotated 90º
holeallignmentII.jpg


diewithsolderrivet.jpg
 
Last edited:

JonB

Halcyon member
Brad, I copied and edited my original posts from the other forum, as requested by Ian.
If you want to move this to the tips & tricks read only section, that is fine...otherwise you can just leave it here, in the tools of the trade forum as well.
Jon
 

Ian

Notorious member
Great tutorial and nice job restoring that fine unit. Hopefully reading this may save some disappointment from the less experienced buyers who don't know about the stretching/cracking tendencies of the base around the die set screw or what wear items to look for.
 

JonB

Halcyon member
at some point in time, I will fix these photos.
my problem is, the "bucket" is the only place where most of my photos are stored, due to a Laptop crash.
Some days I am able to 'copy' my photos from the "bucket", but many days I am unable, due to there adware crashing my connection.
 

KHornet

Well-Known Member
Have 5 sizer lubers. 3 Lyman, 2 RCBS Mostly dedicated to
one cal. My little 45 is dedicated to .225's. Great little tool.

Paul
 

Ian

Notorious member
I sincerely hope that PB dies a terrible financial death and rots in a very hot place for all of eternity. It drives me nuts to be looking for obscure information on-line, find it in a thread on a forum somewhere....and all the photos someone took, edited, and linked are missing. Often that's half or more of the info I am after, and what the person intended to share. People trusted their images to the site and now are getting screwed.
 

KHornet

Well-Known Member
For a number of years, I have made it a practice that when I find an article in a mag,
or on the web that I find of interest, I print a copy and it goes in a three ring binder.
All to often, I have lost the mag or tossed it, or the article on the forum no longer
exists. I prize my 3 ring binders, as among other things, they bring back good
memories of things I had completely forgotten. Old articles, are like old friends.

Paul
 

Pistolero

Well-Known Member
Yes, Paul and it turns out that a paper hard copy is a very good, very reliable "backup", although more
bulky and harder to search.

Bill
 

Reloader40sw

New Member
Hi, new member, new reader here. I acquired a very nice #45 about 6 months ago. U used it right away and just put up with zebra striped .358 bullets for a short while until it worked itself out. Everything worked great until I bought a couple other sized dies off ebay. The original die was stuck. Well, it sat until tonight when I busted out the heat gun and a 21oz hammer. Got it out...yaay. So... I heated the whole thing and let all the lube out into a casserole dish (shhh). My problem now is that NONE of the dies want to go in easily. Finger pressure gets them stuck to the point of having to press them out. I realized I dont even know how far the dies are actually even supposed to go in. The original one was flush with the cast iron. Is it supposed to be? If it is I fear these are all going to have to be hammered in and out which isn't right.
 

KeithB

Resident Half Fast Machinist
You probably have dried lube that won't come out with a heat gun still stuck in there. Clean it good with kerosene.
 

Pistolero

Well-Known Member
The dies are very similar between the later lubrisizers and the 45, but not exactly the same. They added
the O-ring at the top and elimnated the larger diameter at the last .020 of the die, which used to be
the sealing method between die body and lubrisizer housing. Should be a pretty snug fit, but IIRC
the die is about .705 at the very top and .701 in the main body. Should be about .702 or a bit
larger in the housing, and it should be circular. Wonder if it was dropped and is no longer round?

These dimensions are from memory, far from home now so cannot verify, but I was making drawings
to make some dies, so think this is correct.

I have a 45 and a 450 and neither is particularly difficult to change dies, but the dies
are a bit different, but "basically" the same. 45 dies seal to the housing at the top little
bit, the 450 dies use the o-ring to seal into the hollow bolt that holds down the dies, no
side setscrew like the 45.

Bill
 

Reloader40sw

New Member
The dies are very similar between the later lubrisizers and the 45, but not exactly the same. They added
the O-ring at the top and elimnated the larger diameter at the last .020 of the die, which used to be
the sealing method between die body and lubrisizer housing. Should be a pretty snug fit, but IIRC
the die is about .705 at the very top and .701 in the main body. Should be about .702 or a bit
larger in the housing, and it should be circular. Wonder if it was dropped and is no longer round?

These dimensions are from memory, far from home now so cannot verify, but I was making drawings
to make some dies, so think this is correct.

I have a 45 and a 450 and neither is particularly difficult to change dies, but the dies
are a bit different, but "basically" the same. 45 dies seal to the housing at the top little
bit, the 450 dies use the o-ring to seal into the hollow bolt that holds down the dies, no
side setscrew like the 45.

Bill

So these are new style? Your info would lead me to believe they should be smaller in diameter then yes?
 

Attachments

  • Attach3450_20170917_215909.jpg
    Attach3450_20170917_215909.jpg
    233.2 KB · Views: 5