
JWFilips
Well-Known Member
Hi Folks,
I broke a GEW98 firing pin and wanted to shoot this weekend ( no dealer ships that fast)
so I figured I should be able to manage a repair in my workshop. As many of you know my workshop is set up for making 18th Century type guns and I have very few motorized tools!
But I'm a good filer!")
So I took the bolt apart and analyzed the pin break so I set about to making a repair to tide me over until I get a new ( old ) pin.
First thing I did was grind back the break area until I had some meat to drill a hole into the existing pin.
Yes I do have a belt and disc sander so grinding back went fast. Then I center punched ( to the best of my ability) the area I would drill into......set it up in my drill press vise checked the vertical and drilled down with a #35 drill bit about 1/4 inch.
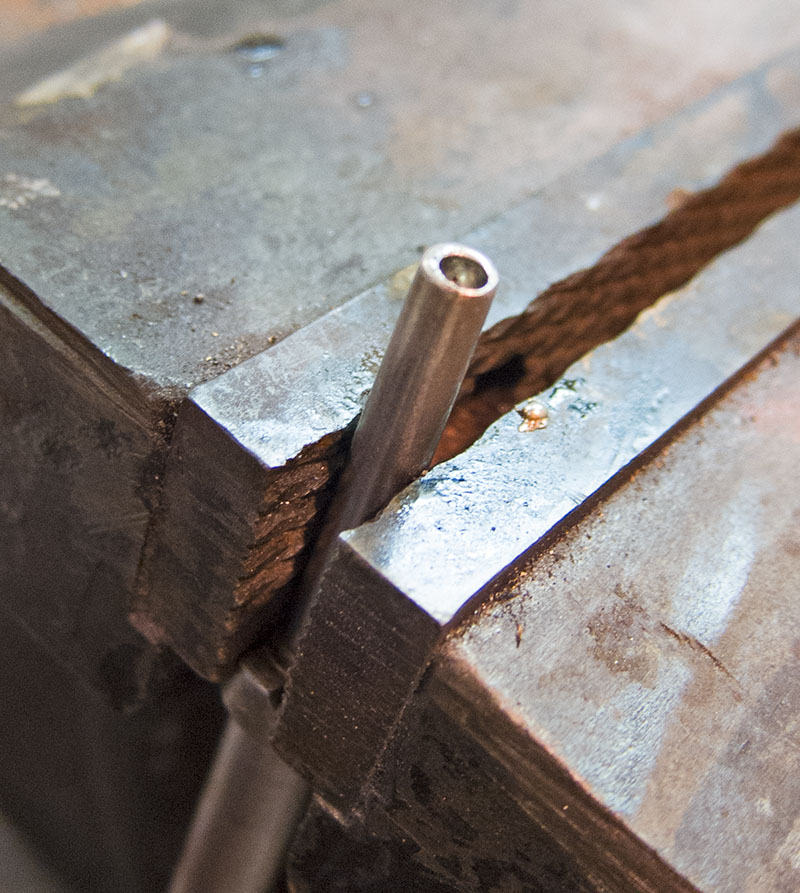
As you can see using a drill press is not ideal....in that the hole wasn't centered properly.
No big deal for me.
An old #35 bit gave up it's shank to become the new firing pin. I cut it over size and then cut scores in the area with a jewelers saw, that area would be in the recess ( hoping it gave a better bite when brazed).
I cleaned both parts well & melted on some flux then silver brazed the two parts together.
Yes the pin was crooked....again no worries.
The next step took care of this in that I filed the drill shank concentric with the shaft ....at first by eye and then once it became round again ....by rolling the entire pin back and forth on a surface while filing.

Many years ago when I first got involved in building 18th century gun I read that the most common sound to be heard from the gunsmith shop back then was "filing" (And I never had a problem making parts by hand filing. Again that actually was a necessity for me when I asked a machinist friend to make me some gunsmithing tools! I was told the set up would take too long to make one tool! So I grabbed a file and some metal and had at it....I made vee spring compression tools and much more ...actually much of my tools i used back then I made by hand filing by eye. I learned blacksmithing so I could make my own cutting tools and turnscrews for working on old guns.)
The biggest problem I encountered the first time is I found I could not hand fit the pin in the bolt my using the machined stop cut into the inside of the bolt! Doing it that way left the pin too short once the bolt was reassembled! Alot of work down the drain chalked up to a learning experience!
SOOOOO after debrazing and rebrazing a new #35 drill shank into the pin shaft; I set out again with another 45 plus minuets of hand filing the new pin.
This time I made it extra long and reassembled the bolt and put the bolt into the fired position.
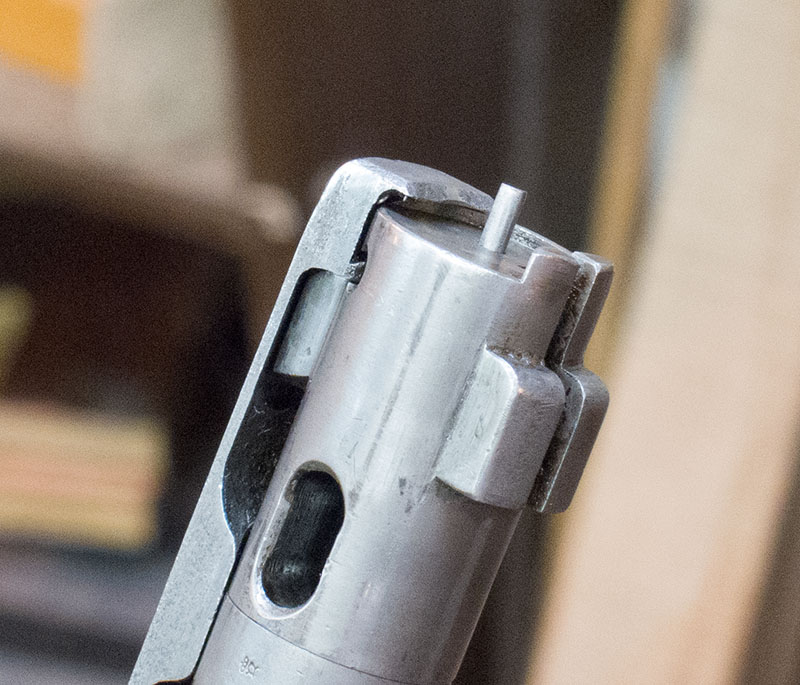
I measured this part of the pin back so that .065" would protrude above the bolt face & marked it.
I disassembled the bolt again and carefully cut back the pin to that mark and again rolled the shaft and filed a round tip on this part of the pin....I wanted to get down to .060" which happened just by shaping it round with a fine file and stoning it on a hard Arkansas stone.

Everything was reassembled and I fired off about 10 just primed cases with 3 differen brands of primers just to be sure there wasn't any punctures.
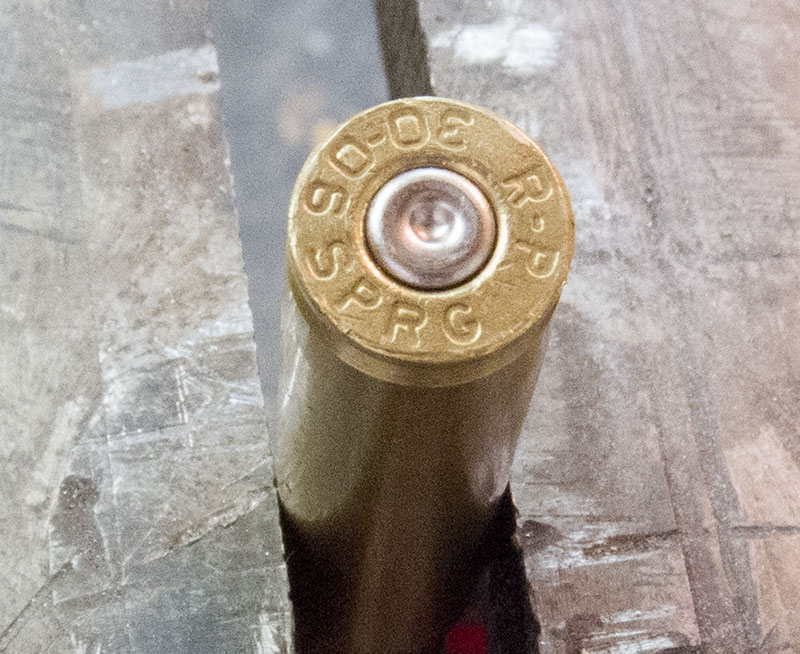
All looked good so I'm off to the range tomorrow!
Thanks for looking!
Jim
I broke a GEW98 firing pin and wanted to shoot this weekend ( no dealer ships that fast)
so I figured I should be able to manage a repair in my workshop. As many of you know my workshop is set up for making 18th Century type guns and I have very few motorized tools!
But I'm a good filer!
So I took the bolt apart and analyzed the pin break so I set about to making a repair to tide me over until I get a new ( old ) pin.
First thing I did was grind back the break area until I had some meat to drill a hole into the existing pin.
Yes I do have a belt and disc sander so grinding back went fast. Then I center punched ( to the best of my ability) the area I would drill into......set it up in my drill press vise checked the vertical and drilled down with a #35 drill bit about 1/4 inch.
As you can see using a drill press is not ideal....in that the hole wasn't centered properly.
No big deal for me.
An old #35 bit gave up it's shank to become the new firing pin. I cut it over size and then cut scores in the area with a jewelers saw, that area would be in the recess ( hoping it gave a better bite when brazed).
I cleaned both parts well & melted on some flux then silver brazed the two parts together.
Yes the pin was crooked....again no worries.
The next step took care of this in that I filed the drill shank concentric with the shaft ....at first by eye and then once it became round again ....by rolling the entire pin back and forth on a surface while filing.
Many years ago when I first got involved in building 18th century gun I read that the most common sound to be heard from the gunsmith shop back then was "filing" (And I never had a problem making parts by hand filing. Again that actually was a necessity for me when I asked a machinist friend to make me some gunsmithing tools! I was told the set up would take too long to make one tool! So I grabbed a file and some metal and had at it....I made vee spring compression tools and much more ...actually much of my tools i used back then I made by hand filing by eye. I learned blacksmithing so I could make my own cutting tools and turnscrews for working on old guns.)
The biggest problem I encountered the first time is I found I could not hand fit the pin in the bolt my using the machined stop cut into the inside of the bolt! Doing it that way left the pin too short once the bolt was reassembled! Alot of work down the drain chalked up to a learning experience!
SOOOOO after debrazing and rebrazing a new #35 drill shank into the pin shaft; I set out again with another 45 plus minuets of hand filing the new pin.
This time I made it extra long and reassembled the bolt and put the bolt into the fired position.
I measured this part of the pin back so that .065" would protrude above the bolt face & marked it.
I disassembled the bolt again and carefully cut back the pin to that mark and again rolled the shaft and filed a round tip on this part of the pin....I wanted to get down to .060" which happened just by shaping it round with a fine file and stoning it on a hard Arkansas stone.
Everything was reassembled and I fired off about 10 just primed cases with 3 differen brands of primers just to be sure there wasn't any punctures.
All looked good so I'm off to the range tomorrow!
Thanks for looking!
Jim