30cal form 1 suppressor ...

wquiles

Well-Known Member
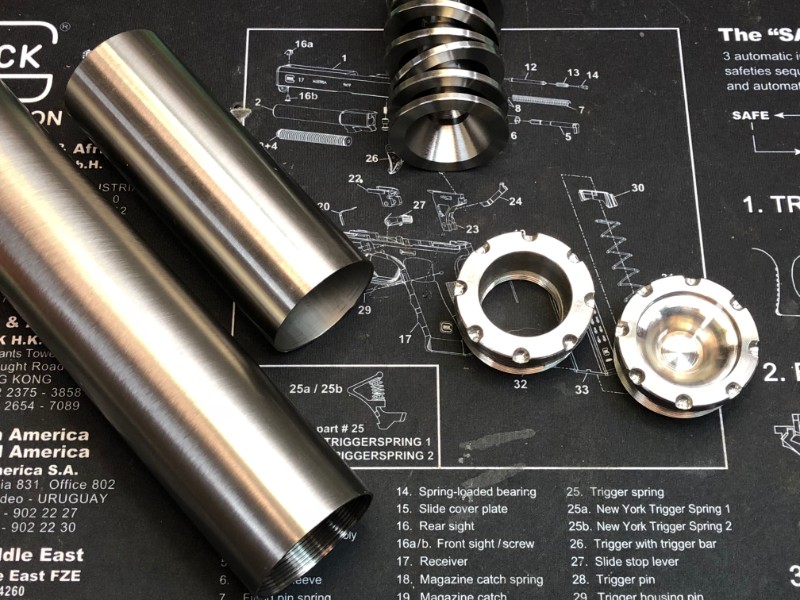
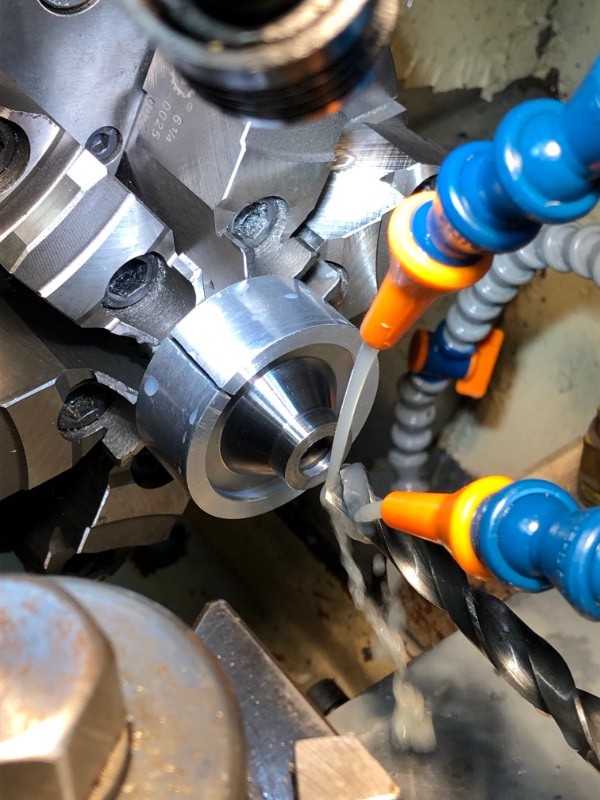
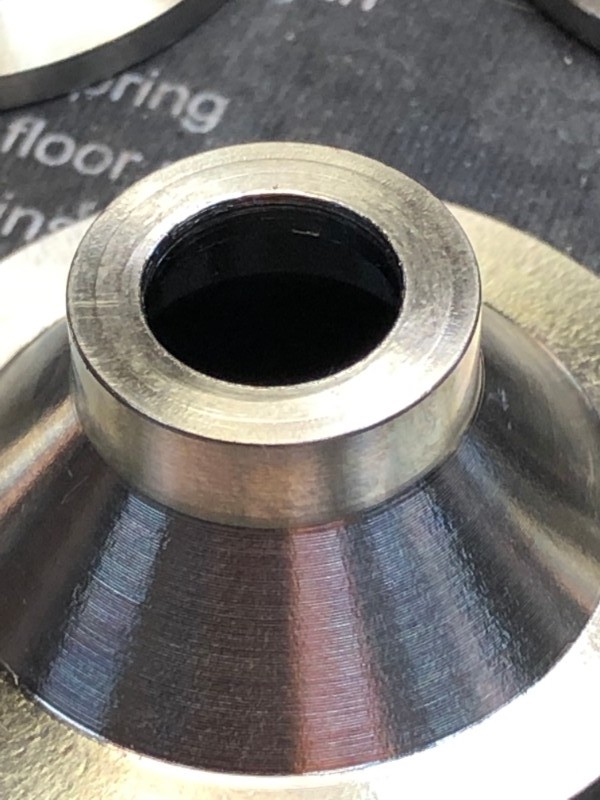
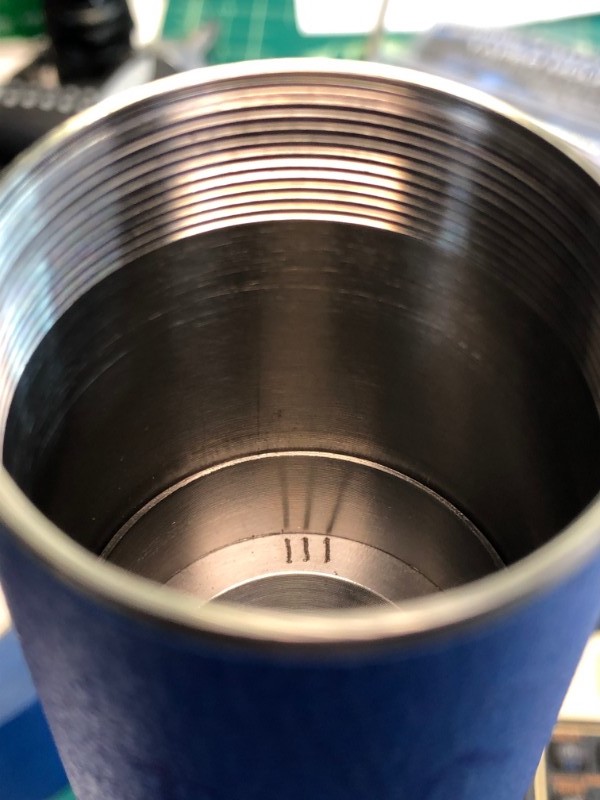
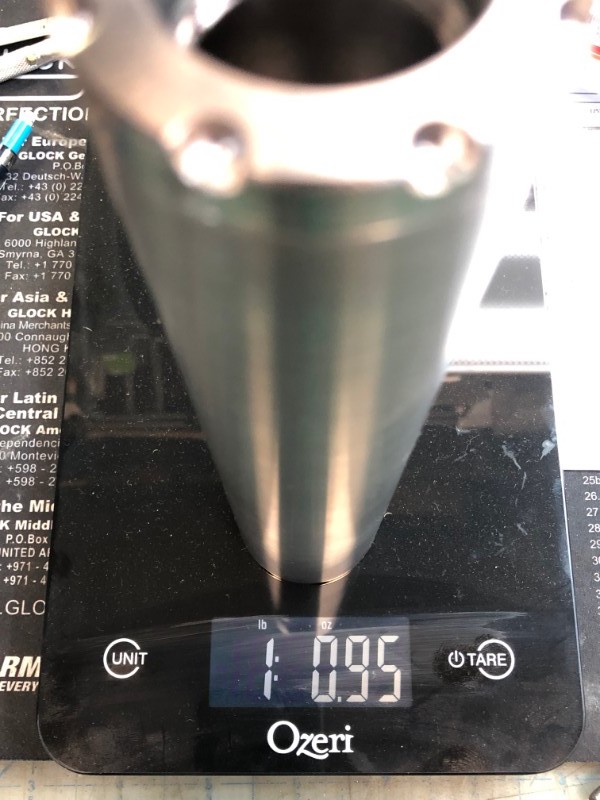
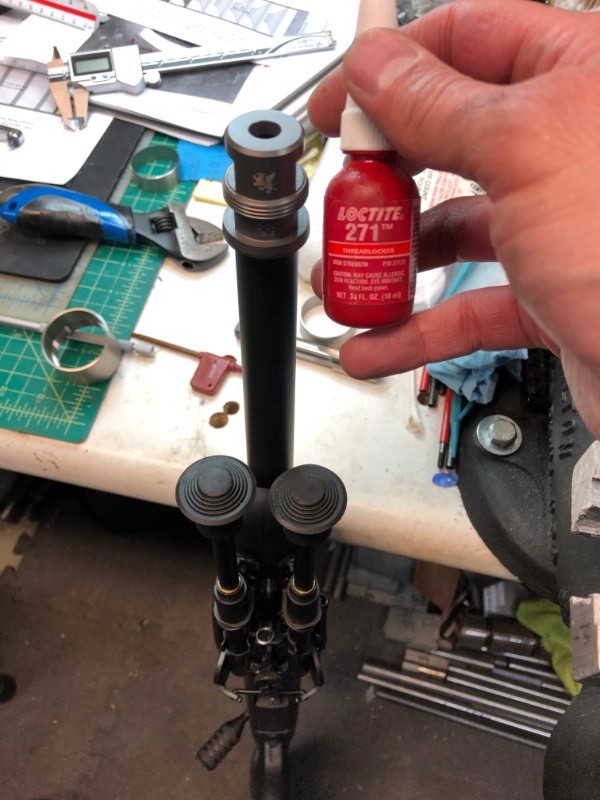
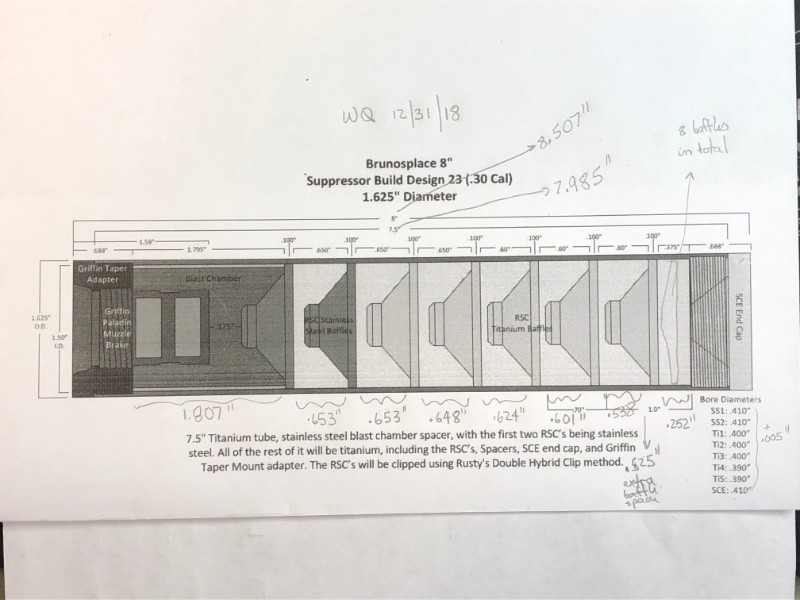
I bought the parts from Rusty back in the summer, I think July, but it was not until today that started work on my 30cal suppressor:
IMAG0001.jpg


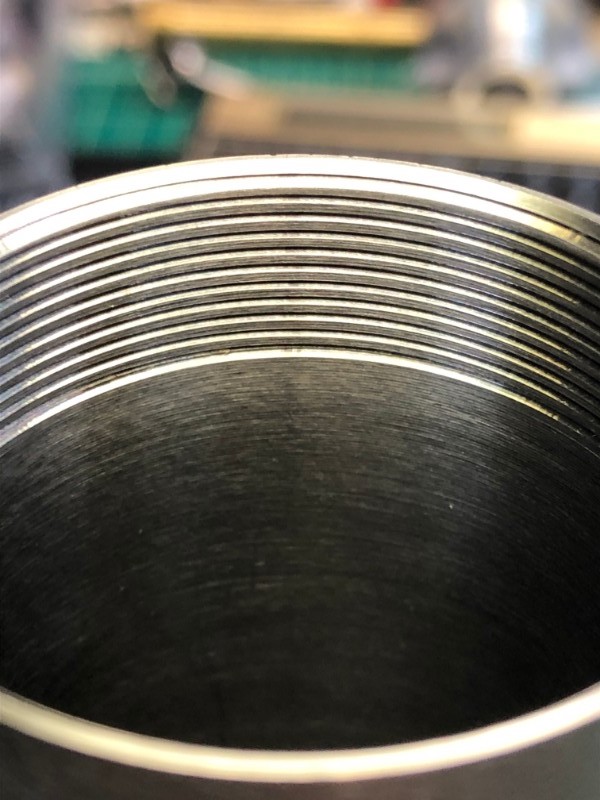
Since it has been a little while and this is a 10" long high-power suppressor, I decided to give the Bison chuck some basic maintenance and perform the alignment/calibration with the 1" precision rod I keep just for this. As you can tell, the chuck needed it - look at all of those small chips!
IMAG0005.jpg


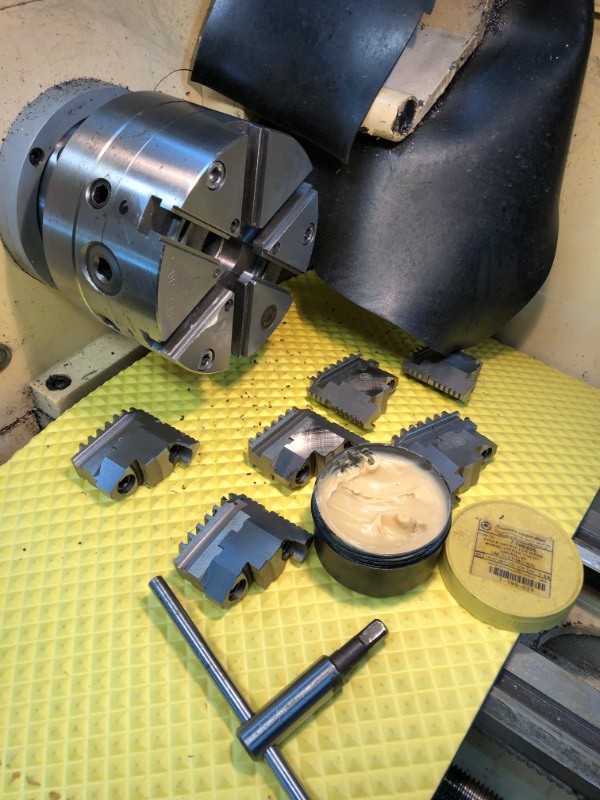
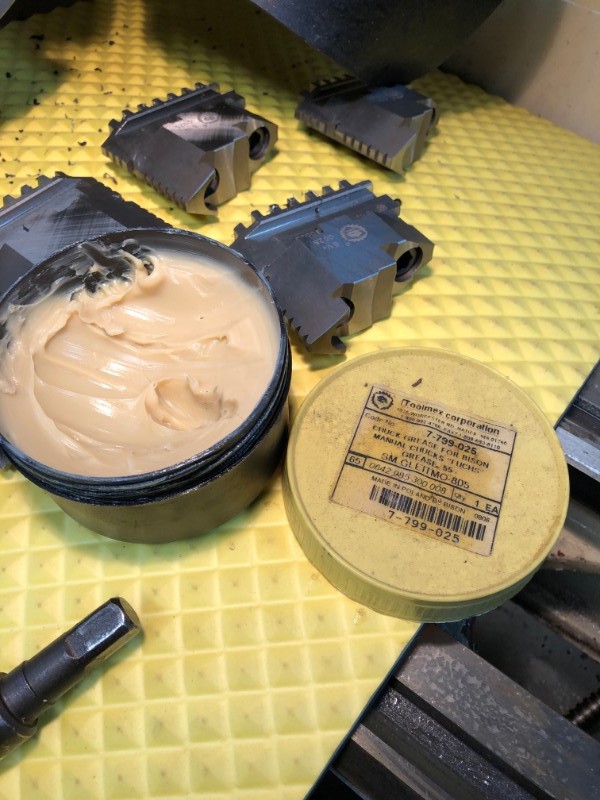
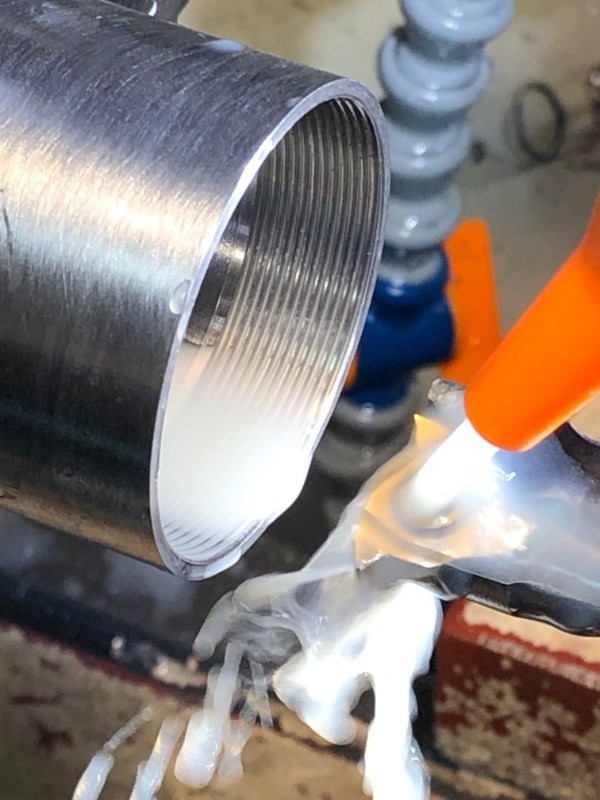
Special chuck grease:
IMAG0006.jpg


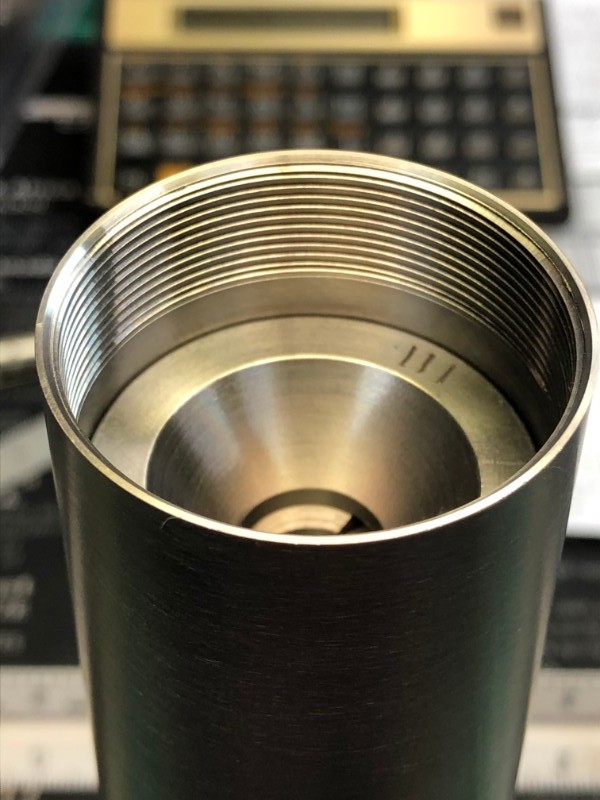
All ready to go? Not quite. Need to align it:
IMAG0008.jpg


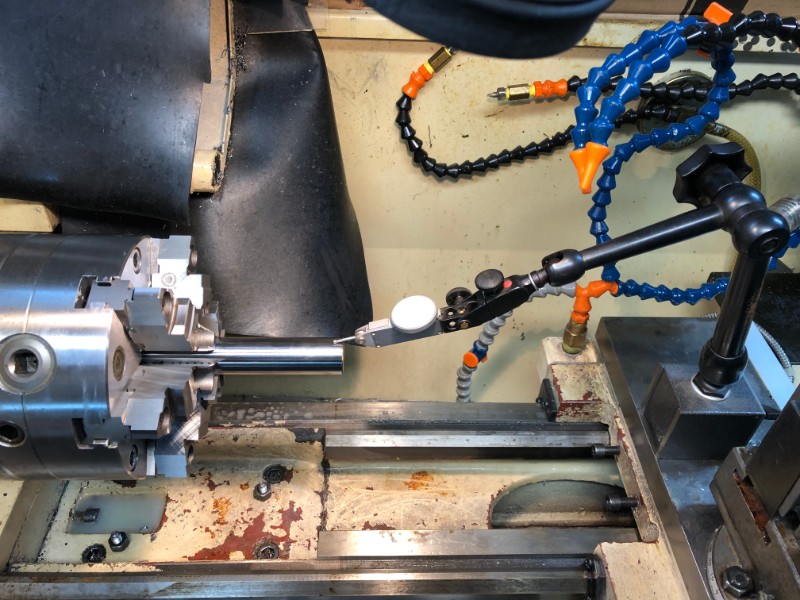
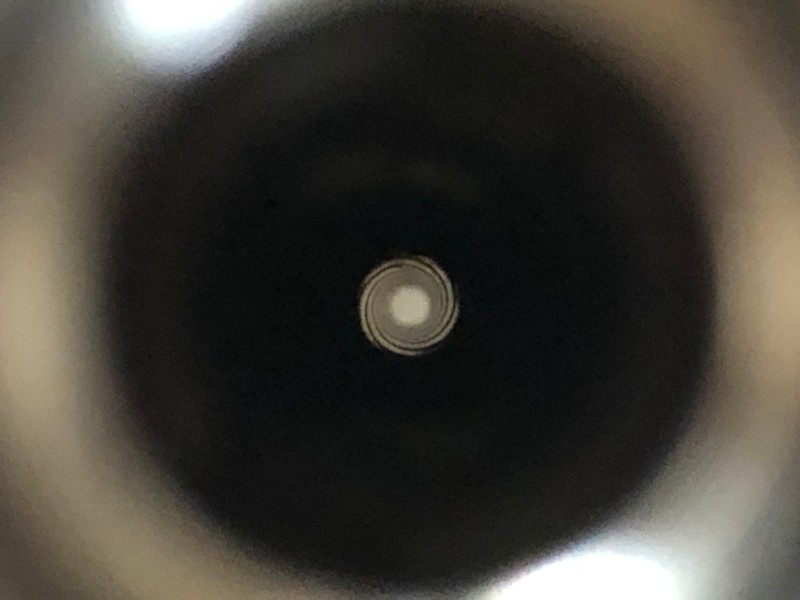
Video when I was done - about 0.00025" tir (each division is 0.0005"):


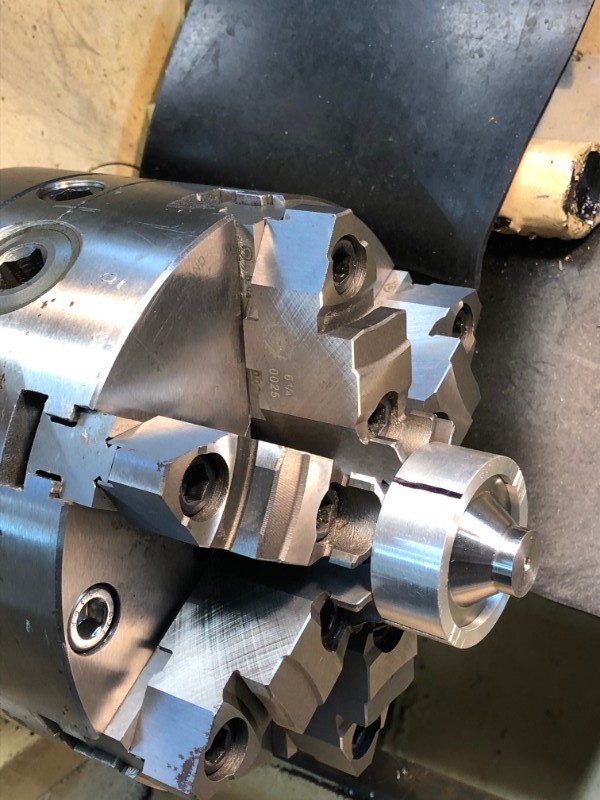
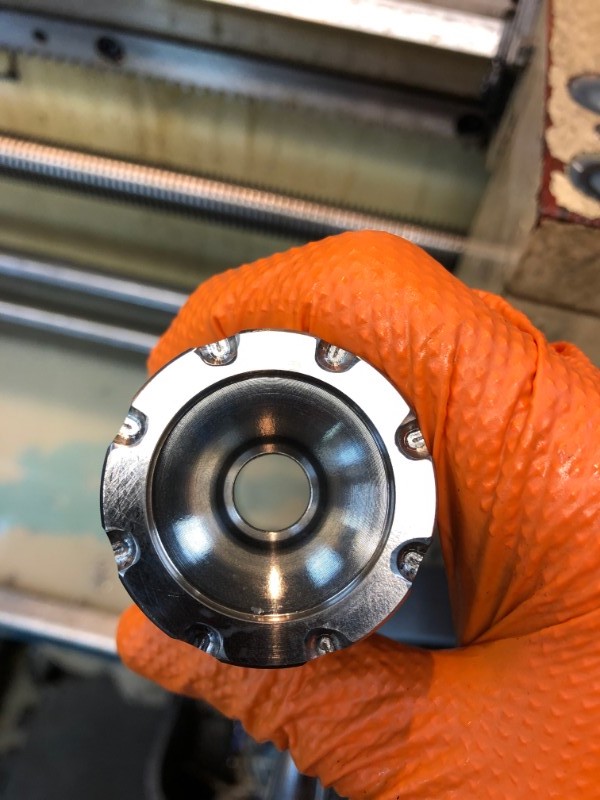
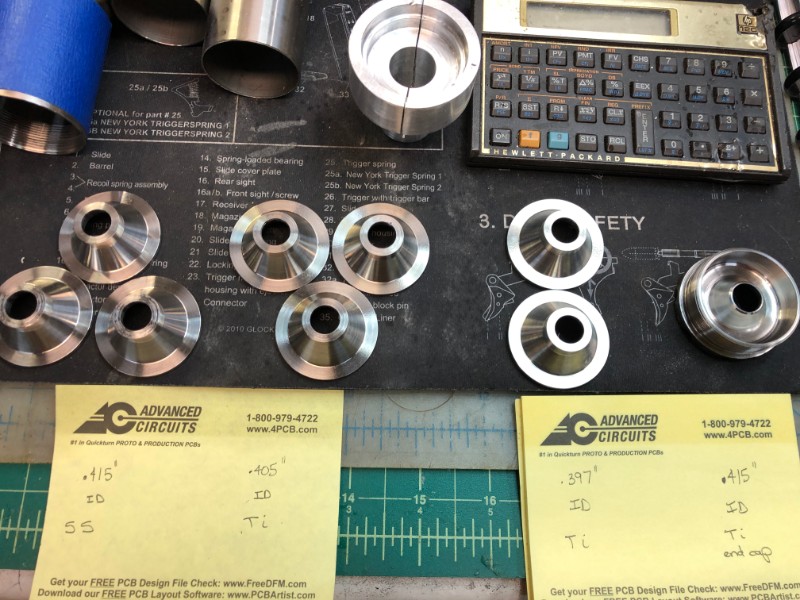
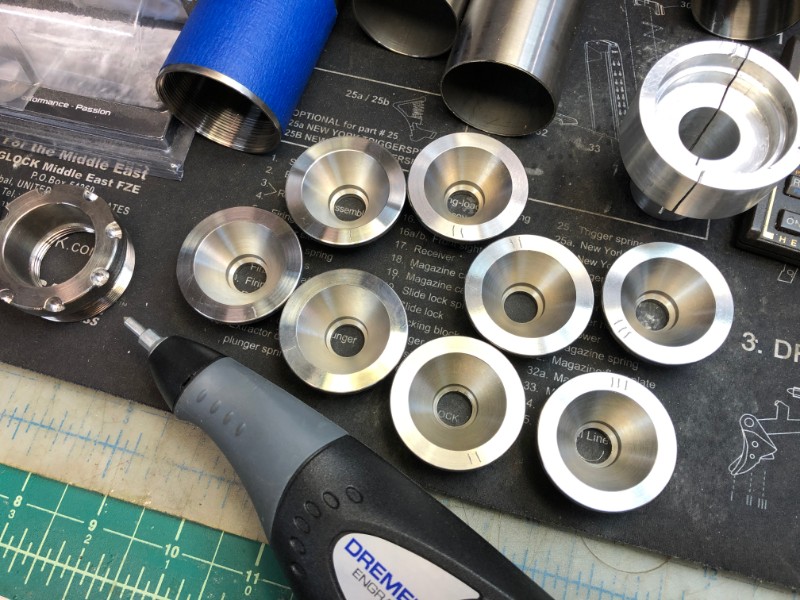
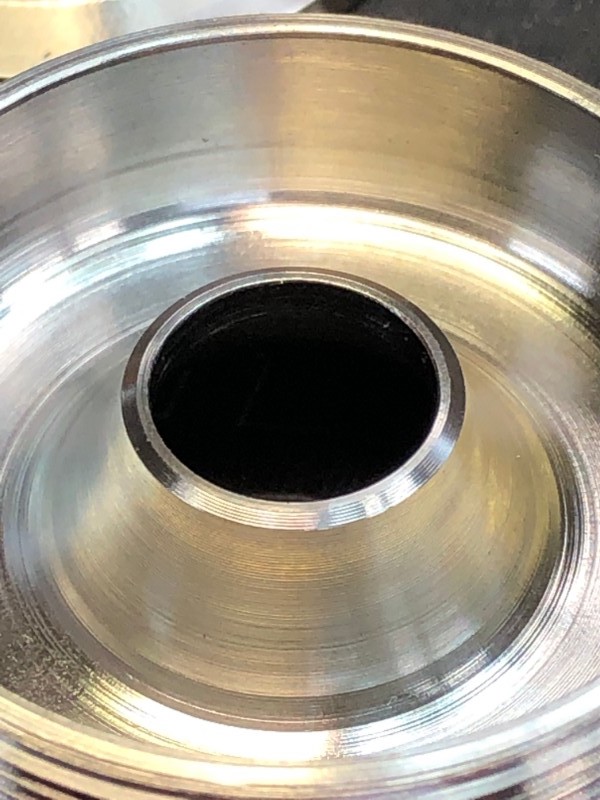
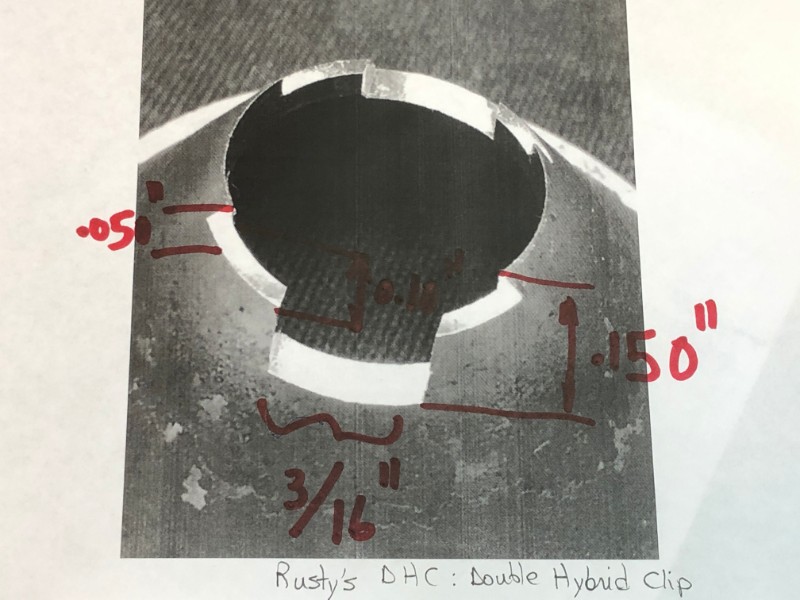
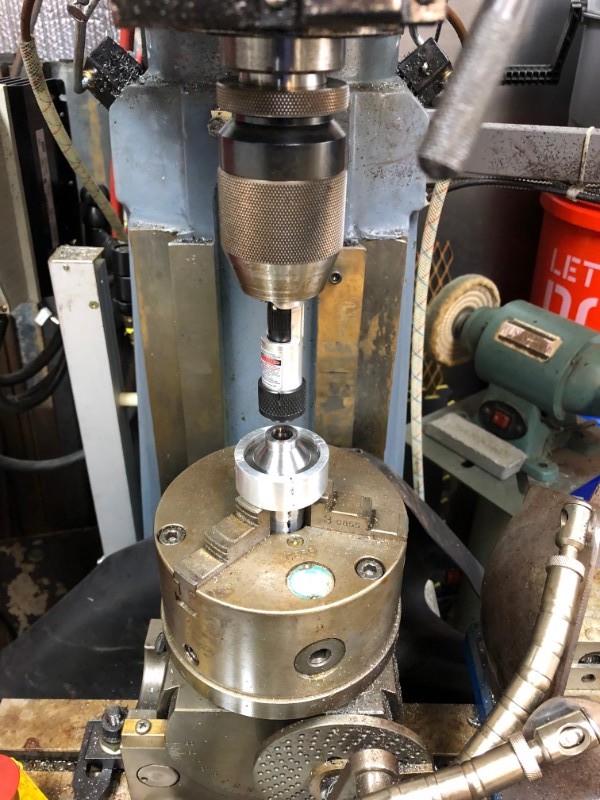
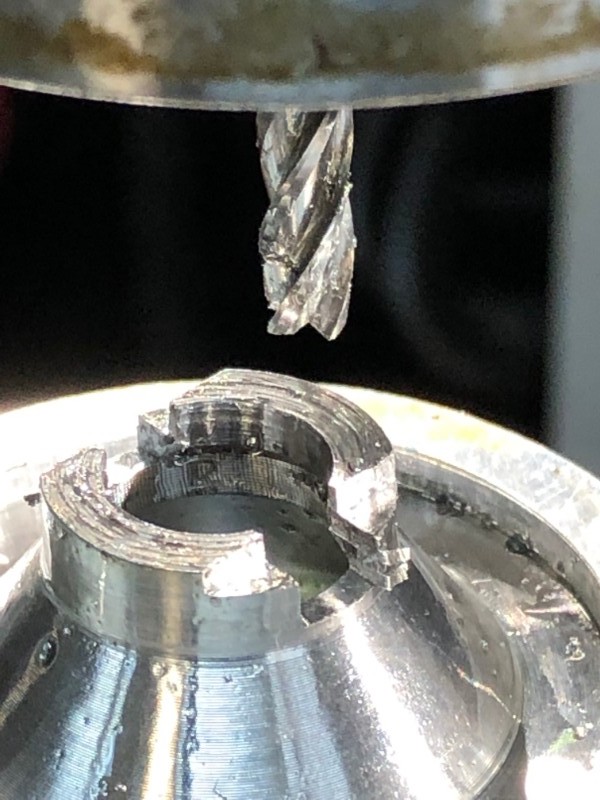
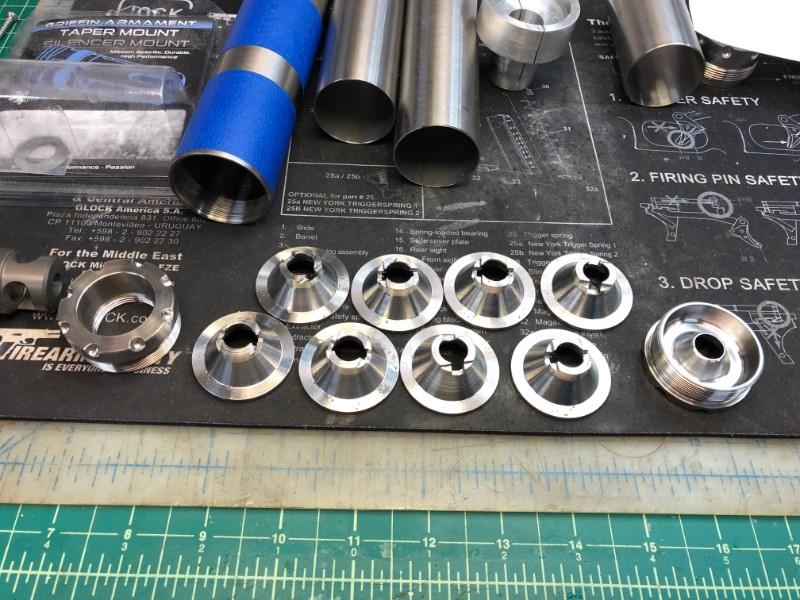
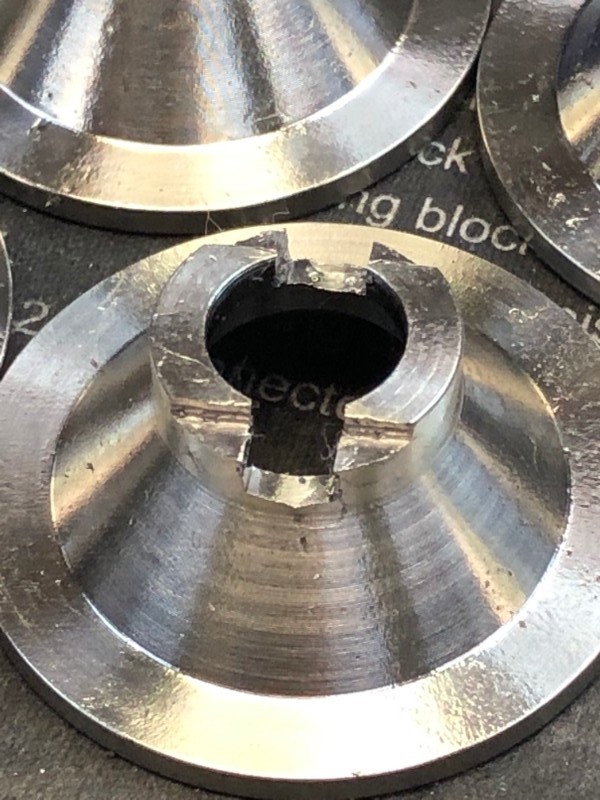
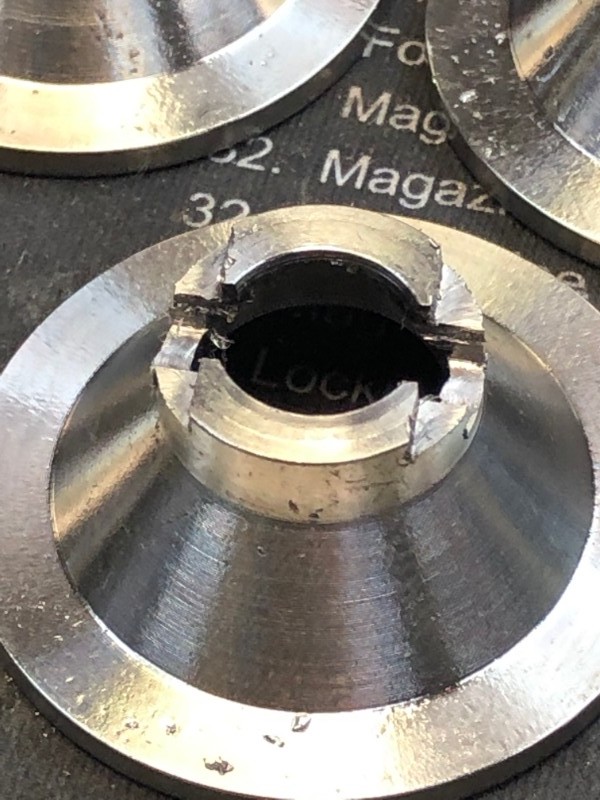
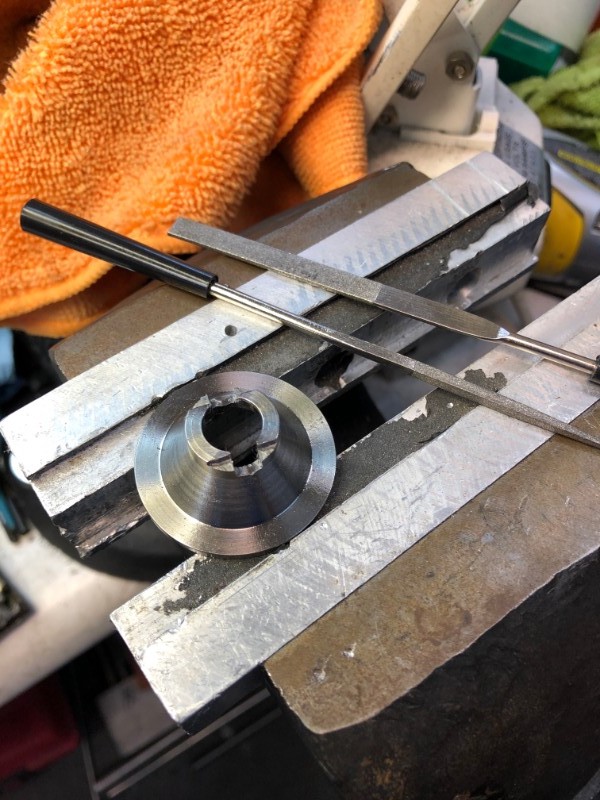
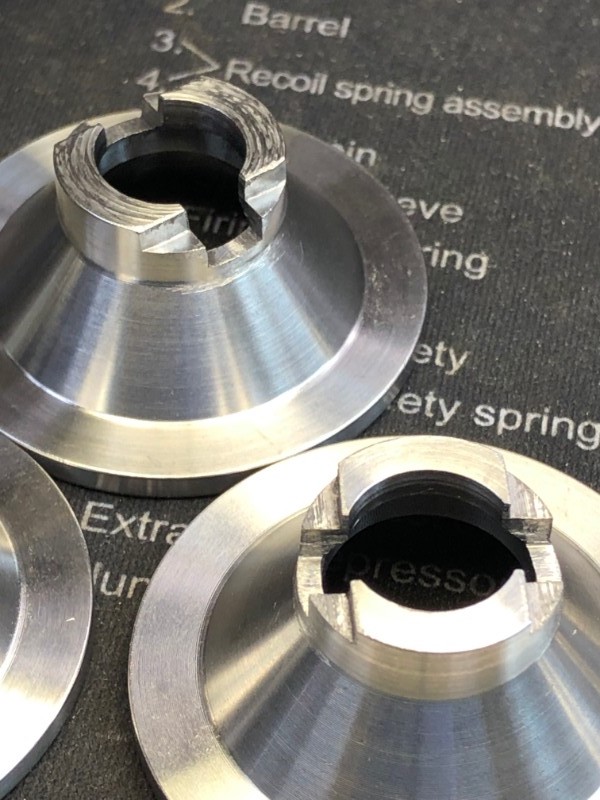
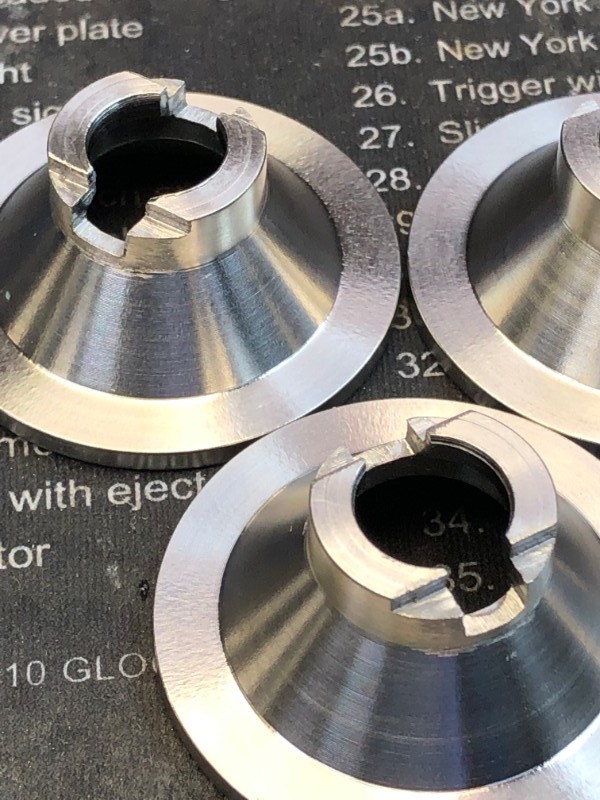
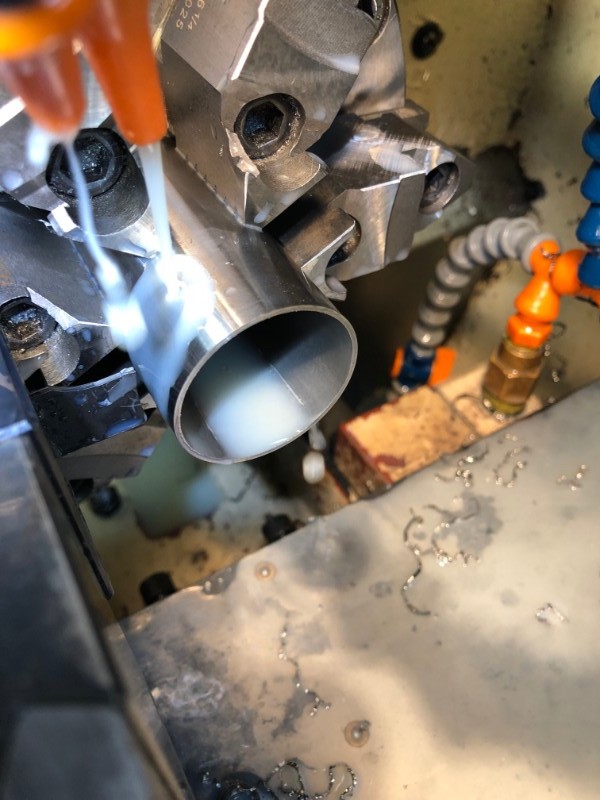
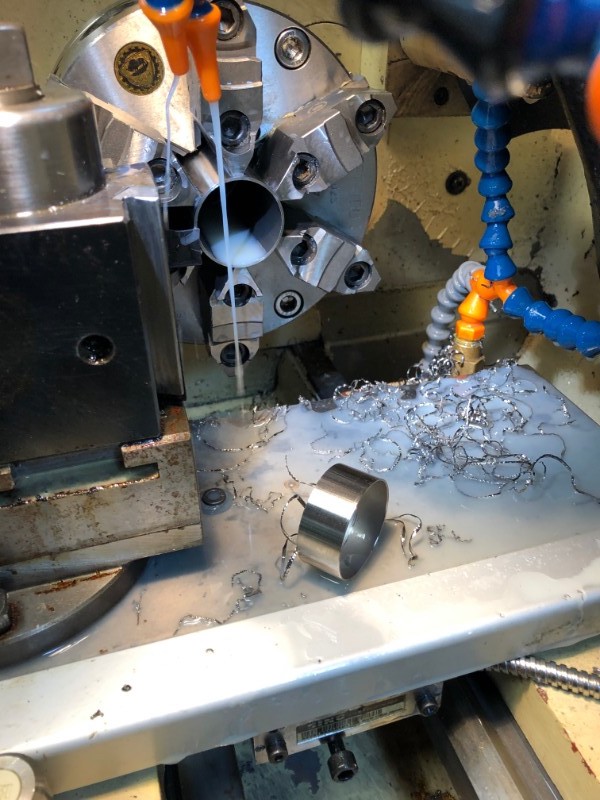
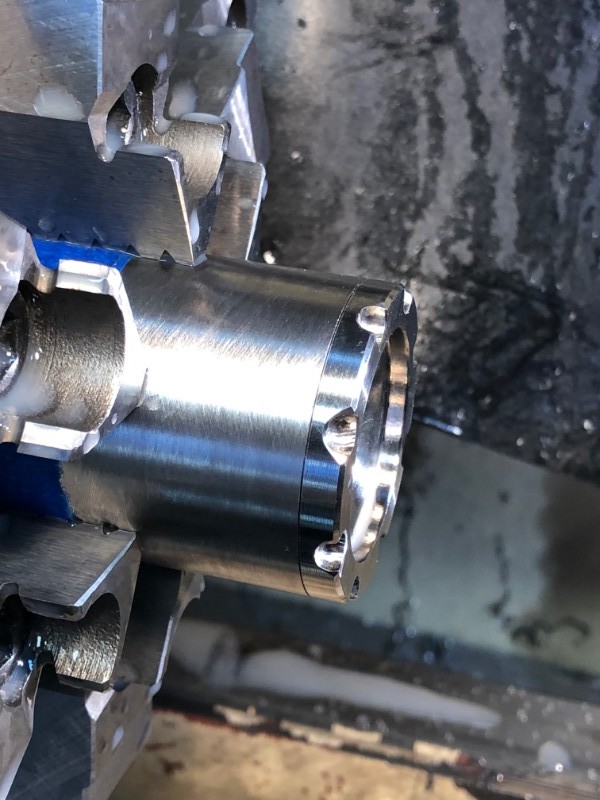
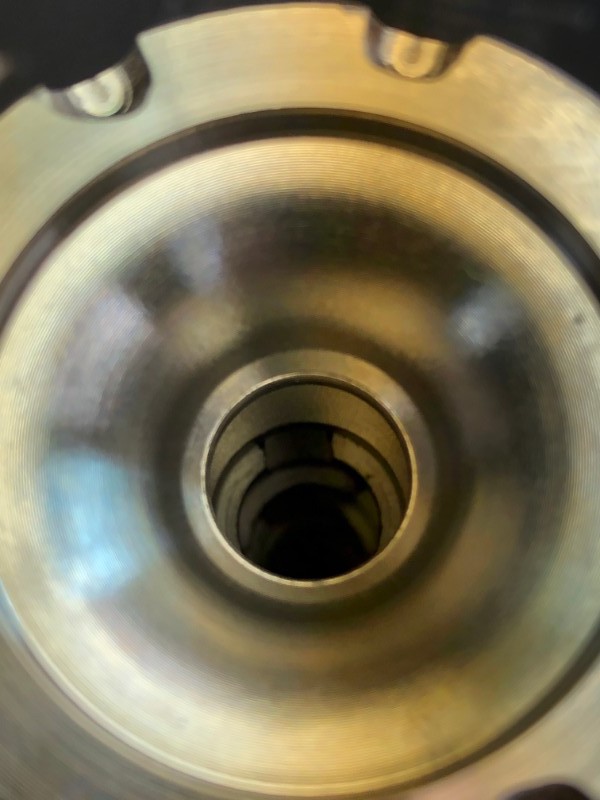
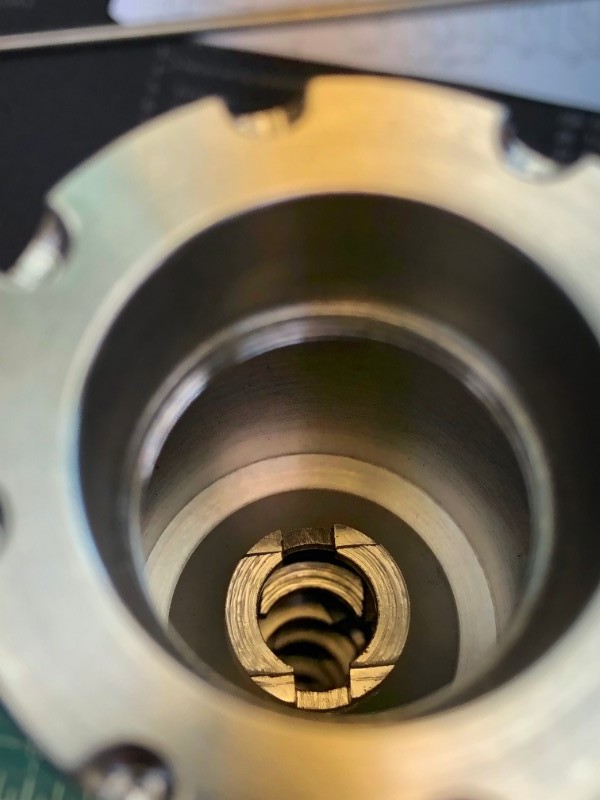
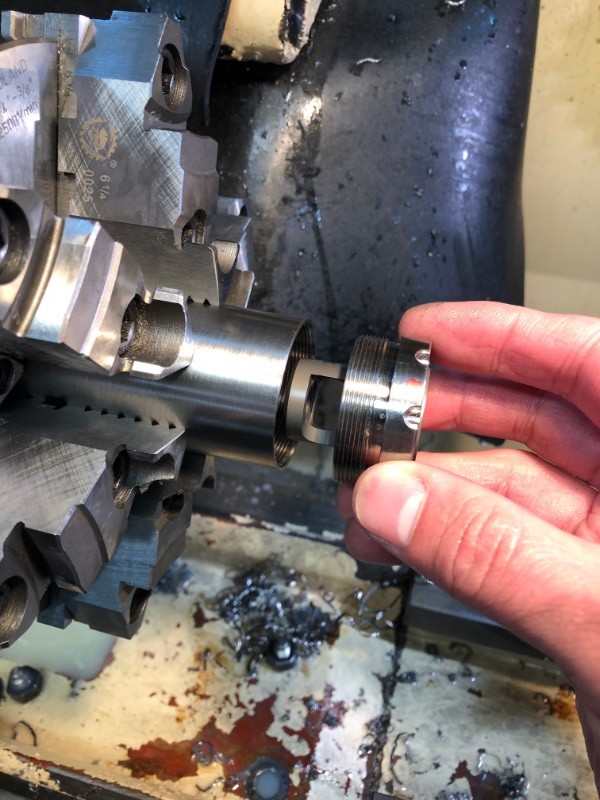
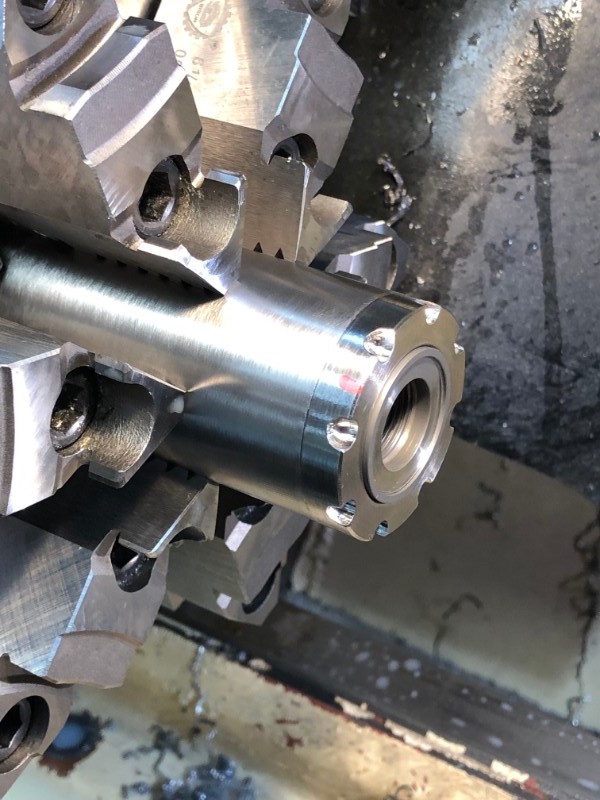
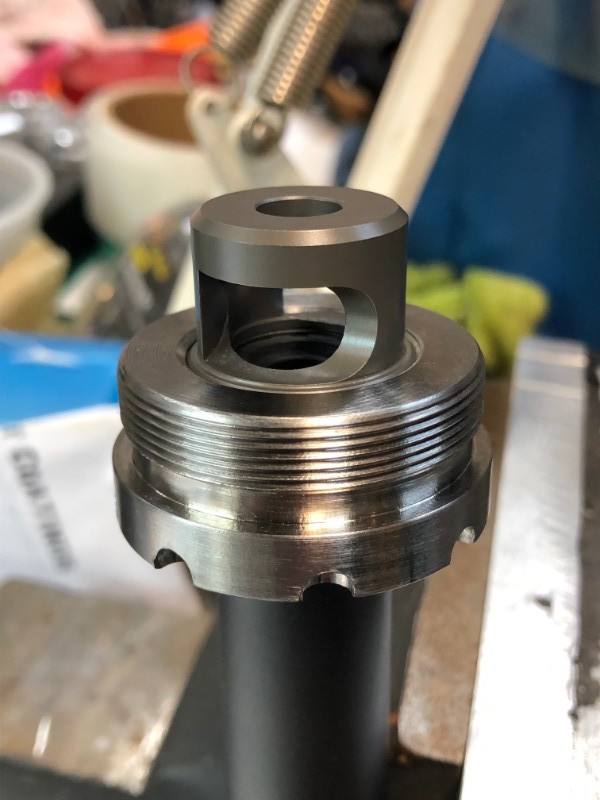
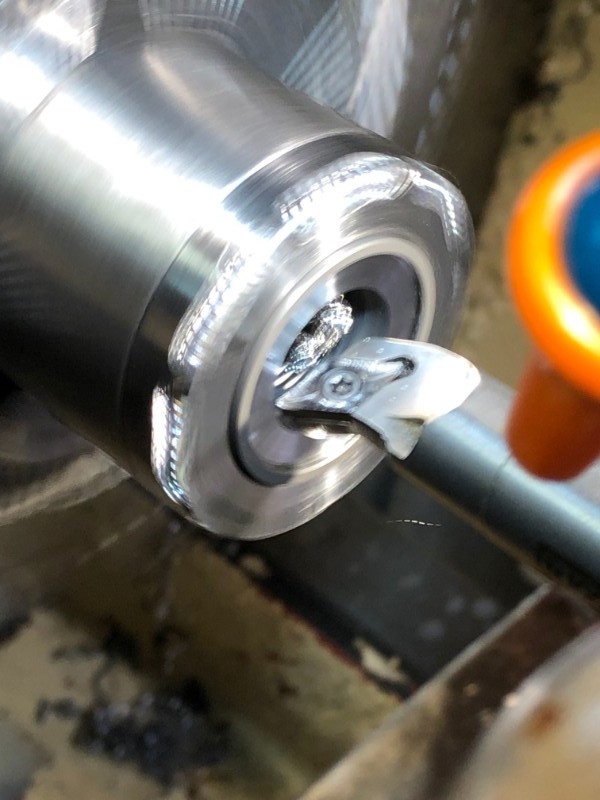
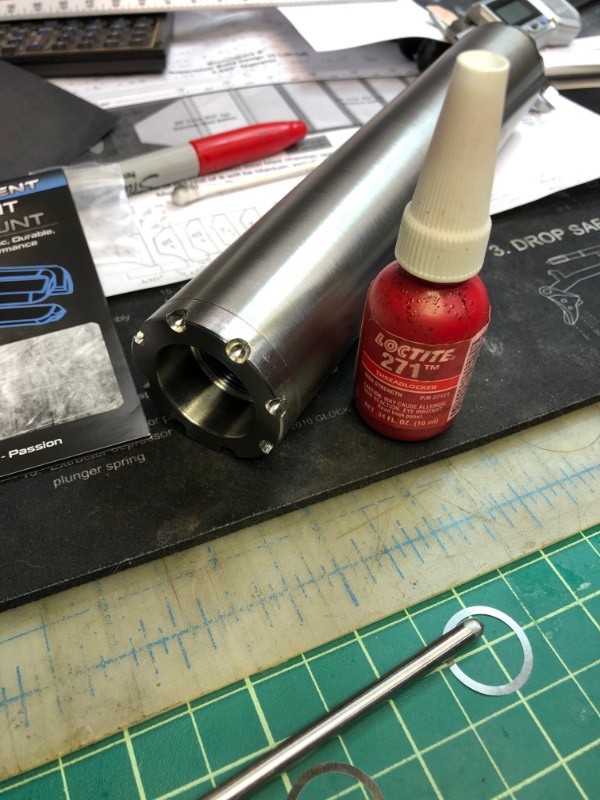
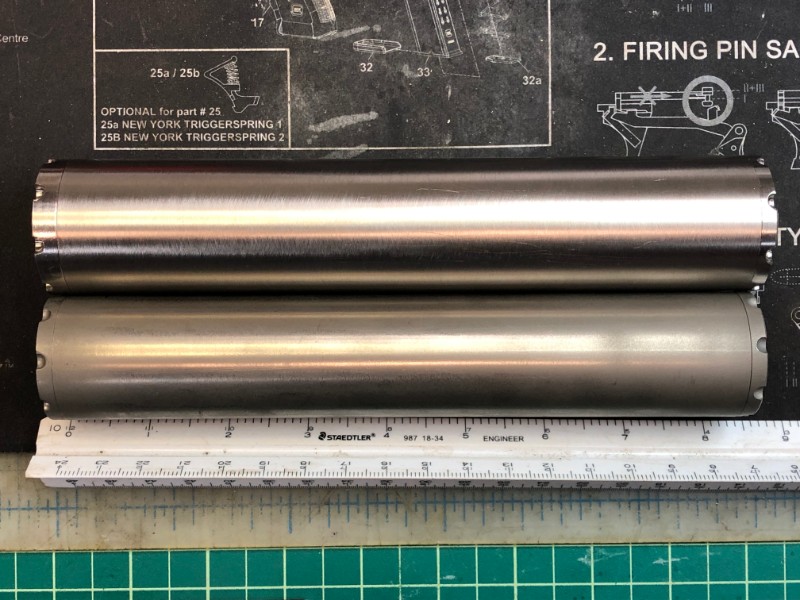
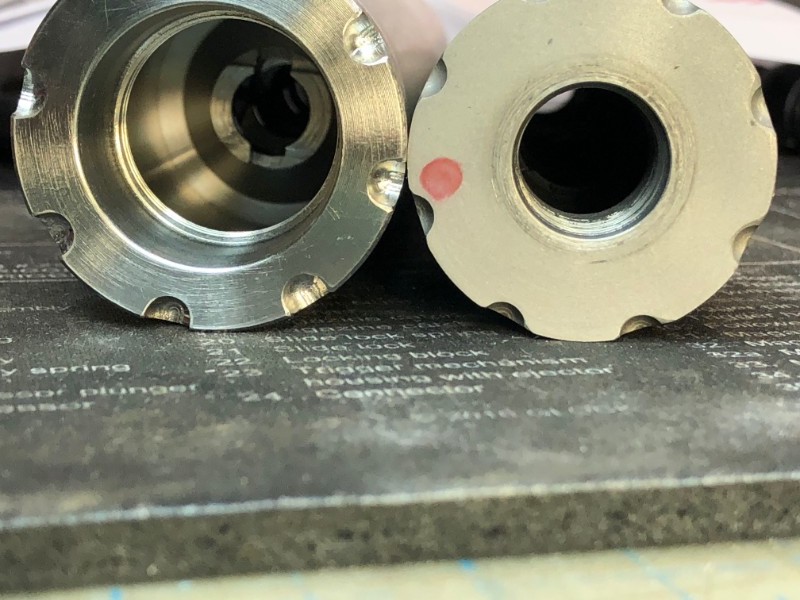
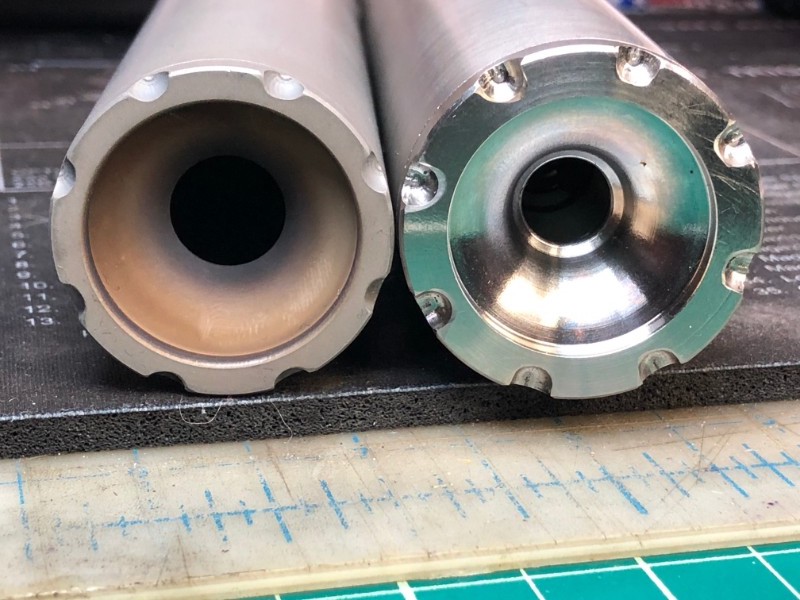
OK, here are all of the parts. For the boring and clipping, I am using the same custom aluminum collet I made for my last 1.5" OD Titanium suppressor (45cal), which I made to support baffles for both 1.5" and 1.625" OD Titanium tubbing (might as well do the work once!):
IMAG0011.jpg
 
Last edited:

wquiles

Well-Known Member
This Titanium suppressor has 8x baffles, the first 3x are SS and the next 5x are Titanium, so I am doing these operations 8x times in the lathe, and then again 8x more times in the milling machine for the clipping. However, per Rusty's advice, the bore in each cone is not identical.

So I spot drill (carbide center drill), then drill with an 3/8" drill:
IMAG0012.jpg


Then bore to the right ID for the particular cone in the sequence:
IMAG0013.jpg


IMAG0014.jpg


For the tailcap, since I don't have a special holder, I am using the actual Ti tube to hold the tailcap in place:
IMAG0015.jpg


IMAG0016.jpg


As I noted earlier, the ID of the cones is not the same. Here the cones are arrange left to right, following bullet travel from left to right:
IMAG0017.jpg


Since this is a serviceable suppressor design, I used a hand-held engraver to mark "I" or "II" or "III" to mark which of the 3 groups above it belongs to:
IMAG0018.jpg
 

wquiles

Well-Known Member
Close up of the tailcap and one of the cones before clipping:
IMAG0019.jpg


IMAG0020.jpg


I am again following Rusty's DHC clipping recommendations (picture of one of my own 45cal baffles after clipping):
IMAG0024.jpg


Milling machine setup, centering with the laser, as the idea is the clipping to be perfectly symmetrical for best performance:
IMAG0025.jpg


Close-ups of the baffles:
IMAG0026.jpg


IMAG0028.jpg


All 8x baffles clipped, but still "raw" from the milling machine operations:
IMAG0029.jpg


IMAG0030.jpg


IMAG0031.jpg


Then "clean-up" each one with small files, on my restored vice:
IMAG0032.jpg


Baffles are now complete:
IMAG0034.jpg


IMAG0035.jpg


By the way, in case anyone was wondering, this was the end mill I used (I need a new one, as this one after two suppressors is no longer super sharp):
IMAG0037.jpg


Next step is to work on the Titanium spacers, since those also have to be cut at specific lengths for each cone group, but I am tired to taking a break for today.

Will

PS. Happy Holidays and Happy New Year!
 
Last edited:

Ian

Notorious member
I did all that without a lathe or mill, you make it look easy!

Rusty is the man, he spent a lot of time and money to crack the code on conventional suppressor design and has shared freely with those interested. The design you have created will be more quiet than 75% of commercial offerings of the same size and will work with subsonic 9mm all the way up to full-power .308 with no compromises in suppression on either end. The only thing you won't like is how quickly it will get hot and how long it takes to cool off.
 

wquiles

Well-Known Member
Interesting, impressing work and very nice photos!
wquiles, looks like you have a very nicely equipped machine shop.
Thank you guys. I am blessed with a wonderful wife, but it also took many years, and many FleaBay purchases to get my "machine shop" where it is today. It helped that when I got started making LED flashlights in 2005/6 that folks started paying me to make parts and machine for them, so that funded most of what I have today.


I did all that without a lathe or mill, you make it look easy!
It is relatively easy with a lathe and mill, so I tip my hat to you as that must have been so much work!


Rusty is the man, he spent a lot of time and money to crack the code on conventional suppressor design and has shared freely with those interested. The design you have created will be more quiet than 75% of commercial offerings of the same size and will work with subsonic 9mm all the way up to full-power .308 with no compromises in suppression on either end. The only thing you won't like is how quickly it will get hot and how long it takes to cool off.

Yes, Rusty is awesome. I have made a form 1 22 cal suppressor already (that my daughter uses, almost permanently attached to "her" 10/22 custom rifle!), but I found Rusty in time for my 45cal suppressor, so I learned a lot during that build. This one was much easier since I am leveraging another design from that forum from a guy who built the same suppressor, but a little shorter, so no much "design" from my part at all - just the machining.

And yes, due to Titanium's poor heat transfer (I know first hand it is a bitch to machine due to this fact!), it makes for a poor material for something like a suppressor. However, the high-strength and the lower weight compared to steel is the one advantage why many like myself chose Titanium for suppressor builds.

Will
 
Last edited:
F

freebullet

Guest
Wow & thanks for sharing!

Simply spectacular!

Where does a guy find out more about Rusty? Only known 2 rustys, one tries to attack my trucks, the other was a dirtbag. It'd be good to read more from a good Rusty.
 

wquiles

Well-Known Member
Wow & thanks for sharing!

Simply spectacular!

Where does a guy find out more about Rusty? Only known 2 rustys, one tries to attack my trucks, the other was a dirtbag. It'd be good to read more from a good Rusty.
Thank you for your kind words.

And apologies. The Rusty Ian and I talk about is actually a guy who has done a good deal of work on Form 1 suppressors (http://form1suppressor.boards.net). You can read his tutorial in this forum, although you might have to join before seeing the page:
(link to Tutorial)

Will
 

wquiles

Well-Known Member
OK, I am done with the suppressor. I spend a long time considering spacer length options, since the OL length since the tube was 9.3" and with the tailcaps would have been close to 10" long:
IMAG0038.jpg


In the end, I decided to have a design closer in length to what Brunosplace designed earlier, but instead of 7x baffles (2x SS and 5x TI), I am doing 3x SS and 5x TI for a total of 8x baffles.

To guide me on how it would look like, I started by cutting the Ti spacers per the design and following Rusty's advice:
IMAG0041.jpg


IMAG0039.jpg


I assembled the suppressor in the "long" 9.3" tube with the last two spacers longer than they should, and I still had a LOT of space left, which convinced me to cut the tube:
IMAG0042.jpg


There is no going back now:
IMAG0045.jpg
 
Last edited:

wquiles

Well-Known Member
Since I cut the tube which was already threaded on both ends, I had to of course re-thread it, so I changed to a new edge on my inside threading tool:
IMAG0046.jpg


Threading was 24-tpi:
IMAG0047.jpg


IMAG0049.jpg


IMAG0055.jpg


Now I only had a smaller spacer to cut:
IMAG0050.jpg


I cut it a "little" bit long on purpose since I can always sand to size afterwards:
IMAG0053.jpg
 

Ian

Notorious member
Flood coolant is your friend when machining titanium! Nice setup.

Personally I would have left it at 10" oal and made a longer blast chamber spacer, but it will be a lot more handy the way you did it and shouldn't have much if any first round pop. You do good work, thanks for sharing.
 

wquiles

Well-Known Member
Assembled:
IMAG0057.jpg


IMAG0058.jpg


About 1lb 1oz:
IMAG0059.jpg


Then comes truing everything, since we have stacking tolerances, specially with the Griffin muzzle adapter which is a part that should be indexed. I first screwed the the Griffin taper adapter in the assembled suppressor:
IMAG0062.jpg


And then of course screw the tailcap on the suppressor itself, which is held "fairly" concentric in my tru-set chuck:
IMAG0061.jpg


For the next operations I left the suppressor in the chuck, and I removed the "assembly" of the taper adapter & tailcap as one unit. I then tested in my rifle repeatedly for fit and the proper index. In this photo the flat portions are fairly "on top" but should be indexed about 180", or to the right of the photo:
IMAG0065.jpg


I took a little bit off and checked:
IMAG0063.jpg


After like 8-10 times, I had the muzzle device properly indexed so I used threadlocker to keep it aligned:
IMAG0066.jpg
 

wquiles

Well-Known Member
Once everything was well aligned, I used threadlocker on the tailcap that goes into the griffin adapter:
IMAG0067.jpg


Making sure that the Griffin adapter was indexed was nice, but the most important part was to make sure it was 100% flat & aligned with the threaded barrel and the body of the suppressor. To confirm the great alignment - here looking through the bolt side:
IMAG0069.jpg


Here looking through the bullet exit tailcap in the suppressor:
IMAG0072.jpg


These are the final dimensions on the finished suppressor (mind you that I have an extra baffle in my design):
IMAG0074.jpg


And here is how this 1.625" OD 30 cal suppressor looks compared to my other form 1, an 1.5"OD 45 cal:
IMAG0075.jpg

IMAG0076.jpg

IMAG0077.jpg


I hope to visit the range soon to try it out :)

Will
 
Last edited:

Ian

Notorious member
Excellent! I Loctite my rear caps on, too, and when it's time to clean the works I put a piece of pvc through the back end and tap th stack out the front. If you don't powder coat your cast bullets, expect lead to accumulate. A tip for monitoring lead buildup is to very carefully weigh the finished can BEFORE you shoot it and watch for it to gain weight. At about 1-2 ounces more it will probably be time to clean it.
 

wquiles

Well-Known Member
Flood coolant is your friend when machining titanium! Nice setup.

Yes, flood coolant is awesome. Believing it was going to be too much hassle, for the first 2-3 years with this PM12x36 lathe I tried "manual" lubing, and then one of the air/oil systems (very small oil/lubricant in a stream of compressed air, which actually works really well!), but once I "really" started working on Ti, and when I started to work with cut knurling, I realized I "had" to have flood coolant, so I took the plunge and went all out. Now that I have been using flood coolant for several years, I am amazed at how freaking awesome it is. Definitely never going back!


Personally I would have left it at 10" oal and made a longer blast chamber spacer, but it will be a lot more handy the way you did it and shouldn't have much if any first round pop. You do good work, thanks for sharing.

Thanks much. Yes, I struggled with keeping it a longer unit, but since now-a-days I always shoot with the suppressor only, I figured having it a little shorter would be more manageable and handy. The blast chamber is about 1.8" long, so I am expecting some first-round-pop. However, noise-wise, my 1.5" OD 45 cal suppressor I have been using with this 308 Savage has an an ID of about .5", but this one has a much smaller ID (.415") and a larger volume (1.625" OD vs the 1.5" OD), so I am expecting this one to be a little quieter and more effective for the 308 rifle :)

Excellent! I Loctite my rear caps on, too, and when it's time to clean the works I put a piece of pvc through the back end and tap th stack out the front. If you don't powder coat your cast bullets, expect lead to accumulate. A tip for monitoring lead buildup is to very carefully weigh the finished can BEFORE you shoot it and watch for it to gain weight. At about 1-2 ounces more it will probably be time to clean it.
Man, that is a great tip - thanks so much. Since I shoot cast lead bullets that I cast myself, I have noticed the "build-up" on the 45cal suppressor already. I am sure it is ready for a cleaning!

I have some supplies to try powder coating, so when I cast again, I will give it a try :)

Will
 
Last edited:
  • Like
Reactions: Ian

Ian

Notorious member
Now that I have a lathe, a mister system is on my want list for titanium. My neighbor built a Ti/Al form 1 can from scratch on a 6x36 Atlas/Craftsman lathe using a mister and well-polished hss tooling.....and LOTS of time. Good, fast, cheap....pick any two? Hah!
 

smokeywolf

Well-Known Member
I use an acid brush and can of cutting oil for small jobs where clearing chips or heat extraction/displacement is not essential. When chip clearing and heat displacement is needed I like using a mister. For knurling, nothing does the job as well as flood coolant.
 
F

freebullet

Guest
Yeah, just rethread the titanium, no biggie..o_O

Magnificent work, pix, explaining, all of it. Thanks...for the links too.