Mould Handle Fix

Ben

Moderator
Staff member
I think all of us have experienced mould handles that " slip ".
There are different " fixes " for this problem.
Some use epoxy, some use steel pins.

Today I had a Lee mould that the handles had a bit of movement in.
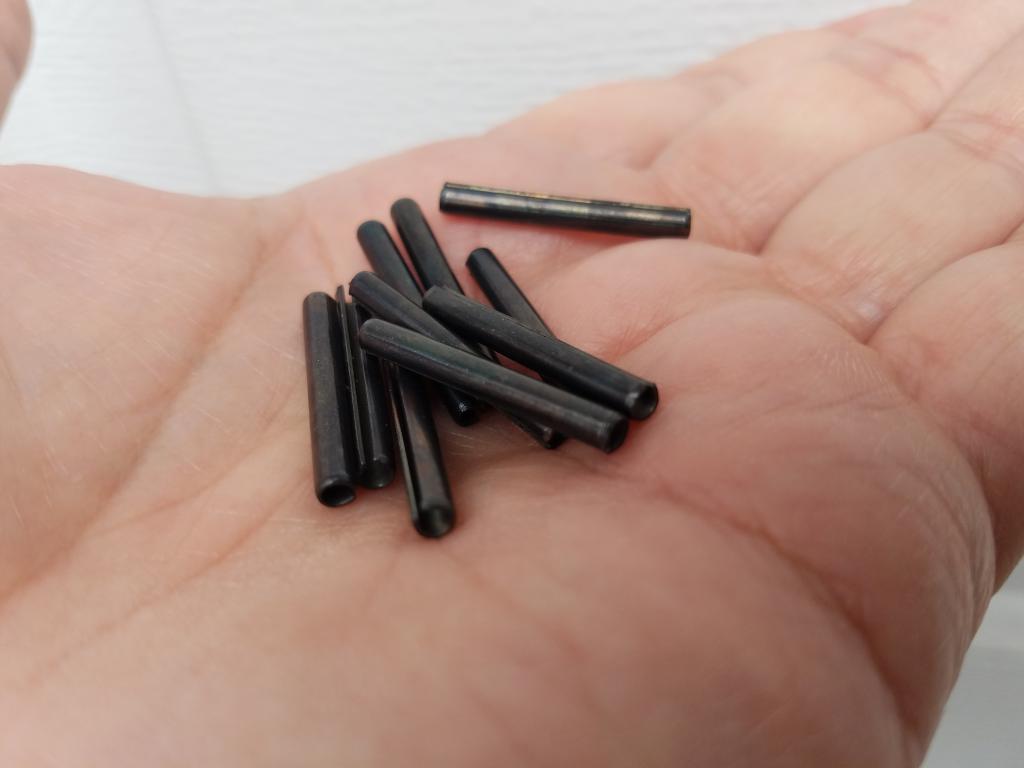
I went to my local hardware store and bought some 1/8" roll pins.
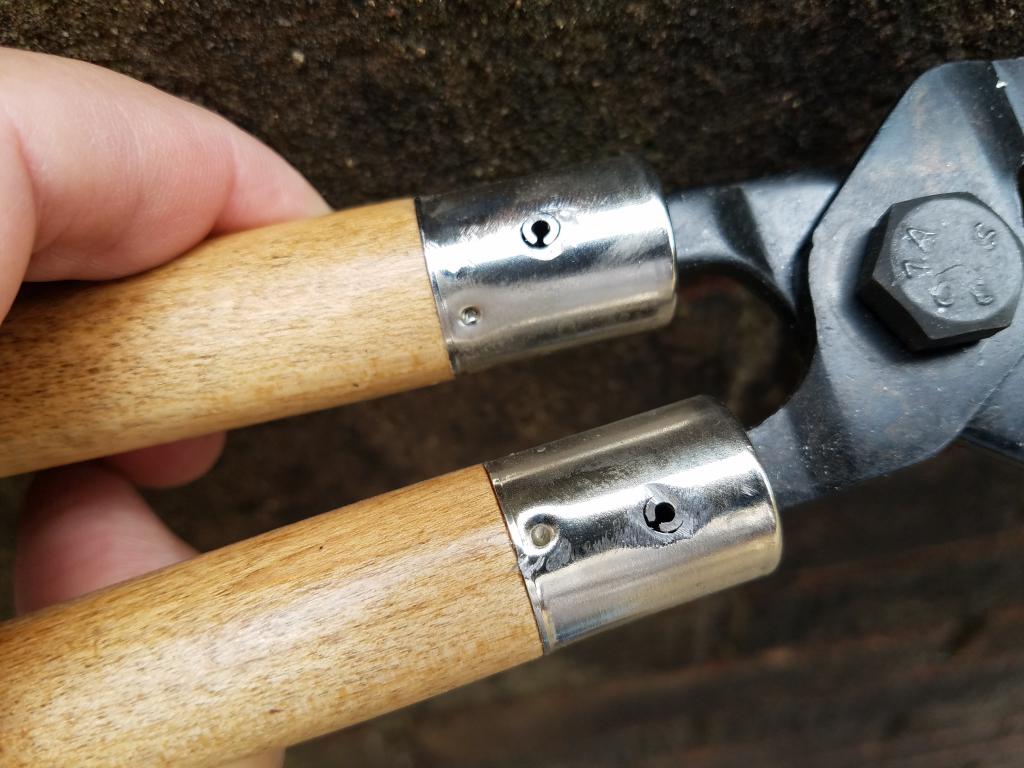
I drilled the holes a couple of thousandths small then drove in the pins
and used a Dremel with a cut off tool to cut them off flush.
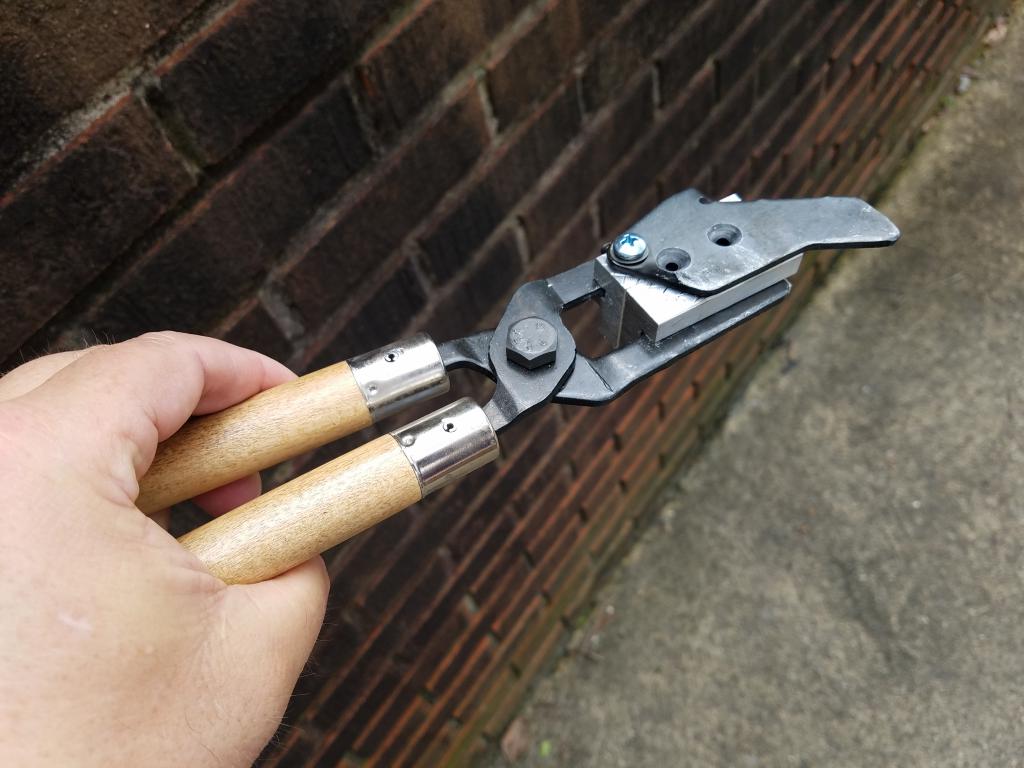
Worked well for me.
No movement now !

8Ehpal4.jpg


These have moved their last time ! !


tIIg1Ye.jpg


HY9tpLL.jpg
 
Last edited:

CZ93X62

Official forum enigma
I have used epoxy on about half of my mould handles, and it holds up pretty well for a while. Your pinning process is light-years better, and I see similar fixes coming to my workbench when the handles begin to escape yet again.
 

Ian

Notorious member
Permatex Ultra Copper high-temp RTV silicone here. I feel that drilling weakens the tangs, and the two pairs that I pinned eventually got some wiggle in them again. The RTV is rated for automotive exhaust applications, adheres extremely well, and never works loose.
 
F

freebullet

Guest
I just bang the things on a bench vertical & they stay on a little while. All these methods sound better.
 

462

California's Central Coast Amid The Insanity
The first I read of handle repair was over at that other place, and the poster said he used roll pins. Sounded like a quick and easy fix, and I used that method to secure two Lee 2-cavity moulds. Many years later, they still are solid though see limited use.
I used the same method on a set of Lee 6-cavity handles, but one handle was mis-measured and the hole was too close to the tang end, and it broke and left the end piece firmly stuck in the wood. I made several repair attempts but none were permanent. Since then, I've used two-part epoxy and they've all withstood the test of time.
If you decide to use the roll pin method, measure twice, drill once.

(I think the 2-cavity tangs are imbedded more deeply, into the handle, than the 6-cavity tangs, and less prone to drilling to close to their ends.)
 

Ben

Moderator
Staff member
I picked 1/8 " dia. pins for that very reason.
Mine are drilled centered ( on my drill press ).
I'm not very concerned about weakening the tangs on this mould.
 
  • Like
Reactions: Ian

Ian

Notorious member
Your fix is great for the two-cavity moulds, Ben. The silicone or epoxy is mo'betta for the commercial handles which are tough to drill (sintered steel) and the Lyman mould handles which use ash wood and do nothing but split when you try to pin them. Heavy brass moulds and repeated whackings in the hinge bolt tend to work mechanical connections loose.
 

Ben

Moderator
Staff member
Your fix is great for the two-cavity moulds, Ben. The silicone or epoxy is mo'betta for the commercial handles which are tough to drill (sintered steel) and the Lyman mould handles which use ash wood and do nothing but split when you try to pin them. Heavy brass moulds and repeated whackings in the hinge bolt tend to work mechanical connections loose.

Yes, agreed......
 

462

California's Central Coast Amid The Insanity
Drilling the sintered steel tangs made me think the bit was dull.
Funny thing is, that set of handles had first been ground and filed to fit RCBS moulds. A lot of work eventually got tossed.
 

Ben

Moderator
Staff member
Ian's idea of using Permatex Ultra Copper high-temp RTV silicone is most likely the safest method offering the highest probably of a , long term, permanent ,trouble free mould handle fix.

Ben
 

L Ross

Well-Known Member
Gorilla Glue works quite well, and fills the cracks in the handles that often come with slipping handles.
I bought a Dick Dastardly Big Lube mould with his version of Lee 6 cav handles cut from stainless. Pretty sure it is Gorilla glue he uses to secure them.
 

fiver

Well-Known Member
hey now.
LEE tells you right on the box that their handles are gonna fall apart after about an hours usage.
funny thing is you can't just pull them off right out of the box and get it over with.

I use that 2-part playdough putty stuff to fix my handles.
I just mix up a chunk about the size of a walnut and shove half down in each handle hole and push the metal back in.
I run the metal around the bench grinder real quick roughing everything up.
 

RicinYakima

High Steppes of Eastern Washington
Since I do one piece Ideal moulds a lot, I use the two part epoxy that is fairly thin. Those 150 year old handles have a lot of shrinkage once they get to the desert and that lets me fill the inside of the cracks and bond to the round stubs. Of course these only get a couple of hundred castings from me and then go into the ammo cans. :rolleyes:
 
Last edited by a moderator:

CWLONGSHOT

Well-Known Member
I epoxy mine.
I haven’t had one come back apart... YET.

BUT, I grind grooves into the steel to give the epoxy better grip. 1/3 on each edge so 4-12 grooves per handle. Then pour a thumbing full of epoxy into handle AND slather the steel before inserting, tapping and standing up to harden.

I even did a couple handles on molds I borrowed for guys (after asking) and been doing so for long time. My epoxy is very good stuff. I have two. I used to have a friend who made gun drills. (Very long bits with carbide tips) they epoxyed the carbide to the end. SERIOUS GLUE HERE!! VERY hot as curing. Even melting my mixing cups!! But this dosent flow at all it’s pasty.
second epoxy was when I was making golf clubs. This is also nice stuff and costly it’s very fluid and almost too “runny” but because of that it soaks in porus items better. It also gets pretty hot, but not nearly as hot as the other stuff! Both are about as Permanent this as epoxy can be.


But pinning is how the better handles I have come. The Redding’s and Lachmere. (Sp)

cw
 

CWLONGSHOT

Well-Known Member
Ian's idea of using Permatex Ultra Copper high-temp RTV silicone is most likely the safest method offering the highest probably of a , long term, permanent ,trouble free mould handle fix.

Ben
I like this idea!!

I use permatax on heavy recoiling scope rings too. Just a dab on bottom half. Can be removed but it’s a solid mounting!
CW