My Venture into PID controlled PC convection oven

JWFilips

Well-Known Member
Hi Folks,
Well as usual I jumped into this project and took it to completion without one Step by Step photo!
(Hey that has been my job for 47 years so When I do things for enjoyment the camera is not close by! :rolleyes: )
Anyway I stated entertaining the thought because I found a seller on eBay that had the complete "InkBird" PID control kit at a great price!
$31.44 free shipping + tax in your state
https://www.ebay.com/itm/Inkbird-PID-Digital-Temperature-Controller-ITC-100-VH-K-sensor-Thermostat-110V/222076892641?ssPageName=STRK:MEBIDX:IT&_trksid=p2057872.m2749.l2649

Then I found this guy's website with a great wiring for the INKBird PID in an oven:
https://www.instructables.com/id/PID-Temperature-Controlled-Oven/

OK why "InkBird" Great price....Great reputation and all in al nice people to work with!

Now this was my first attempt and I did have to ask some questions form the smarter folk here!
But I got 'er done and I am ver excited wit the results. The unit I bought was in Celsius so I chose 207 Deg C for my set temperature!
That equates to 404.6 degrees F
The unit now holds my oven at 404.6 + or - .1 degree! and I do not even have to watch it....no sagged bullets no undercooked bullets Best money and project I have done in awhile.
Granted I only used the extra parts & wires I on hand and did not but anything else! ( cheep)
When I rewired my oven elements I didn't have extra high temp wire so I had to feed one set of Heating elements out the front of my oven and the other out the rear!
OK this looks messy but works! But the key point here is I separated the Heating elements which would be controlled by the PID from the Oven's fan motor which need the normal direct 110 AC current ( otherwise it would burn out iF it was in the controlled environment!)
So the oven no has two plugs one for the fan which goes into a normal 110 ac plug and the oven heating elements that go into the PIS controlled 110 Plug!

Well this is what my first attempt looks like! ( I already have learned from this I can jump off of the PID 110 AC input terminal to eliminate a number of other 110 AC input wires) I was going for a small footprint box but now I see a larger PID control box with all outputs self contained would eliminate the wire mess!

Anyway here are some after photos of the completed project ( I know my Bad!)
Overview of project.jpgPID Backside.jpgRelay.jpgPID Control panel.jpg
 

Brad

Benevolent Overlord and site owner
Staff member
I use a probe in my oven. Drilled a hole thru the side, probe slides right in.

Makes it so much easier when heat treating bullets too. Knowing beats the hell out of guessing!

Good work Jim
 

JWFilips

Well-Known Member
First Off; I know a good bit about electrical circuits but Diddly about electronic circuits!
I found it impossible to understand the wiring diagram on my instructions that came with the kit
That is why the Link to the "13 steps" helped me to some extent but I wired my heating elements direct with no need for my oven controls!
And Based on what I have learned I will most likely rebuild the unit into a bigger self contained box so I also can use it with my lee casting pot (and definitely hook up all ground wires)
 

JWFilips

Well-Known Member
Hooking up the PID and SSR were the easiest parts The one I had trouble with is the 4 heating elements I had in my Black and Decker Convection oven. It appeared to me from the wiring that all 4 were wired in series! but they are not supposed to be that way. This made for a nice clean wiring however all 4 in series reduced the output in half! They must be split So 2 are wire in series and the other 2 are wired in series separately
This really messed up my mind for awhile because the way they looked the 4 were on one circuit ....but they are not!
 
Last edited:

Brad

Benevolent Overlord and site owner
Staff member
I too know diddly about electronics. I bought a complete unit from OBIII on CB many years ago. Got a couple probes too.
 

Kevin Stenberg

Well-Known Member
Jim YOU GONE AND DONE IT. I have been thinking of getting a standby PID for casting. An at that price i cant go wrong. My first (and only) DIY PID cost aprox. 150$. The only thing your kit has that is needed for a casting PID is a heat sink and a power strip. An if you add quick disconnects it can be a multi-use temp. gauge.
 

JWFilips

Well-Known Member
use a probe in my oven. Drilled a hole thru the side, probe slides right in.

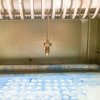
I drilled in from the top I slid a flange type bolt ( the size of the hole I had to drill) pushed the Sensor wires thru it before hooking it up so I drop the sensor in from the top the the flange piece goes down and plugs up the hole to cut down on heat loss. I adjust the sensor height with a tiny binder type clip until it is just above the bullets on the tray. You can see the clip and the flanged plug just above the sensor in the first picture.
I also drilled a hole in a .311 bullet and tapped threads in the hole to screw onto the probe to increase its mass to give me a better idea when the bullets reach core temp


Flanged insert
Flanged Insert.jpg


Probe suspened just over bullet tray
Probe Suspened in Oven.jpg
 
Last edited:

Brad

Benevolent Overlord and site owner
Staff member
That should work well Jim.
I tend to bake for 30-31 min so I figure 10 min to get bullets to temp the 20 for a good cure.
 

JWFilips

Well-Known Member
Actually Brad Even with out the PID I have did the same! I would put the bullets in the preheated oven with my casting thermometer
When the Thermometer returned 400 deg F I would set the timer for 30 minutes
Always seemed to work until my oven termostat started acting up.
Don't have to use my casting thermometer any more now but still use the same proceedure
 
F

freebullet

Guest
Nice work, Jw.

I need to make 3 & have been putting it off to long. I don't do metric temps though.
 

JWFilips

Well-Known Member
I don't Like "C" temps either but It Is easy to plug in your Degrees F into any free conversion app on the internet so it is not a problem!
Also InkBird sells the identical PID with both F & C readouts but it does cost a bit more and I could not find it as a "Kit" (which contained the SSR and Probe all in one box)
 

RBHarter

West Central AR
5/9+32 or 9/5-32 . I think maybe it's the other way around .
I was looking for some other conversion and it was there too .
2.2 lb per kilo .
3.85 liters per gallon or 4.8 in Canada or the UK . That's why there's so much beer in a qt or pint is the 5 qt Kings gallon .
Kelvin is F° plus 243° . Minus 243° F is absolute zero and zero on the Kelvin scale .........and now I'm rambling because there's another metric I can't remember now that's something clever like metres to yards is 13/12 but that's right because a metre is 39.?? Inches and 100 metres is 109.? yd and because we're lazy it's 109 or 110 here in the states .
Knots to miles is times 1.15 which is why nobody can decide on a fixed number for sub/super sonic nevermind that the fixed number doesn't really matter because air density and altitude . It's given as 650 knots or 710 mph on a standard day at sea level 29.92 inhg 59° F and 50% humidity .
 

Ian

Notorious member
39.37"/meter. Iirc 0 K is 273F? 3.8L/gallon/231 in³ is easy because of Buick V6 displacement. Like most people I dislike a system that I'm unfamiliar enough with that I have to stop and think through a conversion for every measurement instead of thinking IN the system. If I had to convert grains to grams every time I set up a powder measure I'd lose my mind or get good at it, one or the other.

Regarding the oven PID I'd be making a chart of conversions in sharpie just so's I don't hurt my brain.
 

Brad

Benevolent Overlord and site owner
Staff member
I just use a simple app or website that has a converter.

Like Ian said, make a simple chart of commonly used temps and move forward.
 

Ian

Notorious member
For us Luddites there's books. I got service manuals all over the garage and all have a pretty comprehensive metric/English chart inside the front or back cover, then there's the little black "Pocket Ref" which is what some of us carried with us everywhere before smartphones and the internet:


JWFilips

Well-Known Member
My Computer is an Apple Macintosh workstation It has a dashboard control center and that has a great little app that converts:
Area, currency, energy, length, power, pressure, speed, temperature, time, volume & weight
Takes only seconds to figure out any conversion you need in those catagories
 
F

freebullet

Guest
That's all easy enough, & I couldn't fault anyone getting what they want.

For me certain things need be a certain way. I won't buy pull start engines for myself. If it's worth having, it's worth having with electric start...& a charging coil. Just the way my mind functions...or doesn't? o_O
 

JWFilips

Well-Known Member
Freebullet : I understand completely! In many ways I am the same!....But since I really only needed one temperature for Powder coating......figured I could live with that one time conversion! Anyway 207.0 deg C is easy to remember!
Now if I build one for my Lee 20 lb pot I will buy the F&C deg version because I have moulds that run at many different alloy temps!
& 25 deg F works for most but my buddy Ed's mould ar problematical! Small grain bullets in large moulds! He only shoots .25 cal and under in the lightest weights ....Was a whole new casting experience for me!