New nose size die.

waco

Springfield, Oregon
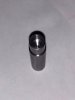
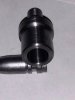
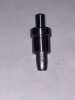
A big thank you to Brad for the new die. Excellent work and the die performs flawlessly.
My Redding .300” neck bushing showed up in the mail today. I’ve been waiting to try this thing out! I have a couple NOE molds that drop a .302” nose. I need .300”
I think I will buy a .301” bushing as well and size down in steps. Doing .002” in one pass works, but I think .001” at a time will be better.
Awesome job Brad and thanks again!
F93AE782-F7CC-4562-9178-CF9BFD753A27.jpeg5B9FB990-2D15-4368-9EFE-0A267DD045BD.jpeg19ACB376-0DFE-4DAD-AC49-A00980406315.jpeg39EB4D73-0236-4DF9-B69E-650B6EEDD6EB.jpeg93947576-8079-45D0-9A8B-007BAA53B803.jpeg0261670B-F978-435C-846E-757271E50627.jpeg56F5C89F-1259-4966-9FA2-9DA08EC6E7AA.jpegF93AE782-F7CC-4562-9178-CF9BFD753A27.jpeg5B9FB990-2D15-4368-9EFE-0A267DD045BD.jpeg19ACB376-0DFE-4DAD-AC49-A00980406315.jpeg39EB4D73-0236-4DF9-B69E-650B6EEDD6EB.jpeg93947576-8079-45D0-9A8B-007BAA53B803.jpeg0261670B-F978-435C-846E-757271E50627.jpeg
 

S Mac

Sept. 10, 2021 Steve left us. You are missed.
Looks great. I can't tell by the pics, does the die retaining not hold the bushing in place on the upstroke?
 

Ian

Notorious member
I think Brad made a washer that holds the insert in place under the nut.
 

Brad

Benevolent Overlord and site owner
Staff member
Thanks to Ben for sharing some info on how Buckshot made his. I hate to copy the concept but since Buckshot is out of the business......

Seeing that it works as designed makes me happy beyond all belief!
 

waco

Springfield, Oregon
Upon further testing of the new die I am certain I don't want to size anymore than .001" at a time. It shaves lead pretty bad otherwise. The only bullets I have on hand to test were cast about 7 months ago and are 13-15bhn.
I think I even bent some bullets. I think sizing right after casting may be in order.
 

waco

Springfield, Oregon
Seeing that it works as designed makes me happy beyond all belief!
It's going to work better when I get a .301" bushing and the size some bullets before they have a chance to harden up too much.
I love it!
 

Brad

Benevolent Overlord and site owner
Staff member
I am tickled that it works. It was actually easier to make that I expected. The retaining washer was the tough part to figure out.
 

Eutectic

Active Member
Upon further testing of the new die I am certain I don't want to size anymore than .001" at a time. It shaves lead pretty bad otherwise.
waco,

In my sizing experience any 'shaving' has always lead to degradation in accuracy. You may want to polish the leading corner slightly to swage the alloy rather than cut it. This has been my experience at least........ Just had this 'shaving' trouble on a heavy body size of .010" for paper patching and ended up making a 2" long tapered die for the smooth concentric transition. Funny thing..... I knew I was going too before hand! Just wanted to test them first!

Pete
 

Brad

Benevolent Overlord and site owner
Staff member
Those bushings are hardened steel but should be workable.
Take a steel rod and drill and tap for a screw in the end. Rod needs to be under bushing size. Cut a circle of abrasive, I wouldn't go any coarser than 400, and put a small hole in the center. Screw goes thru hole and holds the abrasive disc on end of rod.
Hold bushing firm in a padded vise, add a little oil, and use the rod in a drill to polish and taper the leading edge. Rod and abrasive will tend to self center when spun.
Shouldn't take long to polish it enough to stop the shaving. Like 5-10 seconds I would say. Start small, try it, and go from there.
Easy to take more off, damn hard to put it back.
 

waco

Springfield, Oregon
Those bushings are hardened steel but should be workable.
Take a steel rod and drill and tap for a screw in the end. Rod needs to be under bushing size. Cut a circle of abrasive, I wouldn't go any coarser than 400, and put a small hole in the center. Screw goes thru hole and holds the abrasive disc on end of rod.
Hold bushing firm in a padded vise, add a little oil, and use the rod in a drill to polish and taper the leading edge. Rod and abrasive will tend to self center when spun.
Shouldn't take long to polish it enough to stop the shaving. Like 5-10 seconds I would say. Start small, try it, and go from there.
Easy to take more off, damn hard to put it back.
I'll have to give this a try.
 

Brad

Benevolent Overlord and site owner
Staff member
If you have a Dremel they often have a little arbor like this included. Works very well.
 

Brad

Benevolent Overlord and site owner
Staff member
Walter had a little trouble with bullets getting off center a bit. I don't have the nose of the push rod in the die exact to match the nose so he asked for one that could use some JB weld for fit the nose exact.
I decided to see if a bored out top punch that was a snug slip fit on unseized bullets would help. If the bullet is held straight by the top punch when the nose is being sized it can't get as off center.
I will get it off to Walter soon and he can report on how it works out.
Man I hope it helps!
 

Attachments

  • IMG_3083.JPG
    IMG_3083.JPG
    37 KB · Views: 12
  • IMG_3084.JPG
    IMG_3084.JPG
    58.6 KB · Views: 12
  • IMG_3085.JPG
    IMG_3085.JPG
    55.8 KB · Views: 12

waco

Springfield, Oregon
It looks amazing. I can’t wait to try it out.
I think I’ll cast up some new bullets that won’t be so age hardened.
This may help a bit as well.
Thanks again Brad!
You are the man!
 

Ian

Notorious member
It won't be long before we're ordering custom throat reamers and boring/reaming the sizing dies for the full length of the bullets, with the throat reamer. Might have to have two reamers, one for the rifles and one about a thousandth smaller all around for the dies.
 

Brad

Benevolent Overlord and site owner
Staff member
Isn't that just about what some of the CBA guys do?
If cost wasn't such an issue I would consider it.
 

Ian

Notorious member
From what I understand that's exactly what they do, but I haven't heard it directly from any of them how they do it. It would make sense that the gunsmith who installed and chambered the barrel provided a nose-bump die cut with the throating reamer.

What I'm talking about is a full-length bullet-sizing die that is snug enough and shaped right to size the whole bullet, with a slightly oversized freebore entrance about 3/8" longthat will just barely scuff the as-cast bullet body, that way it cannot possibly get crooked in the die. If using a punch which closely fits the die's freebore, it will guide in the die and can be used to seat and crimp the gas checks absolutely square.

As crooked, out of alignment, and wobbly as most H&I type bullet sizers are, it's really easy to get bent bullets using them, which is why I don't like any un-necessary sizing operations with traditional equipment.
 

Brad

Benevolent Overlord and site owner
Staff member
The in out sizers also suffer from allowing force to be applied to a bullet that is bottomed out in the die. The forces seek an outlet and if great enough can lead to a bent bullet.

I have thought of a similar style sizer. If a cutter was made that was identical, except in size, as the cherry used to cut the mould it would work well. We could use pressure to eliminate voids in bullets and help uniform them in size and shape.
Lube would need to be applied before hand to keep from potentially wiping out the lube grooves.