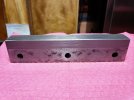
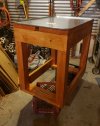
South Bend 7" shaper refurbishment

Ian

Notorious member
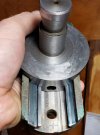
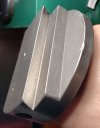
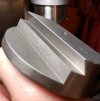
YEAH, BABY!! Chinese end mill (dressed with Chinese triangle hone by Yours Truly), Chinese milling machine, clamps, 123 blocks, R8 collet, 'Murican drawbar wrench, and dumb hillbilly turning the cranks. Didn't turn out too bad, dead accurate, square, flat, and and parallel on both sides. Turns out when tramming that the dovetail taper was all on the gib side relative to the "base" of the ways, so I didn't split the taper between the cuts. The straighter way was worn, bent, or cut at about 65⁰ so I was as glad to fix it as I was the the other side that had a bad taper and trough in it.
20210613_223719.jpg

20210613_223730.jpg

20210613_230027.jpg

The dovetail opposite the gib blued in nicely to the fresh, 60⁰ milled cut so very little will be required to perfect the fit. The gib might even be ok with more honing. It would actually be serviceable just like it is, but anything worth doing....
 

JonB

Halcyon member
but isn't our world round ?

reminds me of my favorite phrase to remember a algebra formula.
Pie R squared...no Pie are round.
...LOL
 

Mitty38

Well-Known Member
That hand lapping, stoning process you use is the same basic technique, I have used on the beyond stock body work resto Jobs. And on fine metal polishing resto work.
Get in a hurry, press too hard or take too much material at once you can work yourself backwards.
Amount of patience that takes is well understood and appreciated here.
Great job!
 
Last edited:

Ian

Notorious member
Play time tonight while awaiting the arrival of some carbide scraper tool blades (tired of sharpening a file). It almost sickens me to cut up a brand-new, high-quality 25' 12-gauge extension cord but I couldn't think of a better way to get my hands on a plug and the right size jacketed wire in the color I wanted.

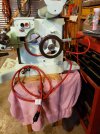
Out with the 16-gauge cord (1/2 hp single-phase capacitor-start motors with a 6-foot cord need 12-gauge wire) and in with the proper stuff. I noticed the motor was wired for the 1860 rpm high speed and not the 1400 low speed, yet the belts were in the lowest "gear". I may start out with the motor wired for low speed and run the belts up a click or two if necessary. Also wired the switch and plug for the light so it operates independently of the stop/start switch (used the green wire to run the plug neutral back from the control box to the neutrals in the junction box).

20210615_232215.jpg
 

Ian

Notorious member
Funny you should ask, Bruce, I was thinking of you when researching oil. It's supposed to hold about a quart and be a "good quality machine oil" of 150-240 Saybolt seconds at 100⁰F, or about ISO 32-46? Most important feature is non-detergent due to lack of any kind of oil filtration besides letting the particulates settle out of suspension into the sump. Also needs to be safe for 660 and Oilite bearing bronze. I was thinking about running ISO 32 weight R&O tractor fluid. SAE 20, non-detergent engine oil is commonly used in these by home-gamers but we know isn't designed to handle long periods of inactivity, operate constantly at room temperature, or to protect against constant moisture condensation inside the case. What do you have in mind for a circulating machine oil?
 

bruce381

Active Member
For a Bijur system the BB oil is a VG 220 aw type oil
Try 20 ND oil or even 30.

Scan not to good but you can get idea I think not listed as a shear but this is what they would have used in all machines.
page second page with Bijur maybe more to your use.

Remember Tractor fluid like J-20 series has high amount of both Zinc and friction modifiers may be too deteregenty for you
 

Attachments

  • South Bend.pdf
    971 KB · Views: 2

bruce381

Active Member
I would not worry to much about moisture condensation inside the case but then I'm California arn't you in Texas they have no moisture down there right?.

A good AW rust inhibited Hydraulic circulating oil like DTE Heavy medium or 25 or 26 would be ideal.
 
  • Like
Reactions: Ian

bruce381

Active Member
"of 150-240 Saybolt seconds at 100⁰F, or about ISO 32-46?"

Correct the 32 being same a Saybolt 150 the 46 same as 240.
 
  • Like
Reactions: Ian

Ian

Notorious member
Thanks, Bruce. I nixed J20C right off because it has friction modifiers for wet clutches and detergents and dispersants added to suspend clutch dust for filtering. It also has some high-temp viscisity modifiers that break down under shear.
 

Ian

Notorious member
Been piddling with the saddle and box table ways trying to figure out where the table sag is coming from. If the table is moved all the way to the crank end, it levels out. The top rail of the saddle is swagged in the middle and thin in the middle on the back, a natural product of the area that sees the most use. I ended up filing the top and back sides flat so the table has even resistance across the whole range of travel with the gib snug. Used a micrometer while working it to get the thickness even. Was originally .6225" thick, had to take it down to .6212-3" to clean it up. Now the slack in the upper way is even and the top of the table will move .007" total vertically at the front edge and .0039" at the top of the rear way block on the table. I'll need to mill a step in that block that stands about .002" proud to make the table level.

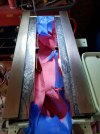
Going back to the ram ways now, need to get that finished and the rock out of it before finalizing the work on the table way. Here's a shot of the work on the column ways being scraped into the ram. Two passes on the whole thing and two passes on the high spots. It's coming in already, but probably will take another 10-12 passes to get it right. Then I'll scrape the dovetail ram ways flat and parallel using the granite plate as a standard, and finally stone or scrape the left column dovetail to the ram. The gib will get stoned smooth and otherwise left alone.

20210619_162432.jpg
 

Ian

Notorious member
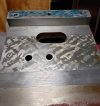
The back side of the box table, bluing to check the hand-scraped surface the top rear way block bolts against. I could mill it down instead of the block but don't want to risk ruining the geometry. Tenths of an inch and minutes of a degree are critical here. The block can be replaced if I dick it up, plus only one surface to worry about making flat and mating with anything.

20210616_220924.jpg

The way block, it mates to the blued part and makes a hook that hangs the table on the saddle. It was originally ground flat and not scraped, I'll mill it flat and then mill down the part that runs through the screw holes a couple thousandths to bring in the slack in the way and raise the table to level.

20210616_215209.jpg
 

Ian

Notorious member
You're right, Emmett. Oily shop grime and spider webs and a cat hair finish is the general motif. I sanded and recoated tonight, it's still orange, maybe even more so. BTW, Valspar kicks Minwax's heiney. It dries fast, sands easily, and doesn't have that Minwax proprietary STANK.

Hallelujah I finally had a flash epiphany that solved my leg problem. I bought two sturdy wheel assemblies to put on the back (called "fixed casters", if that isn't an oxymoron!) But they are 6-1/2" tall. Original plan was to make adjustable machine feet for the front legs from carriage bolts and make the front legs longer so only about an inch of bolt need be exposed below the bottom of the leg, however I nixed that because I thought it would look dumb and also because the table is wider than the original cabinet and I need to get my feet under it to comfortably reach adjustment points on the machine. A 4x4 on the front corners would be a nuisance. I figured I'd just laboriously plasma cut some plates, drill screw holes in them, weld some tubing to them, and weld a washer and nut to the bottom for the carriage bolts.

Then I remembered they make threaded railing flanges for iron pipe. Duh. Couple flanges, couple 5" threaded nipples, couple caps faced in the lathe, drilled and tapped 1/2"-13, screw it together, voilá!
 
Last edited:

Ian

Notorious member
Not that anyone was wondering, but in case you were, the reason the table top is 24x36 instead of 18x36 is because the only decent steel pan I could find big enough is 24x36. Drip pan is not optional for one of these as they perpetually seep oil as part of their normal function. The two Gitz oilers for the jack shaft ensure the motor mount stays lubricated and the crankshaft pin bushings weep constantly to the outside as a way of keeping oil flowing through them. Splash from inside and what returns from the way scrapers and gutters in the front keeps the knee leadscrew bearings and threads lubricated all the way down to the base of the machine and eventually mother earth Gaia ifn' ya don't gots a pan to catch it. Still trying to figure out how to seal the holes where the mounting bolts have to pass through. Thinking about drilling a small pilot hole for each and stretching the metal into upside-down funnels using tapered punches so the pan can stand in at least 1/4" of oil without leaking.