Mold repair?

farmboy

cookie man
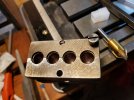
I recently purchased a early Saeco mold and thought I would clean it up today. I think it was an early mold because it said Saeco and mold # on the sprue plate. As I was taking the screw that holds the plate on it snapped off. It left the last 3/8'" in the mold...all of the threaded part. Anyone have an idea how to get that out? It will take someone with more mechanical aptitude than I have. Suggestions?
 

BudHyett

Active Member
I recently purchased a early SAECO mold and thought I would clean it up today. I think it was an early mold because it said SAECO and mold # on the sprue plate. As I was taking the screw that holds the plate on it snapped off. It left the last 3/8'" in the mold...all of the threaded part. Anyone have an idea how to get that out? It will take someone with more mechanical aptitude than I have. Suggestions?
If this is beyond your immediate knowledge, seek a machinist to help you. Preferably someone in a local rifle club with firearms knowledge.

First: Soak it with Kroil, WD-40, some kind of penetrating oil for 24 hours. Then heat with a propane torch and reapply the penetrating oil.

Second:
  • If there is enough of the stub sticking out, use a thin blade in a Dremel tool to cut a slot to use with a small screwdriver blade.
  • You should try moving the screw down first to unstick the burrs that possibly caused this issue.
Third:
  • Drill the screw stub with a smaller left-hand carbide drill in a drill press.
  • Center drill the center with a spot on the screw to align the drill on the broken surface.
  • Drilling with a left-hand drill will often unbind the stress and the screw stub will back out on the drill.
  • Be sure to stop the drill when you see movement, These small carbide drills break easily.
Fourth:
  • If there is not enough of the stub sticking out, use an Easy-Out setup again in a drill press to gain the steadiness needed.
 
Last edited:

Ian

Notorious member
If you have the stuff: Step one is penetrant, overnight soak at least. That's just so you can see the root of the threads better when you're cutting the center of the screw out with a bottom-cutting carbide end mill. After the shank is gone, the threads are peeled out with a pick and needlenose pliers.

If the threads are so corroded that the shank twisted off, an extraction tool won't stand a chance. Extractors are for getting out bolts that sheared off or pulled in two but didn't rust solid in the hole.

As others said, take it to a pro. It only costs more and frustrates the machinist more when you try to get it out first and make it worse.

I'd be happy to fix it for you if you'll only pay shipling both ways.
 
Last edited:

JonB

Halcyon member
I bought a Saeco mold at a gunshow, with one screw missing...well, the top part was missing, bottom part still in there...rusted in there, just like your mold. I proceeded to try and drill it out. I mucked it up, but good. I ended up swapping it with a bullet caster who is a machinist (he knew what he was trading for). My memory tells me that was a small size screw...#8 maybe?
 

Ian

Notorious member
The broken screw came right out. The Kroil soaking did the trick, plus it wasn't rusted in, just pulled in two, so when I touched off the bottom with a carbide end mill to make a flat spot to drill, it caught and spun right out.

I can't seem to leave anything alone and this turned into a monster, but I got it licked finally. The mould was loose on the pins, mainly the front alignment point. Bad ding on the lower right corner. Lube grooves rolled with big burrs on the front two cavities. Dressed the corner ding with a file, lightly chamfered the alignment holes, and tapped the front pin out a bit. Perfect lockup. Only problem is the blocks aren't square up and down. File and peen, got it close but the top isn't flat. Big sigh, fire up the casting furnace and run a few pours. Bullets hanging as expected in two cavities, bullets in the front aren't aligning vertically (right block low in front), rear cavities have grooves aligned but the blocks aren't even (left one high). To top it off, the bullets are .0015" out of round.

Cool the mould and study. The only fix I can come up with is re-bore the alignment holes and make oversized pins, so I press out the original pins, get the cavities very, very carefully trued and even using pin gauges and high magnification to vertically align the block halves with the original machining marks in the cavities, clamp firmly, and ream through the quarter-inch holes with a .465" chucking reamer. Then I rechamfered the female side, turned two new pins to mimic the .0015" interference fit of the originals, pressed them in, and verified the lockup. All looked good except the outside faces on all sides of the blocks are a little wonky.

Next, I set up the blocks to skim the tops square to the cavities, again using pin gauges and a test indicator to make certain the centerline of the cavities were dead-on vertical. Shim and tram, shim and tram, finally get it right. Skim the top of the blocks the bare minimum, cleaned up 95% of the surface by removing about .004" at the highest spot. Now with one flat, true reference surface, I spent couple minutes skimming the bottom and the ends flush and then broke all the edges with a file.

Next, the burrs in the cavities. I used a polished punch to clean up the sides of the lube grooves and then a centering punch shank tapped sideways to peen the curled corners of the lube groove forms back into place, eliminating the burs and closing the gap back up. Quick polish with a bronze brush wrapped in steel wool, degrease, and fire up the furnace again.

Now we're down to a few tenths out of round, vertical is good, bases are bee-uteeful now, all the grooves line up correctly, bullets shake out with no tapping, only problem is the back cavity wasn't bored deeply enough so it is almost a thousandth narrower at 90⁰ to the parting line than adjacent to it. I had cast several pours of reference bullets in sequence and rechecked them all, front, second, and third are all identical dimensions but the fourth (closest to handles) is narrow, so it isn't fixable by "Beagling" that end. I'm not going to lap it, Farmboy can do that or cast with the front three if the one skinny one is a bother. It probably won't make any difference for pistol bullets.

I did take a few photos as I went but this thing turned into a monster so I just focused on getting the work done.

The broken sprue plate screw is a 10-24 coarse thread with a flat head and smooth shank, almost exactly like a Tennessee mountain rifle lock nail. All the ones I have are fine thread.
Now, a question for you Saeco guys: how in the world is the sprue plate/left handle screw retained so it doesn't back out when swinging the plate? There's no shoulder, the sprue plate pivot hole and smooth hole through the block are clearance size for a #10 screw. No shoulder. No grub screw. What gives? Once I get the screw sorted out I can pack this thing up and get it sent back home.
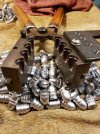
20240428_003748.jpg
 
Last edited:

Petrol & Powder

Well-Known Member
Now, a question for you Saeco guys: how in the world is the sprue plate/left handle screw retained so it doesn't back out when swinging the plate?
Some SAECO molds have a set screw that is accessed from the end of the block. It's a deep hole that comes in from the narrow end of the block. Can't say yours is that way.

Excellent work!
 

farmboy

cookie man
The sprue plate is kept tight with a small screw on the back end the mold. If there isn't one there I must have removed it before shipping. I had no idea that the mold was that much out of speck. Do you think it was dropped or mishandled somewhere along the line? Or was it made like that?
 
  • Like
Reactions: Ian

Ian

Notorious member
I would have sworn there wasn't a hole there because I looked for such a thing last night, but sure enough there is this morning! No grub screw in it. Mystery solved, thanks guys.

If you have all the hardware I'll just ship it back as-is with the old alignment pins, extracted end of the broken sprue bolt, the fine-thread screw you sent with the broken head, and the Bellville washer. IIRC that was it, I'll gather up the pieces.

Most of the problems with the mould were things that could have been done better at the factory. The damaged lube groove forms are from abuse at some point, and the corner that was damaged was probably caused by being dropped. I don't know how the alignment pins and cavities got out of whack, but it was more than I could fix by moving metal around the alignment hole area and was done at the factory. Same issue with the mould top not being flat...even with the blocks evened up endwise the half with the stop bolt in it was low right through the center if the cavities by about .002".

In this photo you can see the shiny spots from the blocks not being even on top. Also the three cavities from the left have gaps and rolled burrs at the lube groove forms, and if you look close you can actually see the lengthwise misalignment where the block on the bottom was shifted to the right.20240427_142242.jpg
 
Last edited:

JonB

Halcyon member
SNIP>>>

The broken sprue plate screw is a 10-24 coarse thread with a flat head and smooth shank, almost exactly like a Tennessee mountain rifle lock nail. All the ones I have are fine thread.
Now, a question for you Saeco guys: how in the world is the sprue plate/left handle screw retained so it doesn't back out when swinging the plate? There's no shoulder, the sprue plate pivot hole and smooth hole through the block are clearance size for a #10 screw. No shoulder. No grub screw. What gives? Once I get the screw sorted out I can pack this thing up and get it sent back home.
FYI, my 1980s vintage Saeco 411 mold (4 cav) has a sprue plate screw that I believe is 10-32
the setscrew to lock the sprue plate screw is same dia (#10) and same thread.
I got a baggie of mold screws from Redding about 10 years ago, for a different Saeco mold...all are same as what I think is 10-32 (I couldn't find my screw gauge to confirm). Also, I had a baggie of short setscrews I got at a hardware store that are different lengths of what I think is 10-32. All these setscrews were stashed in my Mold misc hardware box...and I think they were all for the Saeco project I was unsuccessful with.
.
BTW, the setscrew in the Saeco 411 mold (which I believe is original) is fairly long, like an inch long, which makes it nice to remove from that deep hole. All the other 10-32 setscrews I mentioned I have are about are 3/8" or shorter...which would be a pain to remove from a deep hole.
 
Last edited: