
A Lee mould " could " turn out to be a pretty good mould , IF you're willing to spend the needed time on it.
In defense of Lee, on some of your purchases of Lee moulds, you'll end up with a usable mould as it comes from Lee with little to no work required on the mould , but more often than not there can be problems with a Lee just as soon as it comes from the box. A lot of casters buy from places like MidWay who will refund your $ cheerfully if you're unhappy with your Lee mould.
I recently got a " new style " Lee , 2 Cav. 30 cal. 150 gr. Flat nose, cast mould.
Price was right, around $20 or so ? ?
Disappointment for Ben when the mould arrived, it was casting a .3095 " bullet with a .299 nose.
Just not suitable in my many .30 cal. barrels. Nothing to do but start to work.
My 1st move was to disassemble the mould and debur the edges of the sprue plate. The edges always look like a saw tooth and if left " as is " will in time eat up the tops of the blocks.
Next step was to improve the " as cast dia. " of the bullets. Nothing to do here but spin a cast bullet slowly inside the mould with Clover's Fine abrasive compound until the drive bands were .312 " or so. Slow work, but the Lee mould material is farily soft and will cut pretty quickly. Don't over do this technique, you can easily ruin the mold by removing too much material.
I also wanted .3015" on the nose of the bullet.
Quite a bit of trial and error work allowed me to reach my two goals .
The sprue plate screw that holds down the sprue plate never has the right amount of tension when it leaves Lee. ( usually way too tight, again causing the steel plate to gall the tops of the soft aluminum blocks) .
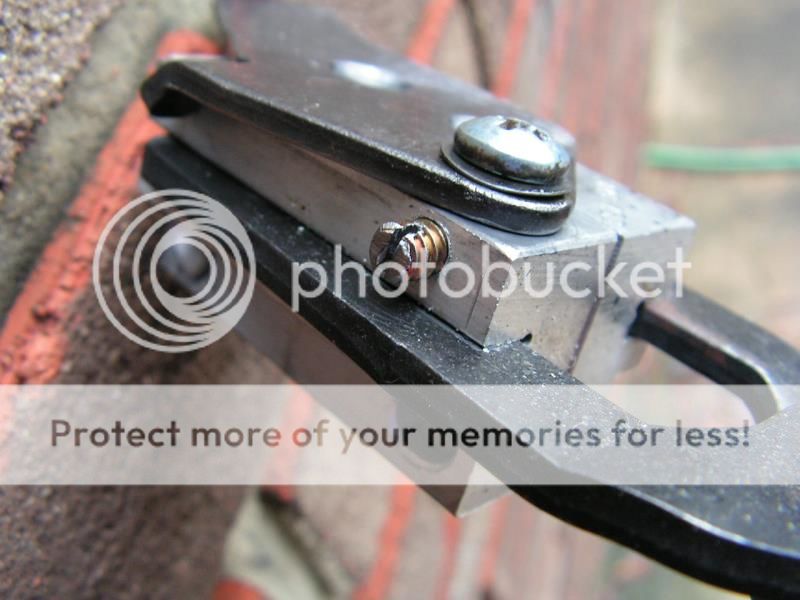
I drilled and tapped a 10-24 hole in the mould block and made a set screw and installed it. The set screw will allow me to set any amount of pressure on the sprue plate that I want. Something that you can't do when you lift the Lee mould out of the box.
Joy after this was completed, now........the sprue plate swings smoothly without damaging the tops of the mould anymore.
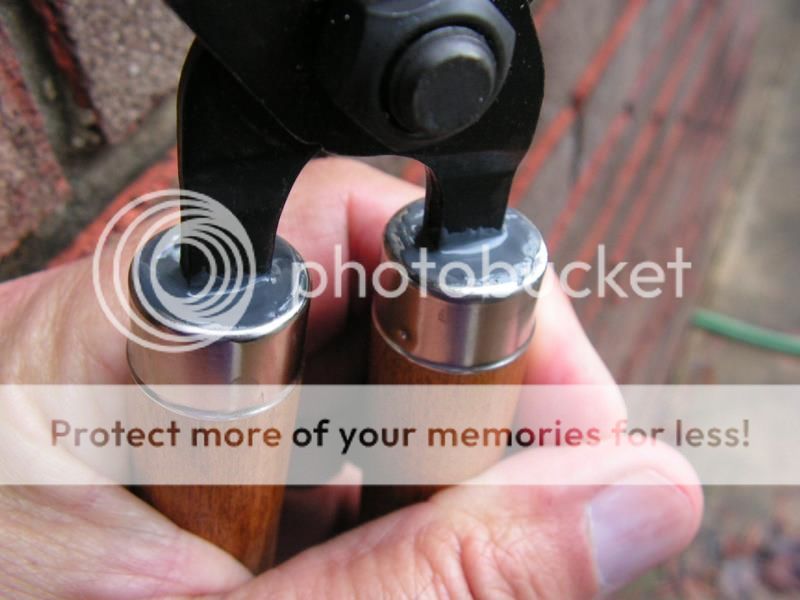
While I was at it, I tapped off the mould handles, cleaned the steel with aerosol brake cleaner, mixed up some slow cure JB Weld and gave everything a good coat of the JB Weld. I don't think these handles will be moving a millionth of a micron in the future.
At the eleventh hour, I also decided to remove the gas check shank, I now have a 152 gr. plain base mould that I can size to .311" and have a .3015" nose. It is a great shooter ( and a cheap shooter ! ! )
I realize that after reading all this and looking at the photos that many of you will say, " Why spend $20 on a mould and then have to do all that work ? "
My answer would be , " Some people don't have the $ to buy a Mihec, an NOE or an Accurate mould ( all GREAT moulds , no doubt ...) Some will be lucky in this tight economy if they can get themselves a few Lee moulds. A bit of your time and very little money can " fine tune " them so that they will be very serviceable moulds for a long time.
Ben
Using the JB Weld technique, the ferrules won't be moving, neither will the wood handles be moving in the future. ( both are fairly common problems with all Lee moulds )
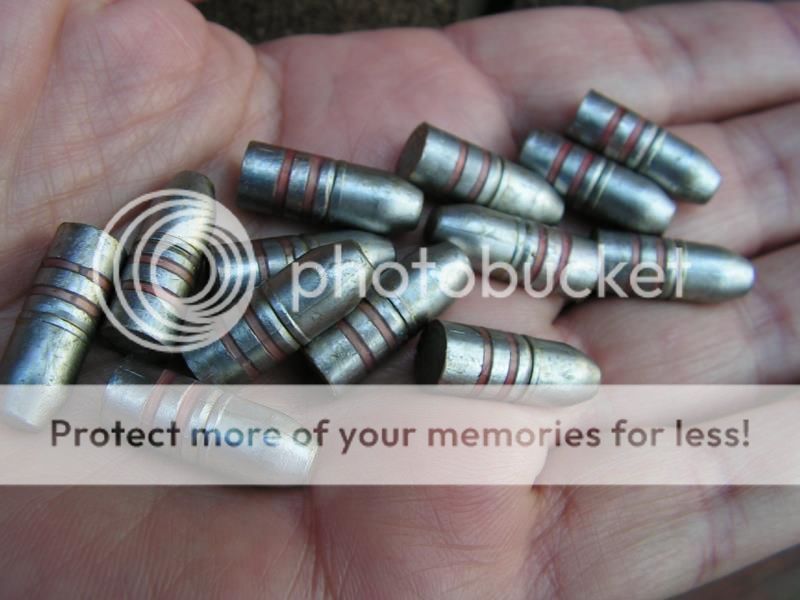
Here are the bullets from the mould, lube rings filled with Ben's Red, and then rolled in BLL.
All drive bands mike .311" and the nose mikes .3015 " .

In defense of Lee, on some of your purchases of Lee moulds, you'll end up with a usable mould as it comes from Lee with little to no work required on the mould , but more often than not there can be problems with a Lee just as soon as it comes from the box. A lot of casters buy from places like MidWay who will refund your $ cheerfully if you're unhappy with your Lee mould.
I recently got a " new style " Lee , 2 Cav. 30 cal. 150 gr. Flat nose, cast mould.
Price was right, around $20 or so ? ?
Disappointment for Ben when the mould arrived, it was casting a .3095 " bullet with a .299 nose.
Just not suitable in my many .30 cal. barrels. Nothing to do but start to work.
My 1st move was to disassemble the mould and debur the edges of the sprue plate. The edges always look like a saw tooth and if left " as is " will in time eat up the tops of the blocks.
Next step was to improve the " as cast dia. " of the bullets. Nothing to do here but spin a cast bullet slowly inside the mould with Clover's Fine abrasive compound until the drive bands were .312 " or so. Slow work, but the Lee mould material is farily soft and will cut pretty quickly. Don't over do this technique, you can easily ruin the mold by removing too much material.
I also wanted .3015" on the nose of the bullet.
Quite a bit of trial and error work allowed me to reach my two goals .
The sprue plate screw that holds down the sprue plate never has the right amount of tension when it leaves Lee. ( usually way too tight, again causing the steel plate to gall the tops of the soft aluminum blocks) .
I drilled and tapped a 10-24 hole in the mould block and made a set screw and installed it. The set screw will allow me to set any amount of pressure on the sprue plate that I want. Something that you can't do when you lift the Lee mould out of the box.
Joy after this was completed, now........the sprue plate swings smoothly without damaging the tops of the mould anymore.
While I was at it, I tapped off the mould handles, cleaned the steel with aerosol brake cleaner, mixed up some slow cure JB Weld and gave everything a good coat of the JB Weld. I don't think these handles will be moving a millionth of a micron in the future.
At the eleventh hour, I also decided to remove the gas check shank, I now have a 152 gr. plain base mould that I can size to .311" and have a .3015" nose. It is a great shooter ( and a cheap shooter ! ! )
I realize that after reading all this and looking at the photos that many of you will say, " Why spend $20 on a mould and then have to do all that work ? "
My answer would be , " Some people don't have the $ to buy a Mihec, an NOE or an Accurate mould ( all GREAT moulds , no doubt ...) Some will be lucky in this tight economy if they can get themselves a few Lee moulds. A bit of your time and very little money can " fine tune " them so that they will be very serviceable moulds for a long time.
Ben

Using the JB Weld technique, the ferrules won't be moving, neither will the wood handles be moving in the future. ( both are fairly common problems with all Lee moulds )

Here are the bullets from the mould, lube rings filled with Ben's Red, and then rolled in BLL.
All drive bands mike .311" and the nose mikes .3015 " .


Last edited: