
L1A1Rocker
Active Member
I always had the idea that I'd put a light on the SBRs eventually. Well, I've been looking at it seriously for the last several months. I'm a very thrifty person by nature but understand the quality sometimes costs. I spent 80 bucks on a surefire P2 (or Z2) to go with my carry gun back in the late 90's. Why it is, today in this time of revolutionary superbright wonder lights a good light costs MORE than that is beyond me. They are either super cheep throw away junk, or they are budget busters.
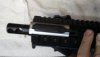
My other problem was how to mount it. Ian has a good setup where you just push the button on the back of the light with your thumb. That won't work for my super short SBR. Mounting the light where I could hit the rear button put the front of the light right next to the muzzle brake. Not good. So I needed to use a remote pressure switch. But where to mount the switch? The obvious choice is on of the hand grips. But that means the light comes on every time you grip the rifle - even in daylight. Not an ideal situation.
Well, after months of aggravation looking at lights on Amazon I found something that looked promising. It was a fairly new listing with just 3 reviews. It came with a remote pressure switch, one 18650 battery and charger. AND, it was only 26 bucks. It claimed 600 Lumens and was only on or off, no 3 or 5 light modes that cause problems for a gun mounted light. I gave a bit of trust to the ad because the battery capability was not an exaggeration (as many tend to be) listing the mAh at 2600.
Stock photo:

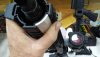
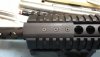
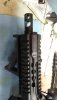
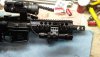
I already had a light mount to put the light on the rail, thanks to Ian's suggestion. But again, how and where to mount the remote? I decided I wanted it on the hand guard in-between the rails accessible with my left thumb. This way I wouldn't inadvertently activate the light simply by grabbing the grip. The only problem with this was where I wanted to mount it there were large vent holes. Glad I have a lathe. . .

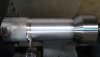
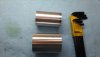
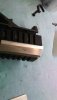
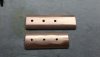
I need something that will match the contour of the O.D. of the hand guard, and then a backing plate that will match the contour of the I.D. of the hand guard. Fortunately I had some aluminum tubing that was very close to both those needs on hand. After just a bit of trimming I had the contours I needed.

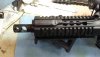
Then I sectioned off a peace with the band saw.


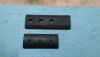
Now a flat surface so the stickum will stick.

I might be close to the pic limit. Better continue in another post. . .
My other problem was how to mount it. Ian has a good setup where you just push the button on the back of the light with your thumb. That won't work for my super short SBR. Mounting the light where I could hit the rear button put the front of the light right next to the muzzle brake. Not good. So I needed to use a remote pressure switch. But where to mount the switch? The obvious choice is on of the hand grips. But that means the light comes on every time you grip the rifle - even in daylight. Not an ideal situation.
Well, after months of aggravation looking at lights on Amazon I found something that looked promising. It was a fairly new listing with just 3 reviews. It came with a remote pressure switch, one 18650 battery and charger. AND, it was only 26 bucks. It claimed 600 Lumens and was only on or off, no 3 or 5 light modes that cause problems for a gun mounted light. I gave a bit of trust to the ad because the battery capability was not an exaggeration (as many tend to be) listing the mAh at 2600.
Stock photo:
I already had a light mount to put the light on the rail, thanks to Ian's suggestion. But again, how and where to mount the remote? I decided I wanted it on the hand guard in-between the rails accessible with my left thumb. This way I wouldn't inadvertently activate the light simply by grabbing the grip. The only problem with this was where I wanted to mount it there were large vent holes. Glad I have a lathe. . .
I need something that will match the contour of the O.D. of the hand guard, and then a backing plate that will match the contour of the I.D. of the hand guard. Fortunately I had some aluminum tubing that was very close to both those needs on hand. After just a bit of trimming I had the contours I needed.
Then I sectioned off a peace with the band saw.
Now a flat surface so the stickum will stick.
I might be close to the pic limit. Better continue in another post. . .

") And thanks. Did you ever order one?
And thanks. Did you ever order one?