Snakeoil
Well-Known Member
I have not posted about this here. I have a Low Wall made in 1899 that I had rebarrelled with an original lined barrel well over 30 years ago. The smith that did the work was famous for being able to rollmark factory Winchester markings. He came highly recommended and unfortunately, he kinda sucked. When I got the rifle back, it would not fire. Sent it back and told him the extractor was not fitted properly. He was not happy, but fit a new (maybe) extractor. It fires some ammo and clicked on other ammo. I put it in the cabinet and did not touch it again for 20 years. I pulled it out about 5 years ago and found ammo it liked and shot it in chicken shoots. But the accuracy of that Winchester Wildcat was dismal at best.
So, I started using better ammo with the result being first trigger pull, CLICK. Recock, second trigger pull, BANG! Been talking to those with much more experience with High and Low Walls and working thru it on my own. Today I figured it out. Below is a report I sent out to a bunch of Low Wall .22RF shooters I know. Gotta share and file the knowledge away as it floats to the surface, right? So, thought I'd share it here.
Spent several hours with the Low Wall today after yesterday’s dismal results for my first attempt at a fix for the chronic misfiring issue. Giving the extractor a better fit in the extractor groove made no improvement. But yesterday was not a total loss. I tried another little test. I reduced the diameter of the bullets with my pocketknife so they would not engrave the rifling. This allowed the rifle to fire properly in 4 out of 5 tries. And that one misfire was with a bullet that I barely scraped any lead from the driving band.
I was now pretty sure that this was a headspace issue. What was happening was when the bolt was closed, the round was not going all the way home due to the excessive headspace. When the hammer dropped, the firing pin would push the round further into the rifling, thus using up some of the energy/inertia of the hammer to seat the cartridge. When the bullet stopped moving upon rim contact, whatever energy was left was not sufficient to fire the round. A re-cock of the hammer would have the hammer falling on a cartridge that was now hard against the rim in the breech and all the energy went into the firing pin blow to the priming compound and it fired.
So today, with the mainspring removed, I kept closing the bolt with a feeler gauge between the bolt and the breech face. Max allowable headspace is 0.007 inch. I kept moving up in feeler thickness until I got to 0.014 inch and I quit. That’s twice the max headspace.
The standard fix would be to set the barrel back, recut the extractor groove and recut the chamber. That’s a lot of work for a rifle with a lined barrel. There were two possible root causes for the excessive headspace. Either the extractor had too much material removed from the face (it was probably a used extractor) or the groove cut into the breech face was too deep. I’m pretty sure it was the latter, but it could have been a combination of both. I won’t know unless I order a new extractor and compare the two.
With the extractor seated in the relief groove that's cut into the breech face, I could see a slight step where the breech face had not been cut indicating that the extractor was too deep. So, I started measuring the extractor rim relief, the groove in the breech face and that little step. The groove and the step were a bitch to measure so I was not confident in the accuracy. But after repeated measurements and some simple arithmetic, it looked like the extractor needed to move aft about 0.012 inch towards the breech bolt..
So, to confirm this, I took a strip of paper, which is a nominal 0.003 inch and folded it so I had 4 layers, which would be 0.012 inch. I tucked it between the extractor and the extractor groove in the breech face and closed the action. It closed up tight and the toggle had a nice firm over-center feel, locking the bolt closed. Could not get any sized feeler to slip between the face and the bolt. Bingo!!
Dug thru my assortment of flat spring stock. I never throw out anything before disassembling and scavenging it for things like springs, micro-screws, small capacitors, etc. I found a piece of flat spring steel that measured exactly 0.012 inch. Cut a small piece, superglued it to the back of the extractor and reassembled the action. Closed the bolt and it was perfection.
So, took this tiny shim and scribed the cutout for the chamber and removed 99% of the cutout with my Dremel. Then, I cleaned everything and soldered the shim to the back of the extractor. With that done, I cleaned away all the excess solder and put the action together again. Perfect. Then it was just a simple matter of finishing the fit of the chamber cutout and cleaning up the extractor before reassembling the action.
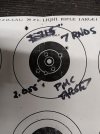
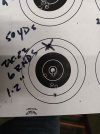
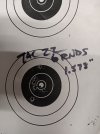
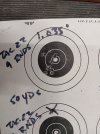
With the gun back together, I went out side to test the rifle. I tried a bunch of different ammo and every round fired on the first pull of the trigger. Looks like the rifle is fixed.
I may order a blank extractor from MVA and fit it to the gun and recut the chamber in the new extractor. But that is not a high priority.
I made a drawing for the fix since a picture is worth 1000 words and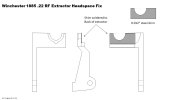 attached it here.
So, I started using better ammo with the result being first trigger pull, CLICK. Recock, second trigger pull, BANG! Been talking to those with much more experience with High and Low Walls and working thru it on my own. Today I figured it out. Below is a report I sent out to a bunch of Low Wall .22RF shooters I know. Gotta share and file the knowledge away as it floats to the surface, right? So, thought I'd share it here.
Spent several hours with the Low Wall today after yesterday’s dismal results for my first attempt at a fix for the chronic misfiring issue. Giving the extractor a better fit in the extractor groove made no improvement. But yesterday was not a total loss. I tried another little test. I reduced the diameter of the bullets with my pocketknife so they would not engrave the rifling. This allowed the rifle to fire properly in 4 out of 5 tries. And that one misfire was with a bullet that I barely scraped any lead from the driving band.
I was now pretty sure that this was a headspace issue. What was happening was when the bolt was closed, the round was not going all the way home due to the excessive headspace. When the hammer dropped, the firing pin would push the round further into the rifling, thus using up some of the energy/inertia of the hammer to seat the cartridge. When the bullet stopped moving upon rim contact, whatever energy was left was not sufficient to fire the round. A re-cock of the hammer would have the hammer falling on a cartridge that was now hard against the rim in the breech and all the energy went into the firing pin blow to the priming compound and it fired.
So today, with the mainspring removed, I kept closing the bolt with a feeler gauge between the bolt and the breech face. Max allowable headspace is 0.007 inch. I kept moving up in feeler thickness until I got to 0.014 inch and I quit. That’s twice the max headspace.
The standard fix would be to set the barrel back, recut the extractor groove and recut the chamber. That’s a lot of work for a rifle with a lined barrel. There were two possible root causes for the excessive headspace. Either the extractor had too much material removed from the face (it was probably a used extractor) or the groove cut into the breech face was too deep. I’m pretty sure it was the latter, but it could have been a combination of both. I won’t know unless I order a new extractor and compare the two.
With the extractor seated in the relief groove that's cut into the breech face, I could see a slight step where the breech face had not been cut indicating that the extractor was too deep. So, I started measuring the extractor rim relief, the groove in the breech face and that little step. The groove and the step were a bitch to measure so I was not confident in the accuracy. But after repeated measurements and some simple arithmetic, it looked like the extractor needed to move aft about 0.012 inch towards the breech bolt..
So, to confirm this, I took a strip of paper, which is a nominal 0.003 inch and folded it so I had 4 layers, which would be 0.012 inch. I tucked it between the extractor and the extractor groove in the breech face and closed the action. It closed up tight and the toggle had a nice firm over-center feel, locking the bolt closed. Could not get any sized feeler to slip between the face and the bolt. Bingo!!
Dug thru my assortment of flat spring stock. I never throw out anything before disassembling and scavenging it for things like springs, micro-screws, small capacitors, etc. I found a piece of flat spring steel that measured exactly 0.012 inch. Cut a small piece, superglued it to the back of the extractor and reassembled the action. Closed the bolt and it was perfection.
So, took this tiny shim and scribed the cutout for the chamber and removed 99% of the cutout with my Dremel. Then, I cleaned everything and soldered the shim to the back of the extractor. With that done, I cleaned away all the excess solder and put the action together again. Perfect. Then it was just a simple matter of finishing the fit of the chamber cutout and cleaning up the extractor before reassembling the action.
With the gun back together, I went out side to test the rifle. I tried a bunch of different ammo and every round fired on the first pull of the trigger. Looks like the rifle is fixed.
I may order a blank extractor from MVA and fit it to the gun and recut the chamber in the new extractor. But that is not a high priority.
I made a drawing for the fix since a picture is worth 1000 words and
 attached it here.
