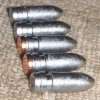
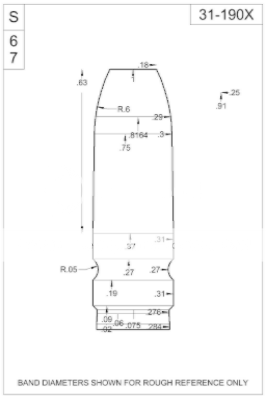
MiHec 30 Sil brass four cavity solid

Ian

Notorious member
The difference between MP moulds and BRP moulds is the hand-finishing after the machine boring. Also, either Bruce's toolmaker put a microscopic radius on every sharp point of the cherry, or they wore that way. MP moulds are razor-sharp in all aspects, fine machining for machining's sake, but lousy for moulds that need to provide a little wiggle room for bullet release.

The blocks weren't canted from vertical, they were out of line horizontally. Miha cuts the moulds one half at a time, and the tool works its way down the line. If the block face is at an angle to the path of the tool head moving from one cavity to the next, it will cut the cavity deeper on one end than the other. When two of these mis-aligned blocks are put face-to-face, the cavities are still perfectly round, but the parting line will intersect off-center of the bullet centerline, opposite sides on opposite ends. If there had been a cavity in the middle the lines would have intersected in the center of the bullet. As it was, the bullets on the ends, where the offset was worse, had more sticking issues than the two inner cavities. The reason why the blocks were out of line is because they were faced on a slight taper, not because they were jigged improperly in the mill during the cavity cutting operation. All this is easily measured.
 

Ian

Notorious member
Well Elmer keith was dealing with some pretty poor lubes in his day. I have seen people shooting bullets in head to head cba matches at that velocity with standard rounded grooves and be competitive..Pat Iffland did it almost 20 years ago.as well as a fellow in the unrestricted pistol cba class.and I think won a title 10 or so years back.
Merrill Martin played with lube dams in grooves and such way back when.I don't think it panned out but I can't remember.I was at his shop and saw the apparatus though.He was odd!

I've pushed this one well past 2600 fps with zero lube issues. I can also promise you I was NOT using anyone's grandpappy's favorite bullet grease, either.


JonB

Halcyon member
The difference between MP moulds and BRP moulds is the hand-finishing after the machine boring. Also, either Bruce's toolmaker put a microscopic radius on every sharp point of the cherry, or they wore that way. MP moulds are razor-sharp in all aspects, fine machining for machining's sake, but lousy for moulds that need to provide a little wiggle room for bullet release.

The blocks weren't canted from vertical, they were out of line horizontally. Miha cuts the moulds one half at a time, and the tool works its way down the line. If the block face is at an angle to the path of the tool head moving from one cavity to the next, it will cut the cavity deeper on one end than the other. When two of these mis-aligned blocks are put face-to-face, the cavities are still perfectly round, but the parting line will intersect off-center of the bullet centerline, opposite sides on opposite ends. If there had been a cavity in the middle the lines would have intersected in the center of the bullet. As it was, the bullets on the ends, where the offset was worse, had more sticking issues than the two inner cavities. The reason why the blocks were out of line is because they were faced on a slight taper, not because they were jigged improperly in the mill during the cavity cutting operation. All this is easily measured.

OK, I think you talked me into lee-menting this mold. Maybe I'll cast with in, one more time before I do, though.
 

Ian

Notorious member
Jon, that's a last resort. Maybe a little twirl in the cavities with a bronze cleaning brush wrapped in 6-0 steel wool just to barely smooth the the edges off the lube groove rings, but that's it. Try a little smoke first, I mean a little. I use a bbq lighter and just waft the tip of the flame through the cavities to leave a little bronze tint. You don't want it blackened or your vent lines plugged with it. Whack the handle hinge bolt smartly with a mallet one time before you open the mould to drop the bullets, and try flipping the mould upside down to dump the bullets out. Wait as long as you can after cutting the sprue to open the mould, the longer you wait the easier they fall. It's a balancing act between keeping the mould hot enough to fill those tall driving bands fully and letting the bullets shrink enough to fall out.
 

45 2.1

Active Member
I wouldn't be twirling a bronze brush in a brass mold cavity....... one material is harder than the other. Try the mold as is before you try anything that will void the warranty.
 

Rick

Moderator
Staff member
I wouldn't be twirling a bronze brush in a brass mold cavity....... one material is harder than the other. Try the mold as is before you try anything that will void the warranty.

I gotta agree with that. A bronze bore brush is designed to cut carbon and fouling out of the bore. The brush may be much softer than barrel steel but it is harder than a brass mold. In addition it has square cut ends which make it sharp. For sure not in any of my brass molds.
 

JonB

Halcyon member
I've done the spinning lead bullet coated with 'automotive paint' polishing compound with several alum Lee molds (my definition of Lee-menting) ...I also upped the game using Rubbing compound a few times (it's a bit more aggressive with rouge in it). I've never been able to remove enough alum to make them cast larger, but made them drop easier. I can't imagine my lamenting can do any damage to brass? BUT, I will definitely try one or two more casting sessions before I lee-ment.

I don't think there is a problem that warrants sending it back, but even if there was, since I bought this mold second hand, at a very good price, I didn't really think sending it back was a real option.
 

Rick

Moderator
Staff member
Jon, I don't think removing brass to make it cast larger is the issue. Think scratches from a bronze brush, possibly kinda deep scratches.
 

Ian

Notorious member
I don't understand how two different people can both get "bronze brush" out of what I wrote and totally ignore/miss/discount/whatever the words "wrapped in 6-0 steel wool" which immediately followed.
 

Brad

Benevolent Overlord and site owner
Staff member
Gentle twirl is different from a spin. One would remove any burrs, the other could change shapes or dull edges.

I would cast first then decide if any actions were needed.
 

Rick

Moderator
Staff member
Evidently I did miss the steel wool. I guess it's a matter of to each their own because I wouldn't do that to one of my brass (or aluminum) molds either.
 

JonB

Halcyon member
I've done the spinning lead bullet coated with 'automotive paint' polishing compound with several alum Lee molds (my definition of Lee-menting) ...I also upped the game using Rubbing compound a few times (it's a bit more aggressive with rouge in it). I've never been able to remove enough alum to make them cast larger, but made them drop easier. I can't imagine my lamenting can do any damage to brass? BUT, I will definitely try one or two more casting sessions before I lee-ment.

I don't think there is a problem that warrants sending it back, but even if there was, since I bought this mold second hand, at a very good price, I didn't really think sending it back was a real option.

Please re-read.

and I will add, "spinning" starts out at maybe 30 RPM and increase speed if "necessary".
 

smokeywolf

Well-Known Member
One of the polishing methods I used when at the end of 3 or 4 days of polishing parts of a film gate was, I would take a couple of dozen of the wooden cotton swabs, break them off to 1" to 1-1/4" long, mount a swab in a Dremel or a Dumore die grinder, dip the swab in a polish or apply a bit of jewelers rouge and use that to do a final polish on parts.

You're not too likely to break or soften edges too much and you could get into most moulds with a cotton swab.
 

CtnLA

New Member
Polishing small holes can often be accomplished by slotting an appropriate sized wooden dowel and slipping ultra-fine steel wool into the slot. I've even slotted bamboo skewers with a coping saw to reach into tiny areas.
An old tool & die maker friend used the simple technique long ago polishing a prototype swage die he had just turned out for me, and I've copied it many times since for different applications.
 

45 2.1

Active Member
I think you all have gotten off track. MP molds need no polishing on the cavity cuts. If you're worried about sharp or highly defined edges, there is a safe method for smoothing those. About 40 or more years ago, before the modern electronic age, there used to be something called a typewriter eraser (good luck on finding one now though). The substitute is a pencil eraser used sparingly.
 

CtnLA

New Member
I'm not advocating any home-remedy on MP moulds, but following smokeywolf's lead in discussing possible ways to polish difficult to reach places. In firearms related hobbies, those tips may prove helpful to someone eventually.
 

Rick

Moderator
Staff member
I still have to agree with Bob, I'm sure I don't have nearly as many Miha molds as he does but I have several and not a one of them has needed anything except an initial cleaning to make sure there was no oil in the cavities. Steel wool or bore brushes in one of them is like finger nails on a black board to me.
 

JonB

Halcyon member
After 3 more casting sessions today and changing the alloy and varying the alloy temp from 680º to 730º
I had no joy. I was mostly "picking" the bullets out of the cavities. 95% of the time they were all sticking in the same side, the side the sprue plate isn't mounted on.

So, I got the battery drill out, drill holes into FOUR bullets for my sheetrock screw (with head busted off). mounted the screw into the drill, then bullet onto the screw, then coated the bullet with automotive finish rubbing compound, then rotated it slowly in the first cavity for 30 seconds, then removed bullet and cleaned the mold of all debris, repeat with new bullet in next cavity, and so on.

I achieved total success. The bullets fall out of the mold. After Lee-menting, I did follow Ian's suggestion to apply the thinnest possible smoke layer from a butane lighter, directing toward the pointy edges of the lube groove on the mold face...to deter tinning.

Using an alloy of 97-1.5-1.5 before and after the Lee-menting, casting at the same temp of 700º, the bullets weighed and measured the same...checking each cavity, before and after, all were .313 and 171.9 (±0.1).

The top two are before Leementing.
the bottom three are after Lee-menting.
reduced for artful.jpg
 

Ian

Notorious member
Awesome. Glad you got it going, those look really good.

ETA: (For what it's worth to those who don't know) Bruce of BRP bullet moulds (used to produce 45 2.1's designs) would take the cherry and make a few turns in each cavity by hand after he bored them in his mill/double-acting vise setup. This insured there were no burrs and no out of roundness. He may even have scribed the vent lines on the trailing edge of the cavity (from the cherry's perspective) before touching it up with the cherry because there are no flashing bits in the vent lines. I have some examples of his work, with deep-grooved 45 2.1 designs, and they cast well. Between the finish work and the slight radius on all the sharp edges (on the cherry, presumably), the moulds aren't so recalcitrant. The deep groove requires care, attention, and proper temps/timing to function, but not so bad as the MP 30 SIL that I had was.
 
Last edited: