'Spearment

Ian

Notorious member
Ever get frustrated because Accurate Molds won't finish a nose out with smaller than a .180" meplat? Yeah, me too, particularly in .30-caliber. I'm trying something to fix that.

The idea is to take a 3/16" (.1875") drill bit, reshape and resharpen the nose, make a drill bushing out of epoxy putty moulded into the cavity with the shank of the same bit wrapped in one layer of cellophane tape and inserted through it, and drill out the meplat to whatever shape you like by turning the bit by hand. The first attempt is hardening right now. Stay tuned.
 

smokeywolf

Well-Known Member
Ian, if I were going to attempt something like that, I'd make an initial point on the meplat with a #2 center drill (3/16" body) before spinning a pointed standard drill bit.
 

Ian

Notorious member
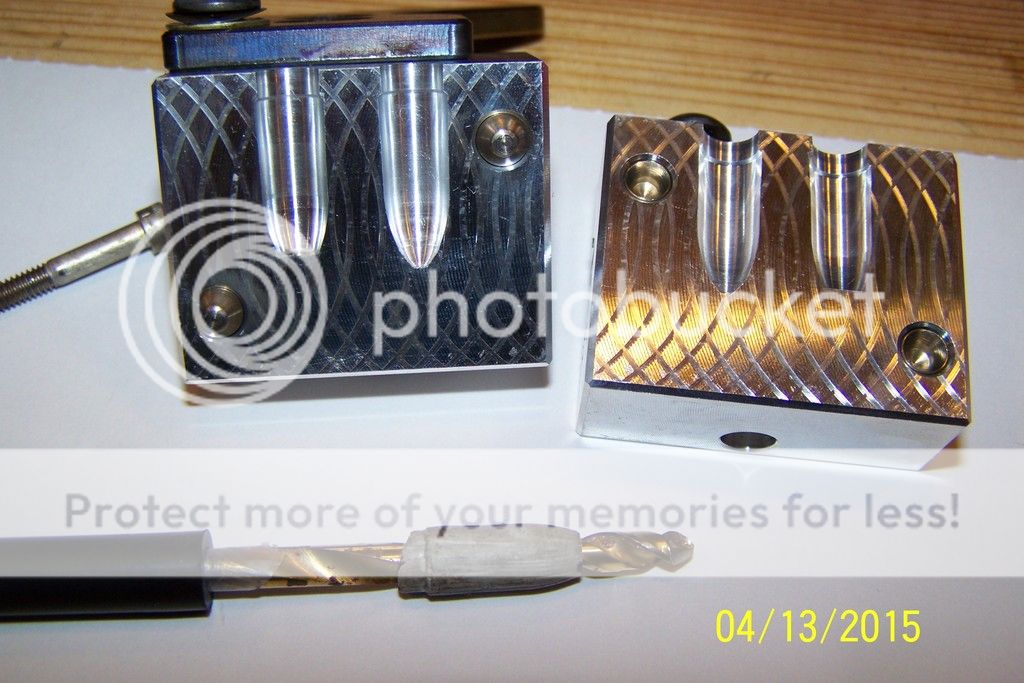
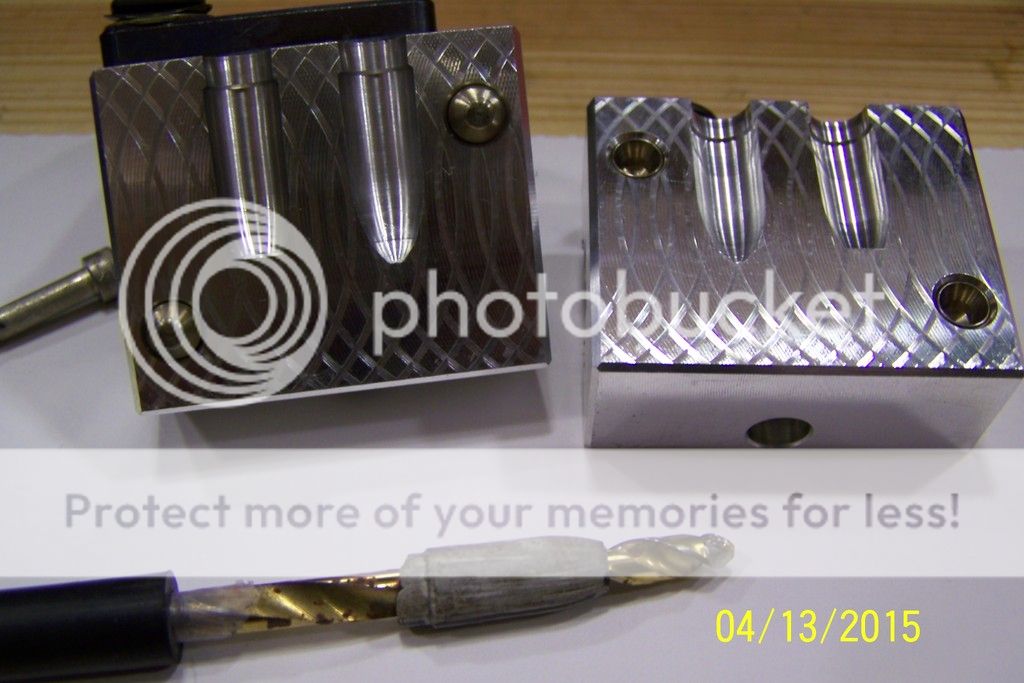
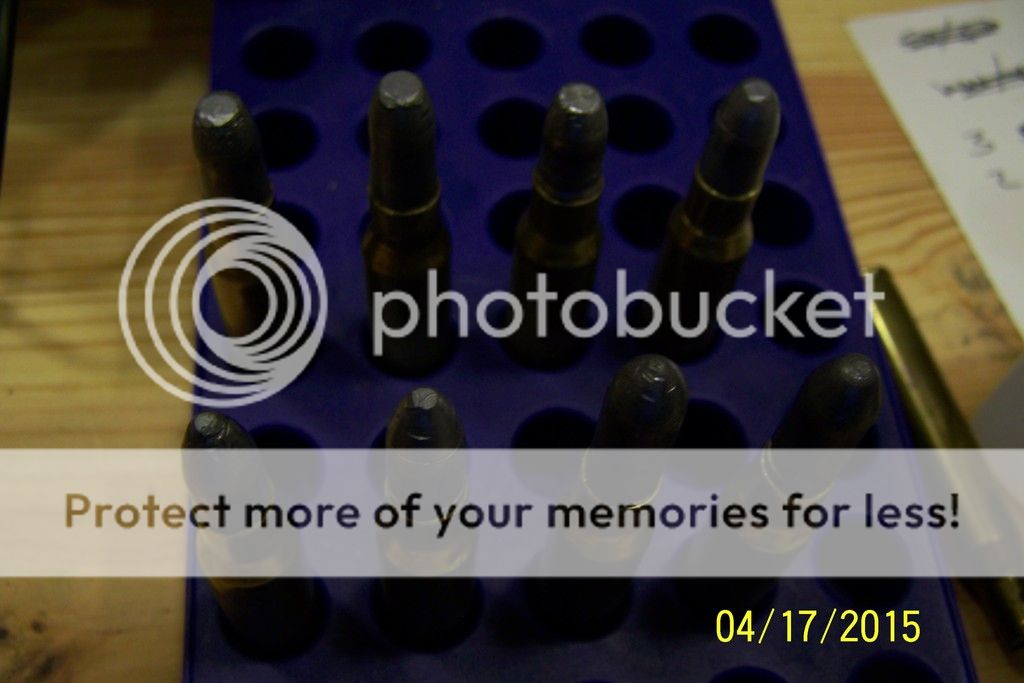
Ok, IT WORKS!!! This is good, Gentlemen, totally workable for aluminum moulds at least if you have some patience and fine motor skills.

Sorry, no pictures yet (no camera at work). I just finished one cavity here on my lunch hour and with some care, it turned out nice and centered and cleaned up very well. I almost had an aschit because I had to stop and re-grind the profile on the drill near the end of the cut, I miscalculated the grind and took too much off of the shoulder of the bit so that the point was going to be too long before it cleaned up the old meplat. THAT was nerve-wracking, actually had to re-grind and re-sharpen twice to set the point back to wider material while keeping the same profile.

Lessons learned: It's extremely difficult to accurately judge the profile cut that a twist-drill will make when re-ground. Getting that grind, back-cut, and point split correct (for a small flat meplat, have to divide the cutting edges on either side of center, very tough to do by hand) was all quite a challenge. The good news is my point will work on several other Accurate designs I have, all I need to do is cast drill bushings for each cavity design that I want to modify.

A long, rubber automotive vacuum cap made the drill much easier to turn with my fingers, but I discovered this AFTER I got a couple of nice blisters.

I used the wrong epoxy, should have used JB-Weld putty but all I had last night at home was some PVC/plastic type epoxy putty, it's a little bit on the soft side and did wear some from the drill.

Dull the flute edges of the drill so it doesn't eat up the bushing hole. I thought I could keep it snug with cellophane or masking tape but it kept wadding up.

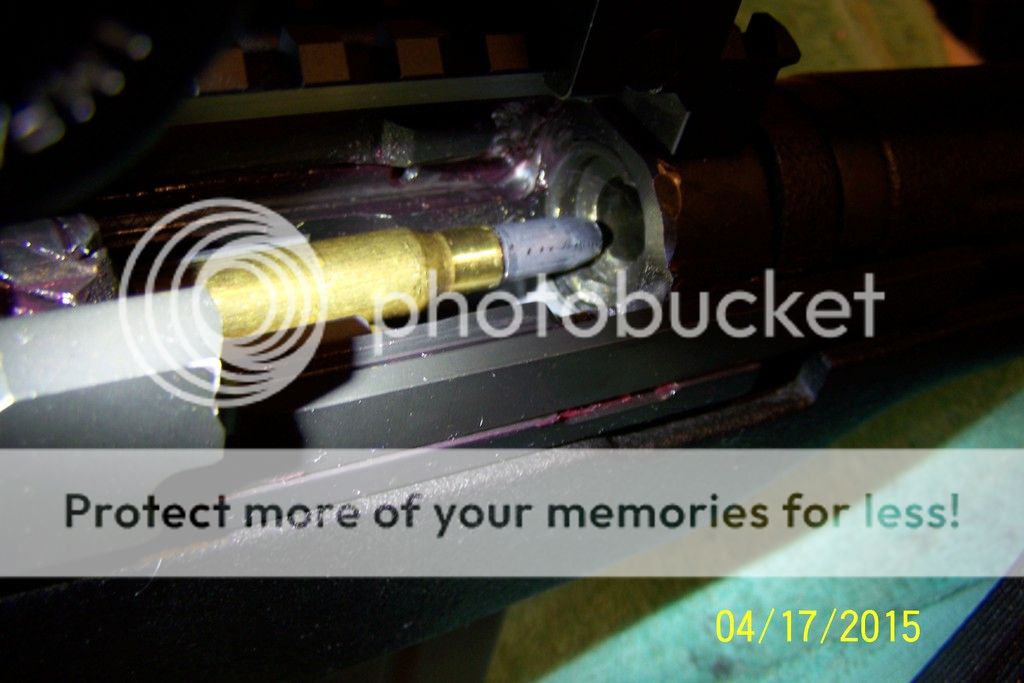
Go slow and use lots of Sharpie or layout blue. Keep checking for point wander, small corrections can be made "as you go" by shaving a high side slightly with one edge of the bit, like a carving chisel.

Rotate the epoxy bushing every few drill turns to help compensate for any eccentricity of the pilot hole.


I know all this is useless without pictures, I'll get that taken care of this evening.
 
Last edited:

Ian

Notorious member
Ian, if I were going to attempt something like that, I'd make an initial point on the meplat with a #2 center drill (3/16" body) before spinning a pointed standard drill bit.

Good idea, I was in fact wishing I had one today, but it actually centered up on its own quite well, kind of surprising to me as I thought I would have to fight it more.
 

Ian

Notorious member
Picture time, these are huge and I was in a hurry so apologies for that and the one with the flash, it's hard to catch the light just right.

100_4120_zpsdhpl2pd3.jpg


100_4116_zps7nxdrpbj.jpg

100_4120_zpsdhpl2pd3.jpg
 

smokeywolf

Well-Known Member
You may be able to blend that line out with either a Cratex or some Timesaver Yellow Label lapping compound, a little oil and a shaped hardwood dowel.
 

Brad

Benevolent Overlord and site owner
Staff member
Nicely done. Now do the other one so they match!
And all hand turned? Damn man, you will be sore for days? How bad are the blisters?
 

Ian

Notorious member
Thanks, guys, I'm heating the pot to cast a few right now, I'll report how it goes in a bit. I'm a little too chicken to do the second cavity, plus like I said, sore fingers (sometimes being a department manager instead of out in the shop/field has its downsides like loss of tough skin). I actually did cut a little cube of Cratex and poked down in the with a Q-tip and polished lightly, but not enough to do much. The line can barely be felt with the end of a scribe, so it's mostly just finish difference anyway.
 

Brad

Benevolent Overlord and site owner
Staff member
Huge leap of faith to modify a mould. Well done Ian. I can't wait to see how they look and shoot.
 
F

freebullet

Guest
Those are some impressive patience you have sir.

Well done!
 

Ian

Notorious member
Just cast and water-quenched ten pounds of these (used both cavities). Turns out I pushed the point a little deep, I mean just barely, but it has a little bonnet on it. I doubt it will affect things very much but it irks me and I may eventually try to polish away the transition. Anyway, the "point" of the exercise was to see if it would work, and it certainly does work very well, the tip is perfectly concentric with the body and carries the shape I wanted from ogive to tip. This opens up a lot more options for Accurate molds.
 
3

358156hp

Guest
I would have bet against you succeeding on this, but I've already learned not to bet against you.
 

Ian

Notorious member
I was hoping to find a way to modify those big meplats that would be simple, accurate, cheap, and doable for the average "Joe", and I think it's practical for most any tinker (aren't most of us tinkers?) to accomplish. The biggest challenge is getting the point ground and back-cut correctly. Standard hardware store drill bit (must have round shank, not triangular, for casting the hole through the epoxy drill guide) and a tube of epoxy putty is all that's required.
 

Pistolero

Well-Known Member
Nice work. Looks really good.

No doubt that "just because" is a perfectly fine answer, but why is
the meplat something to get rid of?

I have some RN, RN on a sort of TC, RF and various meplat sizes,
never worried much about the differences in nose shapes. Prolly
cuz I don't know no better.

Bill
 

Ian

Notorious member
Bill, they wouldn't shoot well in my M1A because the edge of the meplat would get a big chunk taken out of it by the (sorta) feed ramps. Sometimes they would hit hard enough to telescope into the case, or simply jam. The new nose profile feeds much better without damage.
 

Joe7436

Member
Ian, I was just playing with my M1A today. My M1 Garand will feed empty cases reliably and also feed 45 2.1's 06 bullet as made by Accurate with that same .180 meplat you have on your bullet. So I wanted to see if my M1A would feed empty cases. It did and from both sides of the magazine reliably. Now I've told you before I had a good load for that 06 bullet and again the M1A feeds it like butter. I just can't understand why you have issues with your M1A feeding. Here are pictures of the bullet I speak of:

Flatnose_zps4wudchig.jpg
Flatnose1_zpsszv788ck.jpg
 

Ian

Notorious member
Let me help you understand:

100_4123_zpsw1aaplxu.jpg


This was NOT staged, I just loaded two test dummies in the magazine, pulled the bolt all the way back and let it fly. It stopped here. When shooting, after modifying the op rod to hold the magazine more tightly against the underside of the receiver, it won't jam, but it kills the noses and groups suck. It shoots very well if single loaded. If the bullet isn't seriously crimped in place, they will feed (sometimes) but telescope in the case, which scares the hell out of me that I'll shoot one like that. I may have already, I've had some really obscene flyers with these FN bullets and the 311041.

Here are a few more test dummies, the back row have been cycled a few times and the op rod handle slapped to force them to chamber. The front row are my modified nose on the left, a Lee 312-155 I may shoot at some point, the Ardito bullet that works flawlessly now but is a mite heavy (almost the only thing I've been shooting because it FUNCTIONS, and on the far right front a Lee 312-185 2R, which seems to feed very well but I haven't shot any yet as the nose is a bit too snug going into the lands. The modified Accurate bullet on left front has been cycled through the gun by hand maybe 12-15 times from both stacks and it still looks pretty good.

100_4125_zpsaiomwcho.jpg