An answer to your Gun Photography Questions!

JWFilips

Well-Known Member
Well I have been a Professional Commercial (Product) Photographer for 49 years now, so I know a few things that may help out when you take pictures of your guns.
For me to photograph a gun well, comes easy because of my experience with camera exposure and lighting techniques etc. (Not to mention I started working with Adobe Photoshop in 1987)
However If I were to describe it , it is quite complex, however it is simple as taking a picture outside on a day with milky skies and subdued sun. This is what a good photographer creates in his studio!.... basically Mother Nature's perfect control of light on any object! Subtile highlights provided by the subdued sun and open shadows provided the lightly overcast sky. Perfect lighting for using a camera! Here is what you must keep in mind: The human eye constantly scans an object! It can be in direct sunlight with a blue sky and it sees No Burnt out highlights and nice open dark shadows! well guess what ...The most expensive cameras can not do that! See a nice picture in bright sun and take the picture ...It will not look like you saw it! Well yes adobe Photoshop can repair that bad image your camera took and many times make it look like the image you saw with your eyes! But that is not the best way! And quality suffers!
Anyway I was thinking about starting this thread to maybe help folks here and maybe answer their problems!
GOD knows ! I knew nothing about casting until a number of the well known folks here answered my questions & thought me things and set me on the right track back in 2009!
So If you folks like this idea for an ongoing thread and bear with me I will be posting things as they come to mind!

I would also like to answer your questions about your gun photo that you are not happy with.

Jim
 

JWFilips

Well-Known Member
The most typical fault I see !
Underexposure!
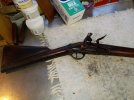
A few days ago some ne sent me a picture of an original Brown Bess that they purchased .....they wanted me to see the damaged areas!

Ok here is the photo they sent:

20220101_100109a.jpg


Can't really make out much! Why,.... because the tried to photograph a dark object on a light background!
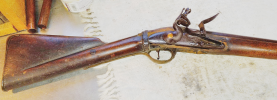
I had to run the photo through Adobe Photoshop and increase the exposure by about 2 stops
Now look at the same photo below that was adjusted ( I also cropped out all the junk)


index.php_1.jpg


Big difference, wouldn't you say?

I wanted you to see this because it is one of the "primary" reasons folks gun photos do not look good!
A camera is only so smart ( even in this day and age)....The metering system is meant to average out the scene that is in front of its lens...it is easy to explain this with Black and White photography because the meter tends to average the scene out to mid-tone gray ....in color photography this is all the mid color tones in the scene!

The smart photographer can "place" his subject into the "proper tonal" range by using his camera set to the "manual" mode and by use of a hand held "Spot" meter he can measure where the object's tonality fall and then expose "up" to get the proper look of the object ...in this case the gunstock!

Most hand held cameras now have very complex micro computer controlled metering systems that let you take photos in "Auto" mode ! Auto mode is only there so you get a picture with out much fuss, However this is not good for "Gun" photography....Now I must say most auto mode cameras do have a" +/- exposure adjust " on them This can be used to "fool" the meter in auto mode!

For instance; if the person that took the picture of his Brown Bess laying on the white blanket on his work table set his auto camera for a +2 stop exposure compensation His photo would look like what I did to it in Photoshop! However The image would have much more quality because it would be that way in the original image!

Hope this is making sense to you ( I'm always a bit too long winded)


Jim
 

JWFilips

Well-Known Member
Based on the above information: If you guys want to send me your bad photos I will let you know how to improve them.
Recently here; I saw some nice guns posted that were very dark ... I can analyze the image and tell you what is going wrong!
If ypou don't want to post them in this thread send me a PM!
 

JWFilips

Well-Known Member
OK now for a real photography lesson:

I started building flintlock long guns in 1983. By that time I had worked 10 years as a commercial product photographer So I had a good grasp on photography & lighting. About that time Muzzle Blast magazine had a 2 part article on Firearms Photography by John Bivens: he was an incredible builder of American Longrifles and needed to get photos of his guns and he set about to do it himself and these 2 articles explained how he did it. I was quite familiar with his techniques on lighting however what made his way special was that he shot the rifles standing on their muzzles by using a long metal rod with tape on it attached to a heavy wood base. The barrel was lowered down on this rod and supported the gun! This also made using the light diffusion panels and lights much easier than trying to light the guns on a horizontal plane And took up far less floor space! The light diffusion panels softly lit the entire gun and by bringing the lights ( he used tungsten photo floods) in closer to the diffusion panels he could arrange the Highlights to create the highlights he wanted on the rifle to accentuate the details!

This is the technique I have always use for gun photography at my studio...because it made lighting the rifle very easy and the set up was not very large.
Today I found those two articles! I'm going to scan them in to a PDF document and make them available for the folks here:
Please note this was back in the days of film only so much is outdated but the lighting technique is still the same!
Jim
 

Ian

Notorious member
Thanks, Jim! Great idea to open up this subject with your expertise.

To illustrate your point about white backgrounds and underexposure...

100_4799.JPG

Here's one that I'd like some input on, maybe sun too bright and too low in the sky?

100_4434.JPG

This one is better, light overcast day, but then I have trouble getting good color. Input appreciated on all these, thanks!

100_4490.JPG
 

JWFilips

Well-Known Member
100_4799.JPG
Ian way under exposed because of the Majority being "light background"+ 2 stops need in over expousure!
 
  • Like
Reactions: Ian

JWFilips

Well-Known Member
I don't Want to come across as a Know it all! Just want to help folks with any photography issue the have
 

Brad

Benevolent Overlord and site owner
Staff member
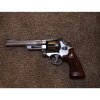
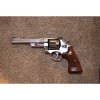
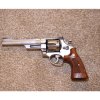
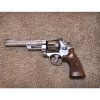
OK Jim, here is an example. Auto setting, plus 1 and plus 2 stops.

First off, excellent thread! You have true professional experience and I appreciate you passing it along.

How do I get the stainless to be bright but not washed out? Is it about lighting? Is it going to require some photoshop gymnastics? I do have photoshop so that is a plus, what I lack is the teaching to let me get the most from it.
40BAD057-956A-4393-BE54-8D860B2CD4C0.jpeg6817F687-F054-4F94-BE29-CF4CC3936BC6.jpeg1B5F032D-9D0F-4DF9-9229-047BC1D3F66F.jpeg
 
Last edited:
  • Like
Reactions: Ian

KeithB

Resident Half Fast Machinist
JW, I for one really appreciate your advice. I have an engraved 624 that I would like to get some good photos of. What type/color background would you use for a stainless gun with lots of details? I have some extra lights I can use to eliminate shadows and provide even lighting but where to go from there? Don't have photoshop but do have some freeware to do simple things like brighten/darken and control contrast but I imagine the better the original the easier any mods will be.

Edit to add: Was typing while Brad posted but it looks like we both could use the same advice.
 
Last edited:

JWFilips

Well-Known Member
Brad,
You need diffused lighting with a soft panel; Fabric stretched over a frame... Light the fabric frame! It will illuminate the stainless!
A photo shop version but not as good as real lighting!
40BAD057-956A-4393-BE54-8D860B2CD4C0.jpeg
 

JWFilips

Well-Known Member
Keith,

Post some pics I can give you my 2 cents!
But I think if you download the John Biven's PDF you may be able to figure it out!
 

KeithB

Resident Half Fast Machinist
JW, I can do the "tent" for diffused lighting, what about the color of the background for stainless? Neutral tone, lighter colors, red/green/blue?

Edit to add: typing while you posted, I will download the PDF and read it, probably has the answer I'm looking for in it.
 
Last edited:

JWFilips

Well-Known Member
Brad,
With the soft panel: You need to balance the Highlight to the Dark grip so they all come on line together! That means more light on the panel near the butt stock and less near the Barrel and cylinder! You feather it off!
 

KeithB

Resident Half Fast Machinist
Just briefly scanned through the PDF, will read in more detail later. I'm going to think about the best way to set up a dome or tent for the lighting and look for some neutral fabrics for backgrounds. Now that I think about it 99% of the stuff we make and that I would like to have better photographs of is in the size range of small handguns to carbine size rifles.
 

Bret4207

At the casting bench in the sky. RIP Bret.
Is it easier to tell what you're going to get with a 35mm SLR? I used to be able to get some real good detail shots with the old Olympus.
 

Rick

Moderator
Staff member
I'm not hardly a photographer, barely know which side of the camera to point to the object. I have come up with a few photo's though that impressed me if no one else. Every one of those pictures was taken in full natural sunlight. Seems cameras do like natural sunlight.
 

JWFilips

Well-Known Member
Ok ,
Just getting here today: Will try to answer some question;
Keith One thing I should mention. In the PDF you will see that Bivens placed his background paper a distance behind the gun . This achieves a few important things, One It lets you light the background independently of the gun so you can adjust the brightness of the background, It removes any shadows so the gun will float off the background. Bivens mostly used a rich blue color paper. ( Color backgrounds have given way to light grays and whites in the past 20 years) what is best is what you like!

Bret; SLR digital cameras are better than point and shoots or Phones
Used with a tripod they let you see and compose the subject...akso their preview screans are larger and the allow you to enlage the shot to see details

As for Light Panels: Art & craft store what are called strecher frames ; People that embroider and painters who use canvas use thes to streach their material! They are inexpensive and you can buy the size pieces you want. When I started at the studio in 1973...they were where first things I built.
I used white muslin fabric stapled to the frames and then used strecher pegs to make them taught. You want the fabric tight without wrinkles.
Wrinkles in the panels with show up in Stainless guns and anything reflective! For long guns I use two 4ft x 6ft