Base Fill out.

Ben

Moderator
Staff member
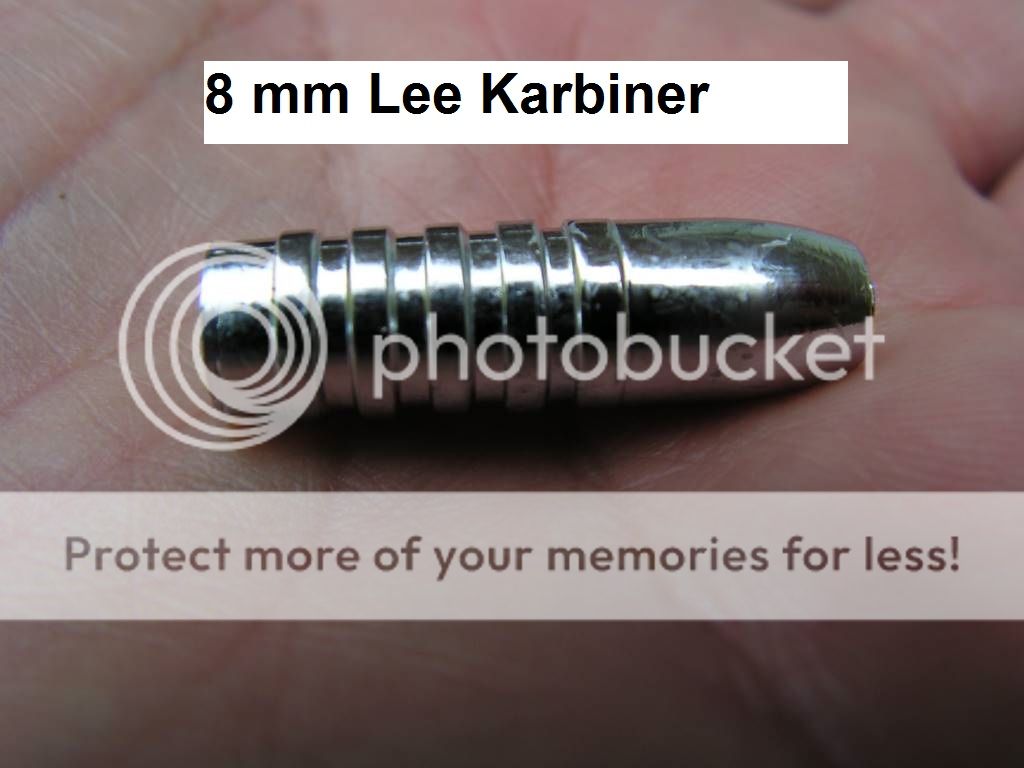
Recently, I got out an older mold.
It is a Lee 8 mm Karbiner .
I've had it about 10 yrs.

The bullet bases did not want to fill out well.
I keep cleaning the mold, no change.

I finally took a jeweler's file and " broke the edge" of the tops of the mold blocks.

Made all the difference in the world.

If you choose to do this with one of your molds, DO NOT TAKE OFF TOO MUCH METAL, it will cause the mold to " fin ". Go slow.


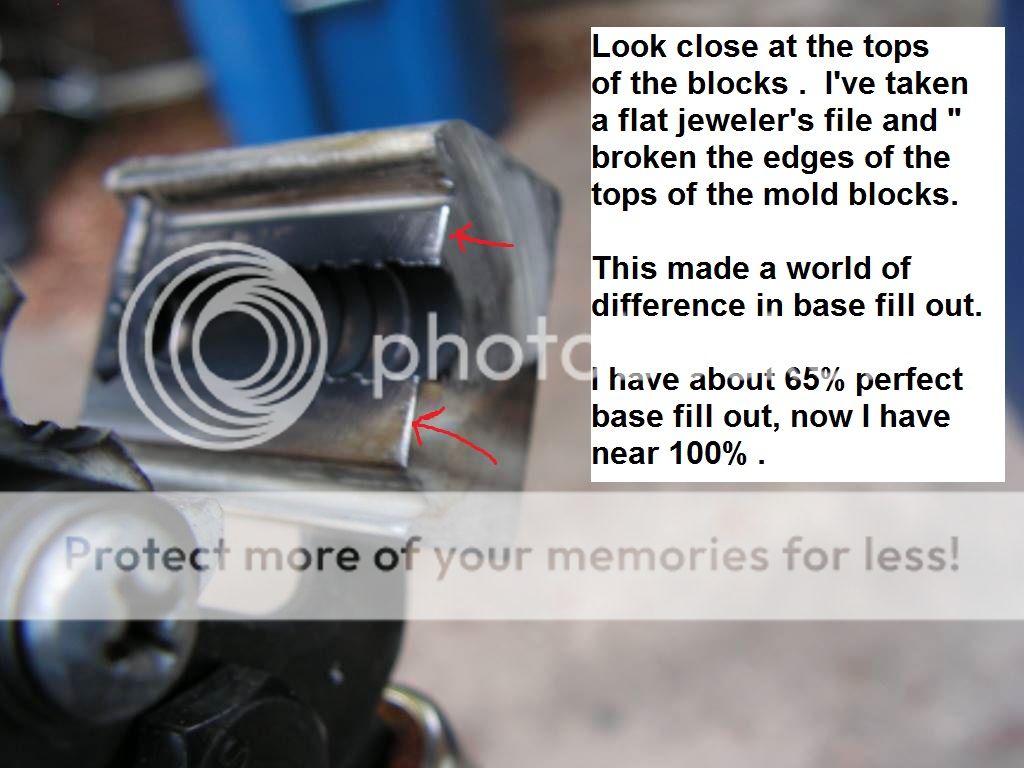
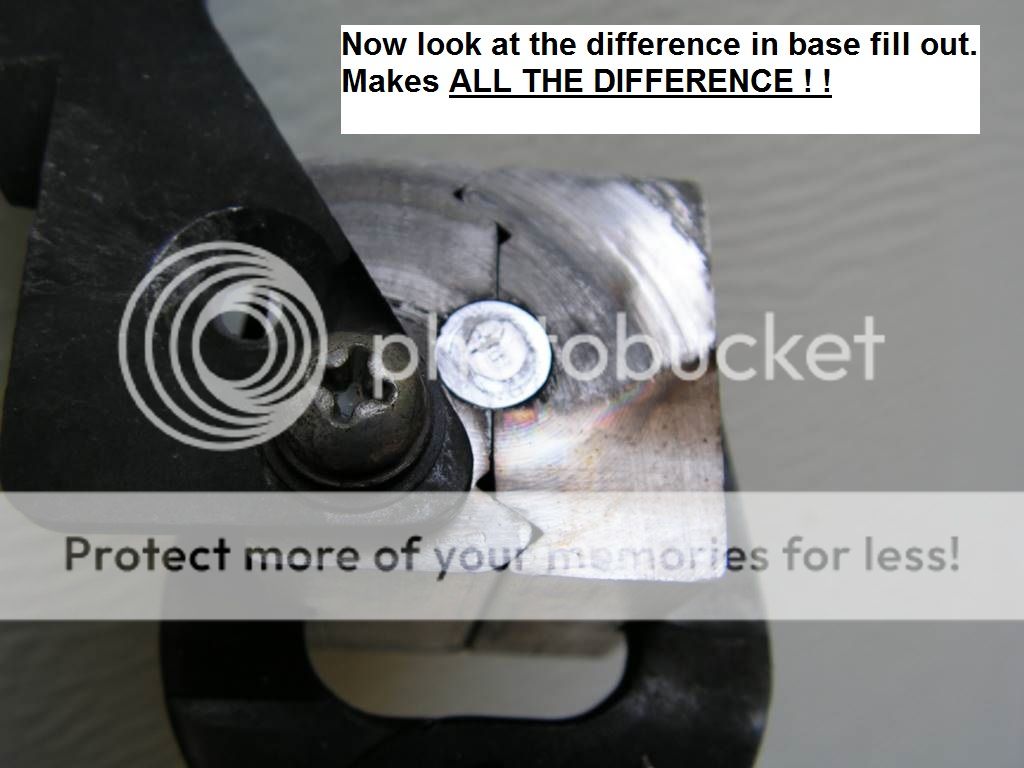
Here are photos of a Lyman 357446 that was stubborn at 1st ( about a 25% rejection rate ) on base fill out. After venting off air at the tops of the blocks ( look close at the tops of the blocks and you can see my work ), the blocks are now down to about a 2 % rejection rate.

Also notice how well the drive bands are filling out.
You'll often times see poor drive band fill also out when there is a venting problem.

023.jpg


025.jpg
 
Last edited:

Rick

Moderator
Staff member
Good post Ben. The very first bullet inspection I do is the bases, I open the sprue plate and with the blocks still closed I look at the bases. Even small minor imperfection in the bases show up like a neon sign at this point. Any bullet with less than a perfect base goes into the sprue pile and it doesn't matter how good the rest of the bullet looks. The base of the bullet steers the bullet not the nose.

Ben's advice to go slow is wise, very little metal needs to be removed to vent the blocks at the base of the bullet. A comparison is to look at the vent lines the mfg. puts in the blocks, very small and that's all you need for the base.
 

Ben

Moderator
Staff member
Rick,

Yes, just enough metal needs to be removed to let the air escape
as the alloy is filling the mold cavity.

I remove a very small amount of metal from the tops of the blocks , get the mold up to temp, and cast 20 to see if the base fill out problem has improved itself.

If I'm not there yet and the base still won't fill out properly , I remove a bit more and cast 20 more.

This routine is much safer than " guessing " how much metal to remove and missing with your guess and ruining the mold with over zealous metal removal.

Like my barber says, taking hair off is easy, putting it back on is another story.

Ben
 
Last edited:
3

358156hp

Guest
I have an early H&G 68 mould that was overdone this way. I'll try to dig up pics. Instead of simply breaking the edge between the two block halves, some knucklehead cut a slight bevel at the top. His work was well enough done, but the bevel is overdone and therefore noticeable. If only affects function if you pressure cast, and then you get small fins at the parting line. I ladle cast, so I didn't catch it right away. It still casts round bullets of uniform weight, so what the heck.
 

Ian

Notorious member
Accurate Molds' sprue plates and blocks are machined so well that they make an air-tight seal on top of the blocks, so I have found it a necessary modification to break those edges to let the air out. Tilting the mould slightly down or up and filling in sequence, or sometimes on a three-cavity filling the middle first and then doing the ends ensures sharp bases.

I bought a two and six cavity Lee mould just recently, both are the new style an have vents cut on the top of the blocks which helps. The first time I saw sprue plate venting on a mould was LBT, pretty impressive how he does those. Then I got a BRP mould and noticed the same milled vent cuts on the top of the blocks as on the faces. Same idea, and it works.
 

Ben

Moderator
Staff member
There are probably many ways for the air to escape, what is important is it must escape if you're to have nice sharp bases.

Ben
 

John

Active Member
I am amazed at how many of my molds have a preference of front pour or rear pour first. It's obvious one vents better than the other and the other is venting through the opposite cavity and out. If I don't consult my notes before I start, I waste efforts as to what prefers what.
 
3

358156hp

Guest
Interesting point John. I have a mould that has a similar preference until it reaches its optimum casting temp, then it cast fine either way. It's never bothered me enough to spend any time trying to sort it out.
 

Brad

Benevolent Overlord and site owner
Staff member
I have a few moulds where I did the same thing. I always go slow as it seems awful hard to put the metal back!
My HM2 9 mm mould was prone to poor base fill out until I filed a very slight bevel. Now I get good bases and no flashing where the bevel as cut.
 
3

358156hp

Guest
I do need to work with the sprue plate a bit, and I've started cooling the sprue plate after the sprue freezes to eliminate the divots out of the base
68bb-1.jpg 68bb-2.jpg
 
3

358156hp

Guest
One more... A friend wants to practice mould work, so I'll have him remove the bevel bases from the mould and make sure the to of the mould is square and level.
68bb-3.jpg
 

Ben

Moderator
Staff member
Most likely with someone w/ some basic machine skills and the proper size reamer, that bevel base could be cleaned up and your problems gone.

It does look like you're getting some " flash" from an ill fitting sprue plate.

Ben
 
3

358156hp

Guest
At first I thought the blocks might be warped, however both bullets come out .452 perpendicular to the parting lines, and .4525-ish slightly off the parting line on each side. Perfectly normal, both bands. This makes it simply "user" grade. We'll just square the top face and ream off the BB, and it'll be ready for another 60-70 years.
 

Brad

Benevolent Overlord and site owner
Staff member
But then it won't be "vintage" and won't bring the same money on EBay.
 

Ben

Moderator
Staff member
At first I thought the blocks might be warped, however both bullets come out .452 perpendicular to the parting lines, and .4525-ish slightly off the parting line on each side. Perfectly normal, both bands. This makes it simply "user" grade. We'll just square the top face and ream off the BB, and it'll be ready for another 60-70 years.

Sounds like good strategy to me !

Ben