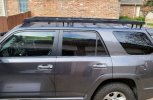
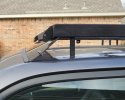
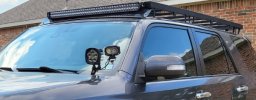
DIY roof rack for 5th gen 4Runner ...

wquiles

Well-Known Member
My best friend and I both have a 5th gen 4Runner (mine the Limited has a sunroof, his SR5 does not) and we wanted a roof rack to aid carrying stuff while camping. We feel the Gobi is the best rack out there, but pricey, and since I can weld, I figured we could do/built our own. I found this DIY article, and decided to create a sort-of-hybrid design with ideas from the article, things we liked about the Gobi, and a couple of 4Runner DIY articles from other folks that have also done a DIY roof rack.

I modified the design from the DIY in several ways by adding extra cross supports, using 14g steel, making the outer frame fully-enclosed/sealed, making the rack full length, including designing a wind deflector, adding side mounting points (1/4" thick), wider load-bearing mount surfaces (more on this later), etc. I was not in a particular hurry so I actually Tig welded everything on both racks:
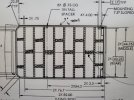
20210918_142843.jpg


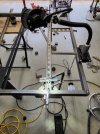
Although my garage floor is far from flat, we used it as a starting point to get the outer frame:
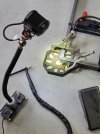
20211002_101525.jpg


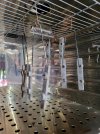
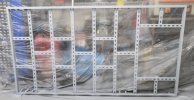
Another design change is that we made the inner struts sit exactly one inch from the top of the frame, which gives a 1" lip to prevent items from potentially sliding over, but also means that longer pieces can fit flat against the outer edges of the frame. I literally used hockey pucks to get the 1" spacing:
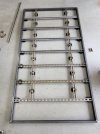
20211002_104726.jpg

20211002_113000.jpg


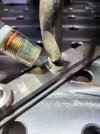
I used my "old" circa-2003 HTP water-cooled Tig welder for everything. Not as modern and lacking options from the more recent HTP 221 model, but it still works well. This is my second HTP welder (my other one is the 2100 MIG welder) and I am super impressed with HTP:
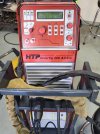
20211009_095607.jpg


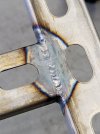
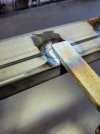
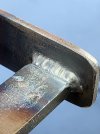
I am still very much learning to weld with Tig, but still did OK for a beginner:
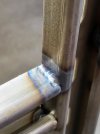
20211009_103457.jpg

20211009_134846.jpg
 
Last edited:
wquiles

Well-Known Member
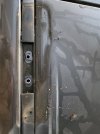
Several roof racks are installed with all of the load/weight placed on spacers, then bolted to the roof, which is not the way the factory roof rack (nor Gobi) does to spread the load to a larger bearing surface. Here is the wide area used by the factory Toyota mounts:
20211016_081858.jpg


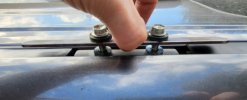
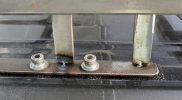
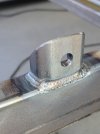
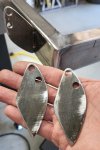
So I designed a two-part system to spread the load. First, I designed a wider mounting plate with welded spacers as a single unit, which will be bolted to the rack, and 2, a wider mounting plate on the rack which spreads the load over the factory/OEM rubber pads, like in this preliminary picture:
20211024_155418.jpg

Here you can see me using a fixture I created (since I am doing 8x of these - 4x mount points times two racks, one for my friend and mine):
20211030_095612.jpg


Once I had all pieces welded/drilled/prepped, we mounted the welded roof rack on the roof so that I can align the mounts/holes to the rack at the 4x factory mount points (we will be adding the two front mount points like Gobi does later on):
20211031_122612.jpg

20211031_124540.jpg

Once everything was tacked, we carefully removed the roof rack, and I then welded everything in place:
20211106_124943.jpg

20211106_131038.jpg

20211114_141328.jpg
 
Last edited:

wquiles

Well-Known Member
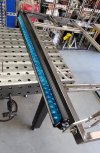
I then designed and fabricated custom mounts for the LED light bar:
20211106_165118.jpg

20211107_132827.jpg

The Gobi rack (our target goal) has a static rating of 700-800 pounds, so my family helped me to at least test my design with a little over 500 pounds:
20211107_142724.jpg
My welding mentor tells me the rack should handle "way more!", so I will call it good enough.

We then proceeded to design a way to hold the 1/8" thick Lexan for the air deflector. My friend came up with a clever arrangement. In fact, he constantly came up with great ideas to streamline the build/assembly as well!
20211120_104705.jpg

20211120_114844.jpg


The rack and the 6x mounting feet (4x bolted to the OEM locations) are going to be fully painted/protected, but the spacers in the roof need protection as well, so I used temp-cured Molyresin for those:
20211124_163225.jpg

For priming the rack I used Raptor Acid Etch Primer for the "easy to reach" spots, and Rust-oleum high performance metal primer (oil-based, applied with a foam brush) to reach into the nooks and crannies, specially inside the lips of the strut pieces.

Once I covered all the tough places with Rust-oleum, I then spray painted the frame:
20211218_152527.jpg


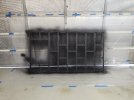
I then used the Raptor coating to give it one coat on the bottom and two coats on top (where it will see wear):
20211224_150849.jpg

20211224_150903.jpg
 
Last edited:

wquiles

Well-Known Member
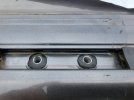
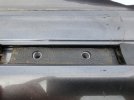
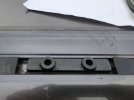
After 3x days of curing indoors, I then proceeded to use butyl tape to seal the roof openings (same OEM style material Toyota uses), layer the rubber spacers, the steel spacer, and then I was ready to bolt the roof rack for good:
20211227_092504.jpg

20211227_092551.jpg

20211227_092644.jpg

20211227_102842.jpg

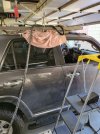
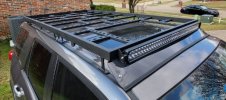
We used a "door rubber seal" at the edge of the Lexan to prevent scratching the paint and provide a good seal against the wind. This photo also shows how Gobi and other similar racks use front "feet" on top of the OEM rubber molding to provide additional load-carrying capacity:
20211227_102925.jpg

And here with the LED light bar in place:
20211227_140634.jpg

Mine is "mostly" open up front for the sun roof:
20211227_140858.jpg


Some additional thoughts:
1) The cost for each of us was about $350 for parts, and another $200 for paint/prime for me using the Raptor truck bed lining kit (my friend went the powder coat route at $240), so about $550, vs $1300 (approx) for the Gobi, so roughly 1/2 of the cost and I would argue just as strong.

2) However this project was a LOT of work, trying stuff out, designing new stuff, lots and lots of welding (two racks!), doing a little bit over the weekends, from Sept 18 2021 through Dec 28 2021. For me, since I got to spend a lot of quality time with my best friend, and shared a lot of the work/labor, and we together came up with solutions to how/where make things work, the time spent was totally worth it.

My advice, unless you have the time and patience and can figure out the little details, buy the Gobi. They did the design, they figured it all out for you - just bolt in place.

Will
 
Last edited:

Jeff H

NW Ohio
Misleading subject title!;)

When I see "DIY," I expect something sort of half cobbled together with a touch on ingenuity. I thought I was going to see some creative use of PVC pipe, carriage bolts and wing-nuts and carpet remnants.

That is a flat-out, full-blown professional, custom item there, sir.

I don't think a fella could go out and BUY something that nice.
 

wquiles

Well-Known Member
Misleading subject title!;)

When I see "DIY," I expect something sort of half cobbled together with a touch on ingenuity. I thought I was going to see some creative use of PVC pipe, carriage bolts and wing-nuts and carpet remnants.

That is a flat-out, full-blown professional, custom item there, sir.

I don't think a fella could go out and BUY something that nice.
I am an amateur at best, but thank you very much for your kind words ;)

Happy Holidays and Happy New Year :)
 

JonB

Halcyon member
While I was looking at used cars last summer, before I bought the Rav4, I seen that they put tents on a roof rack, never seen that before, but I guess I never looked, as I learned they been doing that for a while. Anyway, one of the 4runners I looked at, had a nice rack with foldout camper tent on the roof. I don't camp anymore, but I sure was inclined to start camping again, if I bought the 4runner that was setup. I also seen one on a FJ cruiser.

Is that what you have planned for this rack?
 

Ian

Notorious member
Holy smoke, Will. I think I just saw my TiG welder run out of the shop and down the street, hopefully it finds a real weldor somewhere that can use it....
 

wquiles

Well-Known Member
JonB - Once, I briefly considered a roof rack tent, but then I spent the time researching people who had one. Most regret the weight, expense, how fragile, and inconvenient = installing/removing is time consuming, and not possible by one person, so most "have" to leave it in place, which then prohibits the roof rack from actually being used for other needs. So no, not planning at all to do a roof rack tent :)

Ian - I still have so much to learn man. Each project helps me a little - next I am working on the hitch-mount swing out carrier (which I started but put on hold to do the roof rack!). I already started ordering some parts, and that will also be Tig welded - more practice time ;)
 
Last edited:

fiver

Well-Known Member
i was waiting for the part where the rack took the garage door out.
not sayin,,, but i've seen that done before. [no it wasn't mee]
 

wquiles

Well-Known Member
i was waiting for the part where the rack took the garage door out.
not sayin,,, but i've seen that done before. [no it wasn't mee]
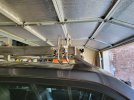
I can totally see how that could happen. As you can see in some of the pictures above we staged everything inside of my garage on purpose to make sure we "can" clear the garage door. This was also another reason we went with this "low-profile" rack instead of the "basket" type rack you see often that has 4-6" high sides, as both my friend and I have relatively low garage doors. I only have about a 1" lift on my 4runner, but I could easily go 3-4" more of lift and still not hit the garage door :)
 
Last edited:

Missionary

Well-Known Member
That is one handsome, use full roof rack ! You are well along the home builder trail.
There was a feller who build a boat in his garage corner to corner..... I forget which corner on the front of the garage he removed rather than remove 3 feet off the bow or stern of the boat.
 
Last edited:

KeithB

Resident Half Fast Machinist
Very nice work in all respects, from design through execution. I’ve never learned to TIG weld very well so when I see good work I can really appreciate it.
 

Ian

Notorious member
You don't see much perfect hobby TiG welding because it takes literally thousands of arc-hours doing it to be that good. Anyone who can pick it up as fast as Will is way ahead of the curve. If it was me doing that I'd opt for the squirt gun because it's faster and either way it would still look like Bubba cobbled it together.
 

Bret4207

At the casting bench in the sky. RIP Bret.
Very nicely done! I watch a LOT of welding videos on You Tube. Your TIG work is on par with the majority of "pros" I've seen. Everyone wants that "row of dimes on edge" look, but real world functionality is more important than appearance. Oddly enough, I just watched an ancient Lincoln industrial training film from the 40's where they were introducing oxy-acetylene welding. The guy they had welding was getting the same "TIG look/row of dimes" welds 80 some years ago with flame and bare steel rod! Good welding is good welding- period!
 

wquiles

Well-Known Member
I made several mistakes that I had to touch-up, so far from perfect, but thank you guys for the praise.
 
  • Like
Reactions: Ian

CWLONGSHOT

Well-Known Member
I loved fabing things like this. Its been a while for me. But many jeep builds and building for others was some of the best times I have had.
Very fine work you should be proud of that looks and I am sure will provide years of service!! ♥️♥️♥️

Thanks for sharing!!
 

popper

Well-Known Member
Puts my VW bus roof rack to shame. I used the cheap rain gutter mounted rails and built a wooden box to put on top. Worked for many Colorado trips. Just tossed a tarp on top & bungie it down. I do remember the blobby welds I did on the 31 ford but I did get a lot better with gas or stick. Shop class didn't have tig or mig in the 50s.
 

Ian

Notorious member
Gas welding is a very much effective and sadly lost art. Most of us wrench wranglers are pretty good at scabbing together exhaust systems with the old blue-point wrench and coathanger wire from the uniform closet