You are using an out of date browser. It may not display this or other websites correctly.
You should upgrade or use an alternative browser.
You should upgrade or use an alternative browser.
Isaac Haines kit build log
- Thread starter Ian
- Start date
L Ross
Well-Known Member
You can just stay away from America's Dairyland with that kind of blasphemy.I use it for chocolate chip cookies instead of butter.
JWFilips
Well-Known Member
Ian, who is this apprentice you speak of ? Apprentices Watch and learn or are put on minor tasks of removing parting lines on brass parts, Draw filing a barrel, or if they inlet a part it is in a piece of scrap wood for practice, Noting critical! I have had about 7 apprentices since 1985 & only one became a builder ( & a good builder). Gots to be careful as to who touches your creations!
Ian
Notorious member
I got a pair of those, too, but they amuse themselves petting the shop cat and drawing hearts and flowers in the file dust that gets on everything.
My apprentice is my manic alter-ego that gets high on coffee late at night and works on guns when he should be in a warm bed with his wife. He isn't always firing on all cylinders and is known to get in a hurry and make mistakes, but he does get a lot done!
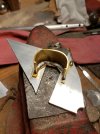
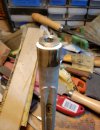
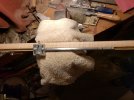
Tonight the Apprentice made a reversible tool for cutting in forestock mouldings, and he managed not to screw it up. It has a hole for Dremel cutters, one threaded for an 8-32 screw with a cutter/scraper ground on the tip, and one to pass an 8-32 with a nut on top and bottom for precise depth and orientation. It's pretty slick.

Last edited:
Ian
Notorious member
I'm not sure I understand about drilling the last 3/4 inch for the rammer hole. I assume this is the hole that continues on past the ramrod pipe. You must have a drill brazed or welding to a long rod in order to accomplish this. I can't imagine another way to do it.
I drilled and tapped the shank of a 3/8" pilot point twist drill and the end of a 4' piece of 3/8" O-1 drill rod 10-32, exactly on center, and connected them with a piece of high-grade all thread and blue threadlocker. Did the same for 5/16" ramrods too. The hole wasn't drilled quite deep enough so I fixed that, drilling until the pilot point touched off on the front trigger guard tab. I hate short rammers. On my 20-gauge I made the trigger guard so it attaches to the trigger plate with stove bolts from the top side and the whole mess is held in the stock by the tang screw and two woodscrews on the tail of the guard. The rammer hole for that one goes all the way to the tang bolt which is about 3/4" past the breech end of the barrel. When the tulip is on the breech plug there's still about an inch and a half of rod to grab and when stowed is flush with the muzzle.
Snakeoil
Well-Known Member
That's cheatin'!!Tonight the Apprentice made a reversible tool for cutting in forestock mouldings,
Nice tool. Clever idea. I remember the guy at the club that showed us his recently finished Kibler had incised lines running down both sides of the rammer channel and he cut them by hand. They were pretty good, but still not perfectly straight. And when they are that long, the slightest imperfection seems to stand out. Depth variation may stand out more than line variation. Your tool solves both of those problems.
Your drill extension is interesting. For the few I've made for non-gun applications, I used a piece of angle iron as a V-block and simply brazed the rod to the drill bit. I think the last one I made (and which I have no idea where it is right now) was for running the cable for TV thru the corner of my house, under the vinyl fluted corner posts and into the upstairs bedroom. That was a fun day.
JWFilips
Well-Known Member
Well, When I'm gone and they go into my gun shop.... They will be shaking their heads at the specialized tools I needed to make! Of course I'm the only one who knows what they were for flintlock building....but I guess they can't ask me!Tonight the Apprentice made a reversible tool for cutting in forestock mouldings, and he managed not to screw it up. It has a hole for Dremel cutters, one threaded for an 8-32 screw with a cutter/scraper ground on the tip, and one to pass an 8-32 with a nut on top and bottom for precise depth and orientation. It's pretty slick.
Best I can do is to leave them to some other young builder!
RicinYakima
High Steppes of Eastern Washington
And don't wait too long! We aren't getting any younger!Well, When I'm gone and they go into my gun shop.... They will be shaking their heads at the specialized tools I needed to make! Of course I'm the only one who knows what they were for flintlock building....but I guess they can't ask me!
Best I can do is to leave them to some other young builder!
Ian
Notorious member
I've said it before, I don't like lots of fancy carving on longrifles, especially not ones with heavily quilted maple stocks. I also don't like gaudy four-piece patch boxes or brass nose caps.
But this is a rifle in the style of Isaac Haines, so here goes...
Even the best photos of originals I could find and good photos of the modern interpretations of others aren't clear in some areas, so I printed off some generic images of Baroque and Rococo carvings to help me sort out the details.
I'm taking my own liberties as well, doing what I think looks best and not attempting to make a bench copy of Haines' work.
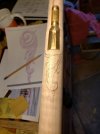
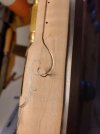
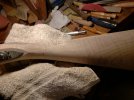
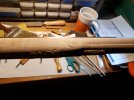
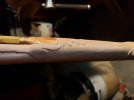
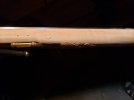
All cut in:
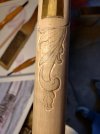
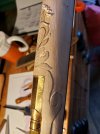
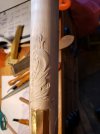
I'm cross-eyed and my tools need a hone, but I got half of it relieved and some of the contouring and details done.
But this is a rifle in the style of Isaac Haines, so here goes...
Even the best photos of originals I could find and good photos of the modern interpretations of others aren't clear in some areas, so I printed off some generic images of Baroque and Rococo carvings to help me sort out the details.
I'm taking my own liberties as well, doing what I think looks best and not attempting to make a bench copy of Haines' work.


All cut in:


I'm cross-eyed and my tools need a hone, but I got half of it relieved and some of the contouring and details done.
Last edited:
Ian
Notorious member
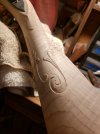
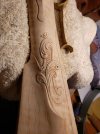
One place this stock has excess wood is on the cheek rest and front of the comb. I wasn't making enough headway with rasps so out came the chisels.
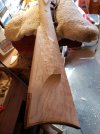
Finally got it knocked down and contoured back enough to start in on the carving for that area and the moulding for the comb nose.
Still needs a lot of background smoothing and leaf contouring but it's roughed in and no major disasters happened. The real fun part will be checkering the closed off background section in the center per the original.

Missionary
Well-Known Member
That is some fine work. I am enjoying watching this assembly.
Ian
Notorious member
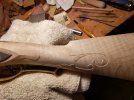
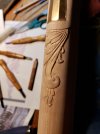
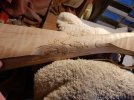
Roughed in the other side of the wrist tonight, more or less copying a more or less copy of the original carvings on the Haines rifle that I chose as the model for this one. This is a very subtle and brilliant design that has to be really studied---and perhaps carved---before one fully appreciates it. I did struggle a bit at first getting it drawn and modified to fit my particular chunk of wood, but I think it's mostly right except for a mental lapse carving the return for the leaf head around the guard pin backwards. I'll try to fix it with contour shading.
