South Bend 7" shaper refurbishment

Bret4207

At the casting bench in the sky. RIP Bret.
Looking good Ian. I would encourage you to go ahead and wire that for the lower speed. It's going to take a while figure things out and dead slow is a real good idea when learning. I don't know if your SB can be creeped along like an Atlas can, but it's pretty easy to bust something made of unobtainium if you screw up. And for heavens sake, don't get your fingers near the tooling while in motion! Those thing have no qualms about removing parts and pieces of the guy running it! I found that out the hard way!
 

KeithB

Resident Half Fast Machinist
There's a big hand wheel on the side. SOP is to disengage the motor and cycle the ram through its stroke by hand. Let's the operator adjust the stroke length and end points. Crashing anything when using a shaper or planer can cause a LOT of damage.
 

RBHarter

West Central AR
Case seals and fixed bolts . If they aren't chamfered for an O ring and not provided another seal type may be sealed with Dacron or silk thread . The particulars of weight escape me just now but 10 or 100 is present .Dad's tool box has a spool in it , I'll look later . It's called out in Lycoming O engine manuals to seal the case halves , probably Cont , and Pratt also .
 

smokeywolf

Well-Known Member
Back in the late 1940s Dad was working in Lockheed's Burbank machine shop. He was running a shaper, 16"-20" I think, when the toolbit dove and the ram snapped in two. He sad it sounded like a grenade going off. No one was hurt, but ironically, the shop manager was standing about 20 feet away at that moment. Turned out, there was an anomaly or void in the ram structure that created a weak point.
 

Ian

Notorious member
The front mounting holes through the base are a fairly close fit to a 1/2" bolt and the rear one is threaded 1/2-13NC, so my stretching a cone idea won't work. I'll just run a thin bead of Permatex 2A around the mounting holes in the pan and squish the machine down on it. 2A is what was used to seal all the threaded holes through the case, oil pump mounting screws which are drilled clear into the pressure passage, and the oil gutters. It worked for 70 years and wasn't leaking when I took it apart so that's the sealing product I used to put it back together. RTV silicone is good stuff but simply won't stay stuck or pliable after decades.

I'm definitely going to re-wire the motor for low speed since it's an option. Seems no one runs these past the second slowest belt speed because it's crazy fast and the stroke has to be lengthened so the clapper box has time to close. Of course there are a zillion different motors on these now, being the three-phase originals and most of the single-phase ones are long gone, so who knows? Many of them may have 3,450 rpm motors stuck on them now.
 
Last edited:

RBHarter

West Central AR
It was 110 denier thread ..... Dacron was on the spool in the box . I guess it didn't register these were base bolts ......
 

smokeywolf

Well-Known Member
The 20" G & E shaper in the studio machine shop had several speeds. With the exception of running the ram on the two highest speeds for a few seconds once just to see what it looked like, I never ran it on those speeds to cut material. I think the highest speed I ever used was cutting PVC and the slowest was three or four down from that for stainless.

Always kind of figured the highest speeds were more for machinery demonstrations at shows.
 

Ian

Notorious member
Yeah, I was kind of vague. Sure way to make a drip pan leak oil is to drill three half-inch holes through it. I think the 2A sealant will do the trick though, there's a nicely machined flat boss around the bolt holes on the bottom of the base where it sits on the pan.
 

Ian

Notorious member
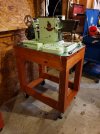
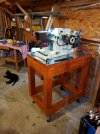
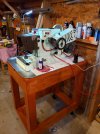
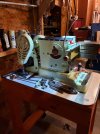
Finally got the stand finished and machine bolted down. Had to call in a bolt order to my old shop because I needed some extra-thick, SAE (small OD) grade 8 flat washers and some 5.5" long USS bolts with staked locking nuts to match, and some other odds and ends like hardened 1/4" flat washers that don't exist anywhere except catalogs and warehouses (which is why I kept about $120,000 in fasteners alone at the shop). Picked up some pipe flanges and pipe for the front legs. Also ran a piece of 1.5" square tubing up the middle and bolted it down to support the back of the machine. Stopped at the parts house and ordered belts since nobody locally has 4L280 or 290 belts on hand.

20210623_232143.jpg

20210623_233250.jpg
 

Ian

Notorious member
Guard cat is doing a fine job too. ;)
She was someone's pet but got abandoned or dumped and ended up hanging around here. I took her in and got her the medical care she needed. She had been spayed and by tooth tarter the vet said she was about two years old but was so starved she weighed 3.5 lbs and her immune system had shut down to the point her eyes were matted shut with green and brown crusty scabs. A little love and a lot of food and medicine and she bounced back in a couple months. Since she came along I have had ZERO trouble with zombie elephants or grizzly bears storming through the shop at night.
 

Ian

Notorious member
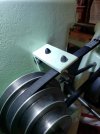
Got the belts put on and checked for fit tonight, then discovered that the locking lever for the adjustable pulley system interfered with the motor cable coming out the back of the junction box due to my use of cable glands. So I unwired the box, took it off, flipped it around the other way, fished all the wires and glands back through, resealed the box mounting screws into the case with ptex 2A, and hooked up all the wires again so the power cord comes in from the front bottom instead of top rear and the motor cord comes out the bottom rear. Then I wired up the motor for low range, put the motor belt on, adjusted the motor, loosened and aligned the motor pulley, put on the belt guard, and fired it up.

It runs backwards. For the love of GAWD, the bumblefluckery.

It has run backwards since it was installed judging by the lay of the directional wires (hooked up by the motor manufacturer) and it had some green overspray on it so that has been a long, long time, long before Keith got it. I wondered how so many chips could have run through and chewed up the gear teeth since the proper direction of rotation means a chip would have to come in from the bottom straight up to get run through the gears. But if the gears run backwards it creates a funnel lined up in the path of any errant chip flying into the big opening at the front of the column. I also wondered why so much pressure wear and galling existed on the return side of the arm that moves the ram; now I know that it was working under its heaviest load at the point of least mechanical advantage so surface stresses were high. Remember, shapers have a mechanism which returns the ram about 60% faster than the work stroke, and if run backwards it runs forward fast and returns slow, not good for the mechanisms nor production speed.

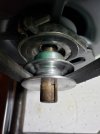
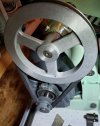
Anyway, I reversed the motor wires which control direction and we should be good now. I still have to figure out why the pulley on the tower input shaft is a quarter inch out of alignment with the jack shaft pulley, must have something to do with why the locking collar/spacer that's supposed to be between the pulley and hand wheel is missing...I think it was removed so the pulley could be stepped over and aligned and silly me aligned the pulley so the set screws bit on the two machined flats that were obviously there for the purpose. Hopefully I'm nearing the end of repairing Stupid.

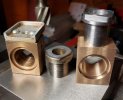
Oh, no, not quite, still have to whittle a round bar of 660 bronze into a rectangular sliding block and make a 4140 bushing to fit it. The chipped and ragged gears, I think, will live.
 

Ian

Notorious member
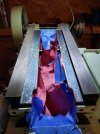
I don't want to bore you guys to death with photos of the seemingly endless scraping of ways, so I'll just post a couple more and you get the point of what I'm trying to do.

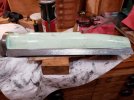
Final bluing check of the lower ram ways in the column. If the pattern looks a little screwy that's because the last 20 or so passes were spot-scraping the high points and finally splitting high spots into smaller points.

20210626_181120.jpg

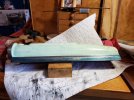
Ram left side after roughing in some crosshatches and bluing it directly on my surface plate:

20210626_193444.jpg

After about 15-18 passes of of scraping to level out the high spots and get decent flatness:

20210626_222238_20210627234932664.jpg

I then used this surface to blue the mating dovetail on the tower and then scrape it in to match the ram. Sorry, no pictures of the dovetail, I spent about 15 hours on it this weekend and am quite sick of looking at it! All that's left of that project is scraping the other side of the ram flat and then trueing the gib.
 

Ian

Notorious member
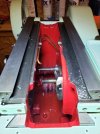
I got both the belts installed and alignment/adjustment sorted out, guards mounted, housing cleaned of all the scraping dust, right way oil tube that goes through the gib reinstalled, poured some oil in it, and fired it up. Photo of the oil running everywhere it's supposed to:

20210627_225355.jpg

All cleaned up and running sans the ram, swing arm, and connecting links.

20210627_225346.jpg

20210627_225412.jpg
 

Ian

Notorious member
Been working on the gib side of the ram for several evenings, it still has a bad dip in it so I brought a fresh 12" mill bastard file (went through the pack with my straight edge and found the flattest one in the hardware store) and worked off some metal.

The motor pulley was eating up the fresh belt so I investigated further to find the sheave was worn out. Also, it had no provision for a key to fit tue motor shaft. So I got a brand new 2"x 5/8", 4L keyed sheave and got it installed. The ratio increased about 10% now that the belt is riding the sheave correctly.

20210701_154402.jpg

20210701_160253.jpg

I also found some rubber bumpers for the other belt guard at the hardware store and got those installed:

20210701_161158_20210701165322519.jpg

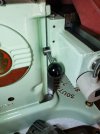
And last, I found a polished Bakalite knob with 1/4-20 brass insert to replace the one which was missing from the knee gib lock:

20210701_162252.jpg
 

Ian

Notorious member
Yesterday afternoon I fixed the saddle way so the box table runs true and finally got the sag out of it relative to the ram travel. Photos at some point, I was busy measuring and milling to four decimal places and I didn't take any of the process.

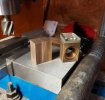
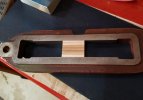
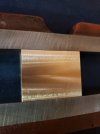
After putting the kids to bed I returned to the milling machine and turned a chunk of 660 bronze round bar into this:

20210704_003153.jpg

20210704_004113.jpg

20210704_004220.jpg