Do you have a way of knowing within a few thousandths your carriage travel? Trav-A-Dial, carriage stop, dial travel indicator?
Think I'd dial my cross-slide out so that my boring bar is outside the O.D. of the part.
Carefully move carriage forward so as to bring the end of the boring bar even with skirt-cone juncture; just eyeball it. Now back off .035".
Mark location of carriage; zero on your dial travel indicator or set a deadstop/carriage stop.
This should give you at least a pretty good idea where to stop advancing your carriage as you take your passes with the compound to establish the inside of your cone.
You may still have to pull the part out once to check dimensions, but this will get you to a point where you can establish where your are and how much further you need to go.
Hummm, I did something very similar on another part a few years ago. Don't know why it didn't come to me to do that thanks.
And this is what machinists call "painting yourself into a corner".
What you're doing is not apprentice level work. I sit down and plan out every operation before clamping the raw stock in the chuck and I still get stuck on occasion.
That's why you will NEVER see me claim to be a machinist, or an apprentice, or even a novice. I am a hobbyist, nothing more. What I've learned, I've learned from reading books, watching a few videos on the internet, and asking questions on the internet. This particular "cone project" is from watching a video where the person did his operations this way. I figured there was a measuring tool I was missing in my tool cabinet. I think I mentioned I do a lot of cleaning as it allows me to do a lot of thinking on "how" to do the next operation.
I often will "model" my work in Delrin first, so I have everything lined out beforehand. (as I did with the muzzle brake) Such is not possible with doing silencer baffles as it is not legal. Creating a plastic baffle as a "model" would be considered an illegal silencer part in the eyes of the ATF. Sooo, at some point, without any coach watching over my shoulder, I have to jump in and just do it. If I screw it up, well. . . that's really my final way of learning - through experience.
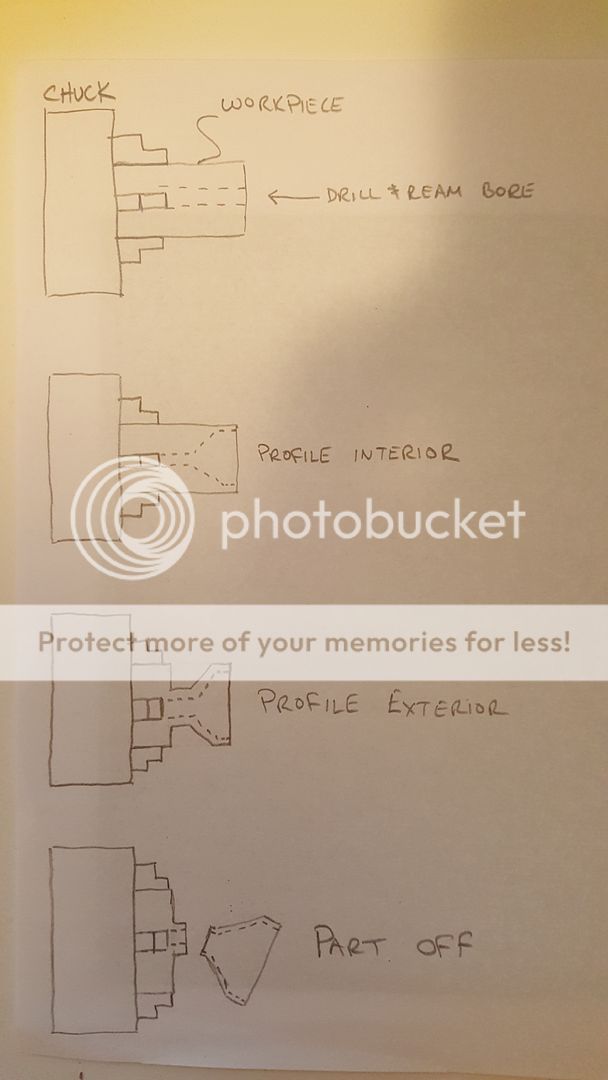
If you ever do this again, I would do all my internal work first. Then, make an expanding mandrel to fit the bore. Hold on to the I.D. of your workpiece with the mandrel and finish the outside of the cone last. Doing it this way allows for pulling the part off the mandrel, checking dimensions, then putting it back on the mandrel and taking additional cuts.
Hope this is of some help.
I had considered a mandrel. What I was thinking of was to machine out a cone from round stock that would be threaded on the outside. Machine the outside of baffle, fit it inside the mandrel, and then screw a hollowed out "cup" to hold it inside the mandrel. Then I'd be able to remove the part and check it from time to time as needed. I decided to just follow the video I had seen of doing it this way. BUT, that video never mentioned checking final dimensions. Had I been able to model this first, it would have become apparent.

")