
You are using an out of date browser. It may not display this or other websites correctly.
You should upgrade or use an alternative browser.
You should upgrade or use an alternative browser.
Titanium Silencer on a Form 1
- Thread starter L1A1Rocker
- Start date
L1A1Rocker
Active Member
How tight is the joint between the end of the brake and the support ring? Looks like lots of gas, and pressure, goes into that chamber.
i can see why it is referred to as a blast chamber.
Pretty tight. The ring is also support for the silencer when it screws on to the brake.
L1A1Rocker
Active Member
So most of the gas that gets in isn't released into the silencer, at least not very fast or with much umph.
What sort of lifespan does one expect from a blast chamber like that?
I really don't know. There's a few major manufactures doing it like this so hopefully it'll last a while. The endcap/chamber is .07 thick Grade 5 Titanium.
L1A1Rocker
Active Member
Time for an update, well past time I guess. Ian is a hero! He fixed my A/C. He came over and did a little looking around on it and said "you need one of these" as he ripped out some beer can looking thing with lots of wires attached. Twenty bucks to Amazon and I had a replacement part on the way. Then Ian was kind enough to put this part back in and the AC roared back to life from its' dead stupor.
THANK YOU Ian!!!
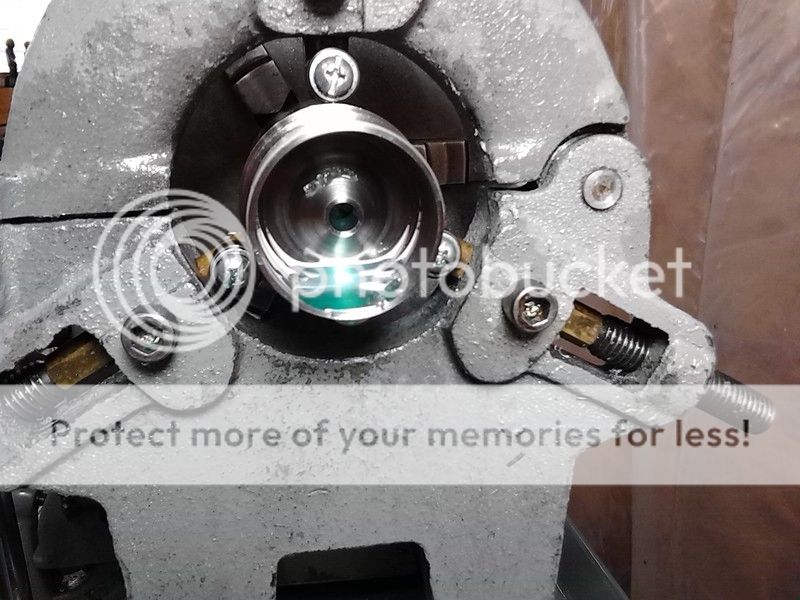
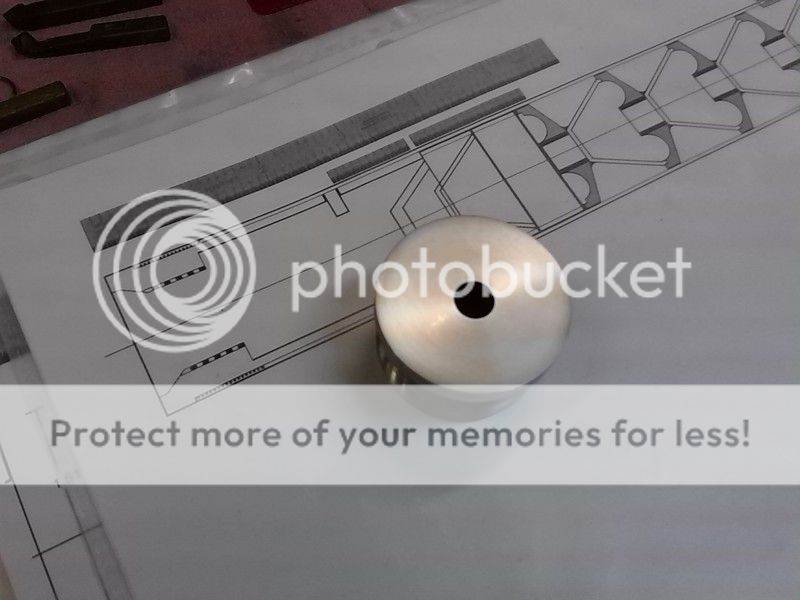
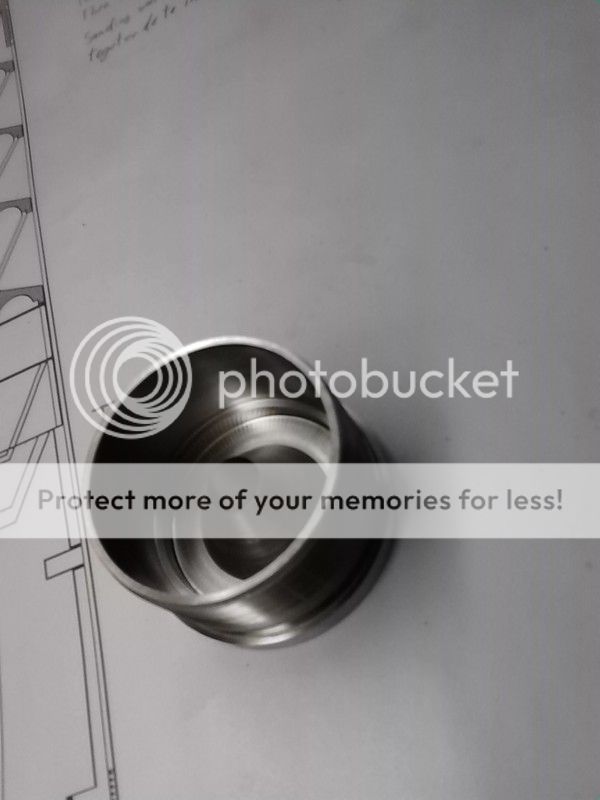
I've started on the other end cap now. Not many pics as it's a lot of repetition. But here we see it with the threads complete.
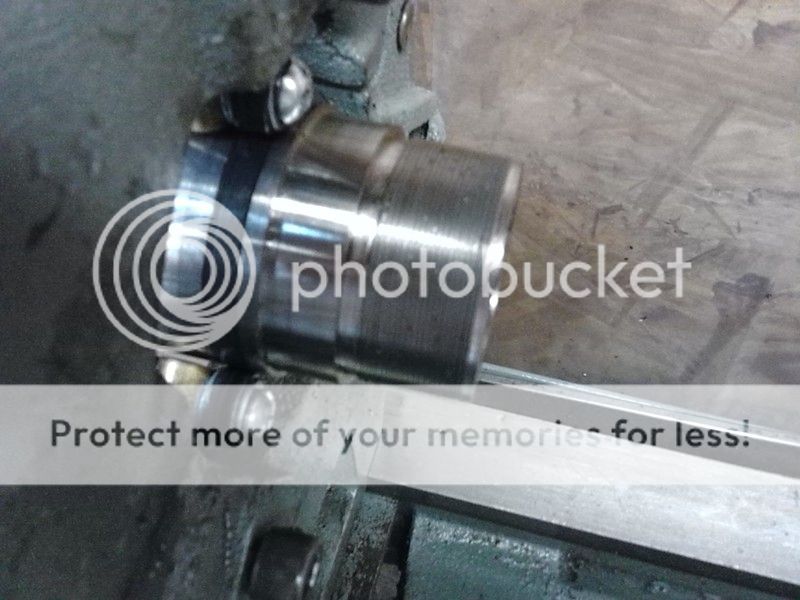
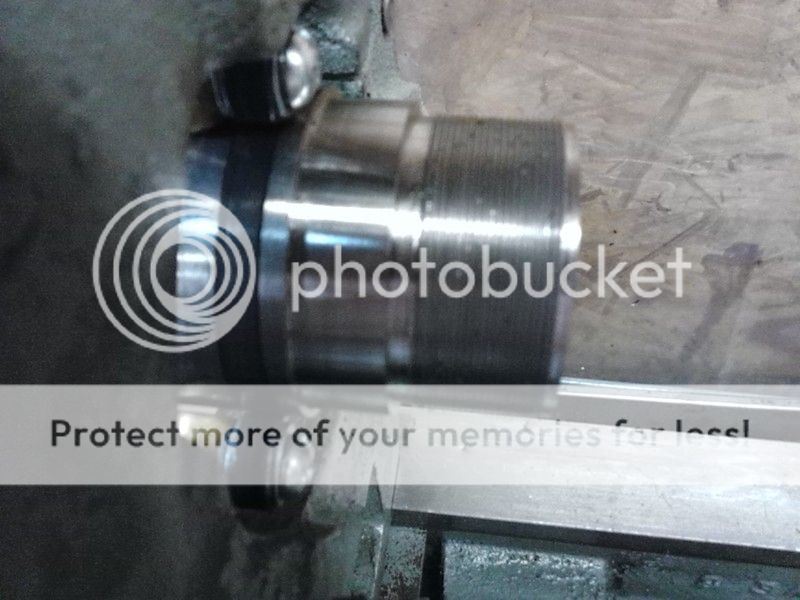
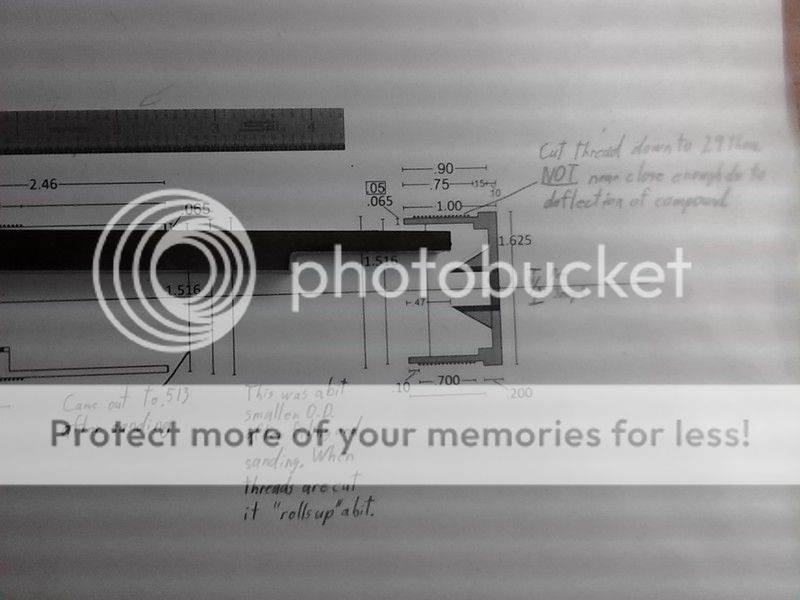
And here I've started boring it out. This boring procedure is going to be a bit of a new challenge though. If you remember from the drawing on page one, the end cap is going to incorporate a 60* cone in it. So I will only bore in to a depth of .40 for now.
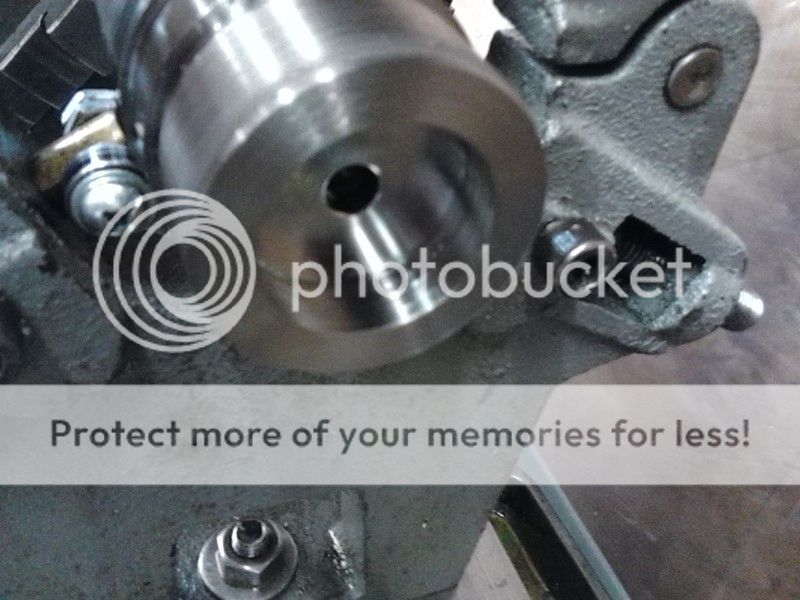
And bored out to a wall thickness of .05.
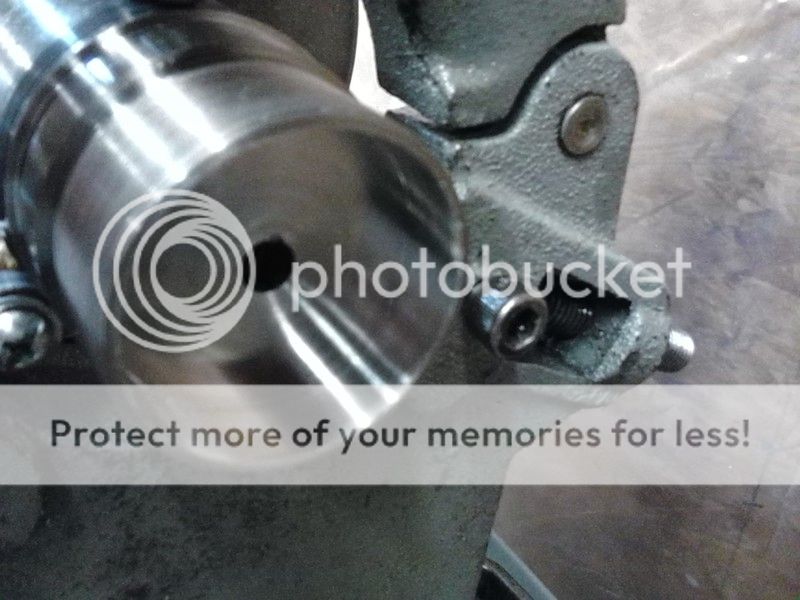
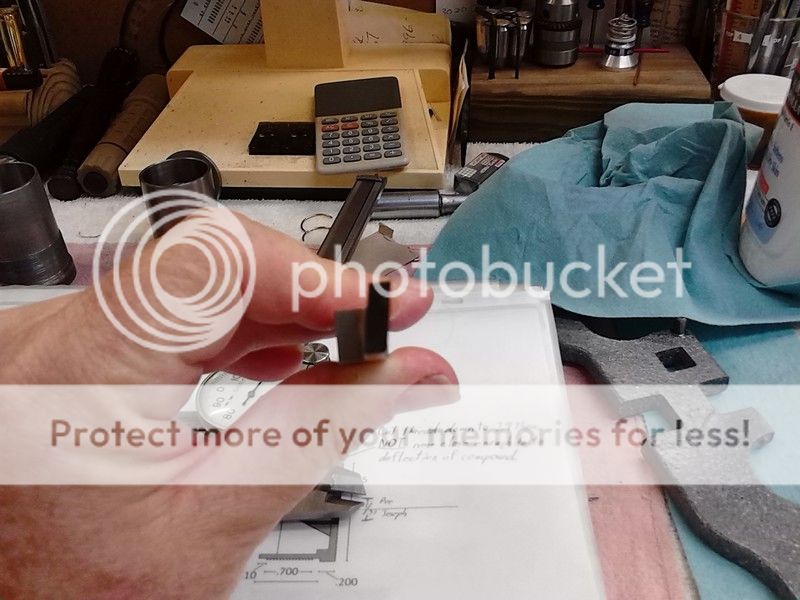
And now I'm at a bit of a stopper. I need to make a tool that will let me plunge into the peace. Once I get the tool down to depth I'll then start cutting my angle. Here's the tool partially done sitting on top of the drawing. You can kind of see how this will work.
The next step will be to grind the tool with a curve that will match the curvature of the end cap.
More later. . .
THANK YOU Ian!!!
I've started on the other end cap now. Not many pics as it's a lot of repetition. But here we see it with the threads complete.


And here I've started boring it out. This boring procedure is going to be a bit of a new challenge though. If you remember from the drawing on page one, the end cap is going to incorporate a 60* cone in it. So I will only bore in to a depth of .40 for now.

And bored out to a wall thickness of .05.

And now I'm at a bit of a stopper. I need to make a tool that will let me plunge into the peace. Once I get the tool down to depth I'll then start cutting my angle. Here's the tool partially done sitting on top of the drawing. You can kind of see how this will work.

The next step will be to grind the tool with a curve that will match the curvature of the end cap.
More later. . .
Ian
Notorious member
That was the least I could do to repay you for getting me addicted to the 300 BLK and stamp collecting! 
Figuring for deflection can drive a person mad. One job that I used to do a lot was setting up the end play on truck wheel bearings after other repairs. Many spindles have dual jam nuts with some variety of locking ring. Setting bearing end play to .002-4" was the easy part. Determining how much end play was added by torquing the jam nut was the issue, especially at several hundred pound-feet of torque.
Figuring for deflection can drive a person mad. One job that I used to do a lot was setting up the end play on truck wheel bearings after other repairs. Many spindles have dual jam nuts with some variety of locking ring. Setting bearing end play to .002-4" was the easy part. Determining how much end play was added by torquing the jam nut was the issue, especially at several hundred pound-feet of torque.
L1A1Rocker
Active Member
That was the least I could do to repay you for getting me addicted to the 300 BLK and stamp collecting!
Figuring for deflection can drive a person mad. One job that I used to do a lot was setting up the end play on truck wheel bearings after other repairs. Many spindles have dual jam nuts with some variety of locking ring. Setting bearing end play to .002-4" was the easy part. Determining how much end play was added by torquing the jam nut was the issue, especially at several hundred pound-feet of torque.
I don't think you wife has the same opinion on that - new caliber, and stamp collecting gets expensive.
LOL, I hadn't considered my notes being on the photo. I guess your situation relies on a lot of experience.
L1A1Rocker
Active Member
Sorry I've been a bit remis in posting on this. The project does continue and I have lots of pics. Just uploaded 44 pics. I'll try and limit it to the high points. (my photobucket folder is open for public view if you want to pop over there and look through them)
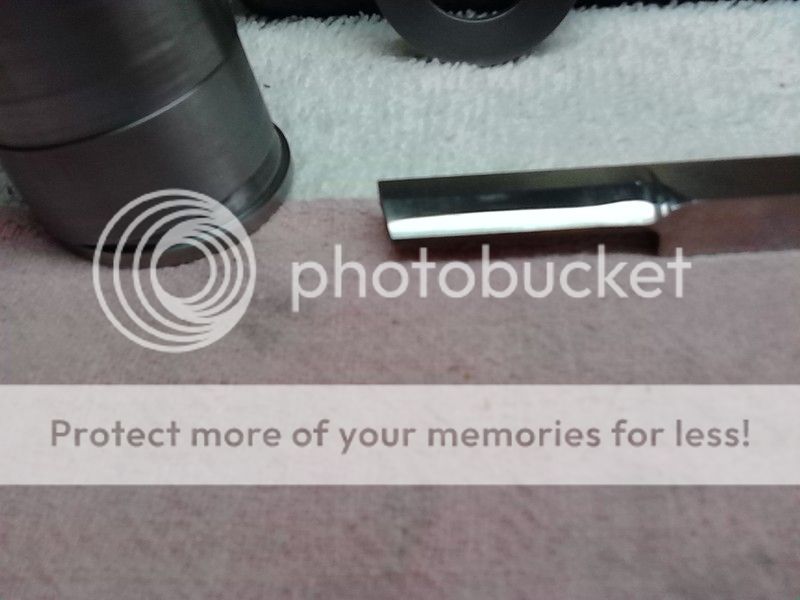
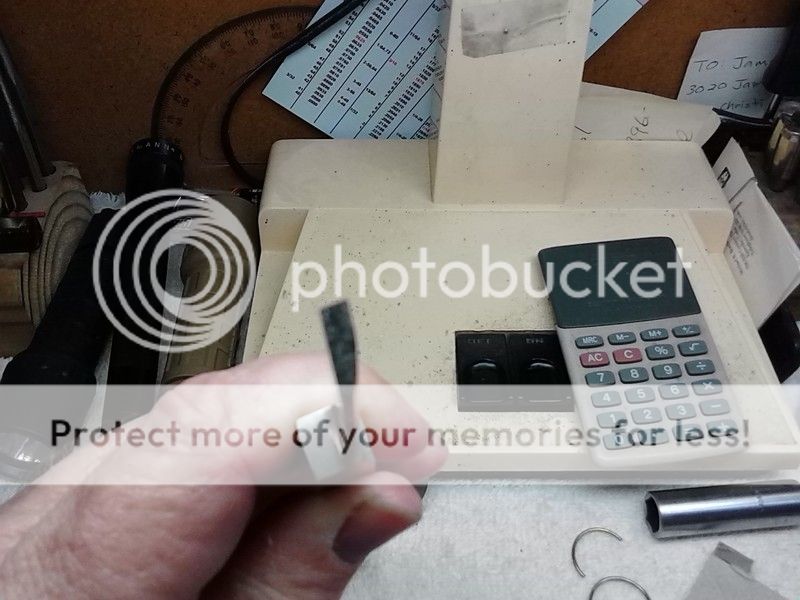
When last we left off I had started on grinding a tool to plunge cut into the end of the round stock making the end cap. I'll be carving a cone here so things get a little "jiggy". Honestly, I didn't know if it was possible with Grade 5 Ti. Ok, here we go, next step was to grind the tool into a roughly correct angle. (note: the tool blank is HSS with 10% cobalt)

Next was to start putting the outside "curve" on the tool. I actually did this by grinding a couple of reducing angles. The pics didn't come out so good but you can at least see the facets reflecting the light.
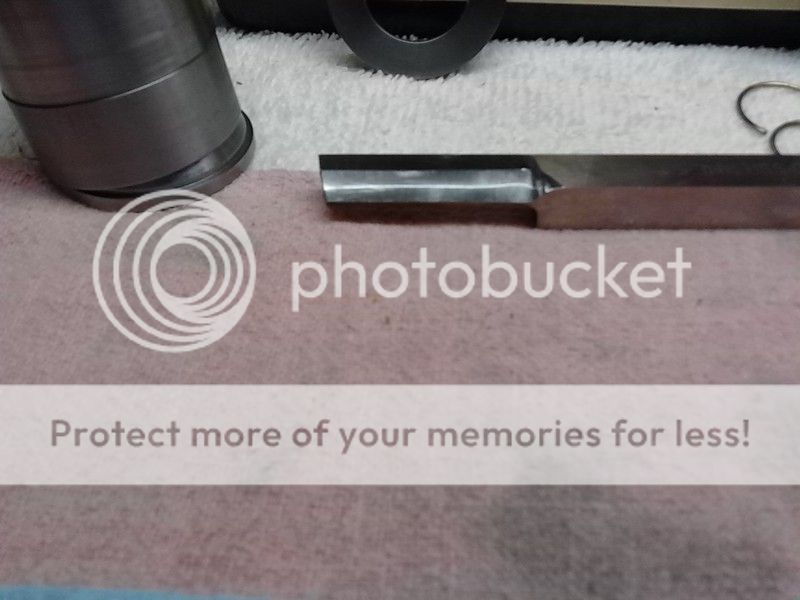
Then a trip over the the little mill to put the inside curve.
I then gave it a try and it didn't work so good. I was seriously questioning if I would be able to do this. I had cut the tool a bit on the long side and that was intentional. It's easy to cut off some, but a real pain in the tail to try and re-do all the grinding to make it longer. Soooo, I took off about 3/8ths inch.
And it worked!!
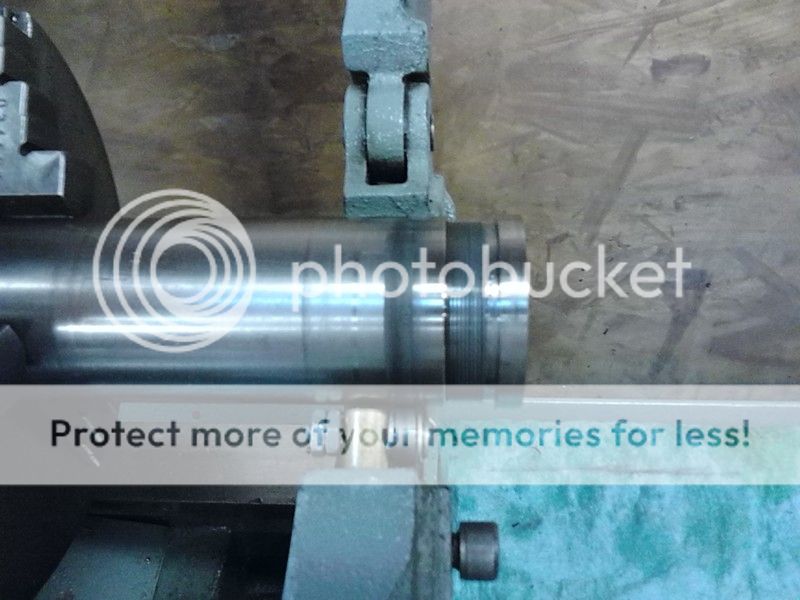
It was slow cutting but slow and assuredly, it got deeper
and deeper
Then it was time to cut the cone. I really screwed up here. I decided to grind a tool to carve the cone. I carved it totally wrong with the leading edge knifing into the work. Scratch that, try again. Wouldn't fit in the groove that was cut - how'd I make THAT mistake. Anyhow, after two days of dinking around I just used the same tool I used to do the plunge cutting.
The finish was not very good, but it got the job done.
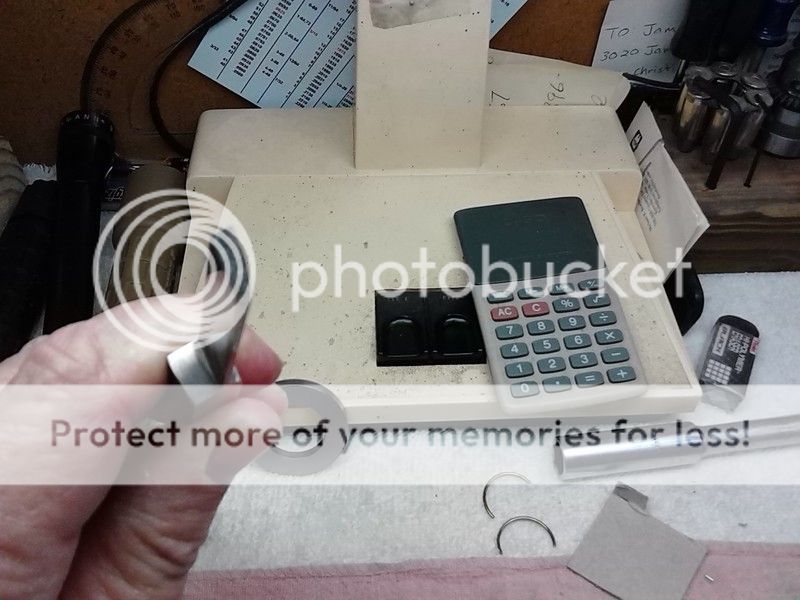
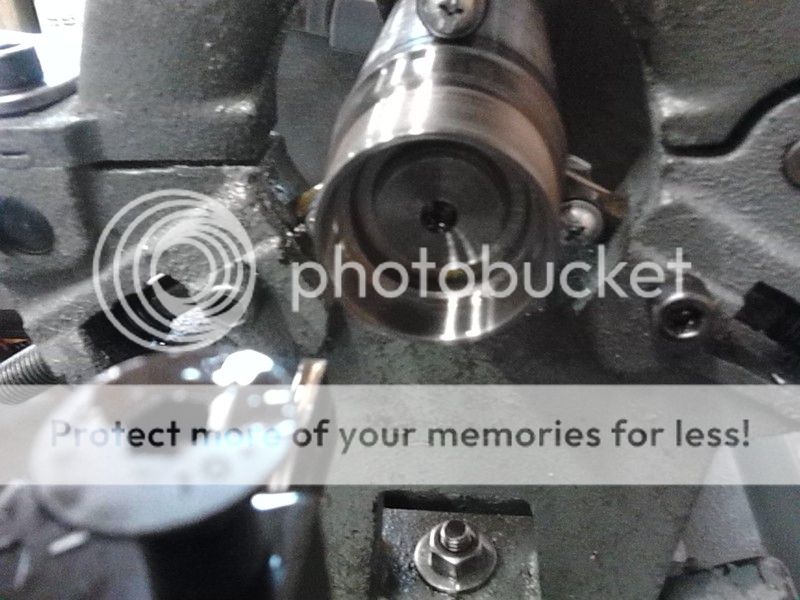
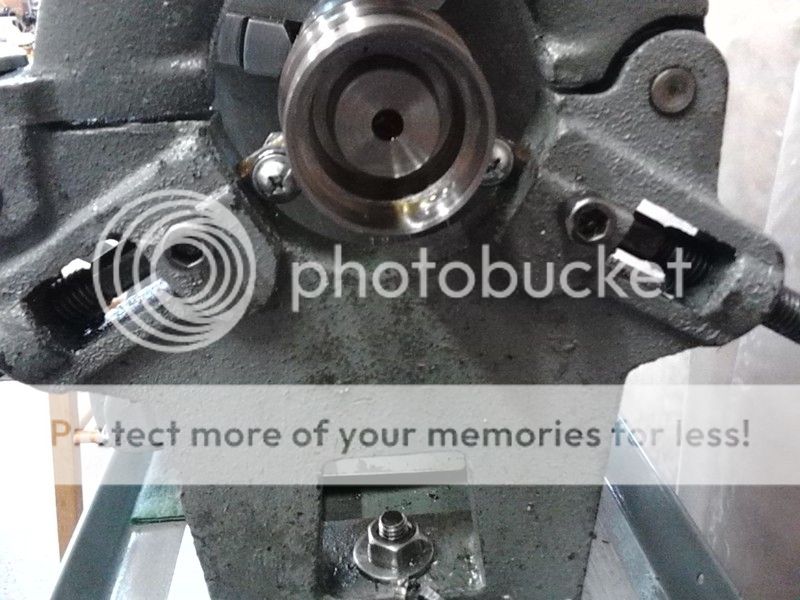
Then it was time to cut the final I.D. I could get a real boring bar in now and the finish was really nice.
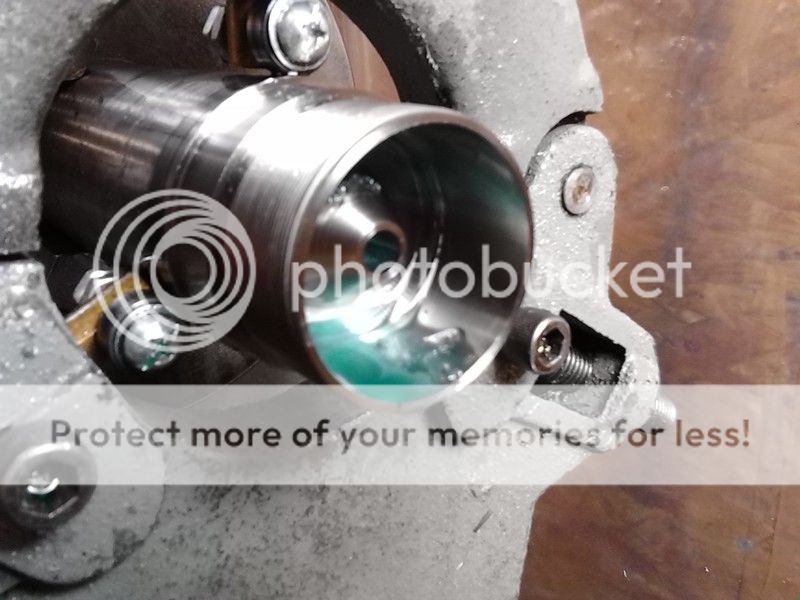
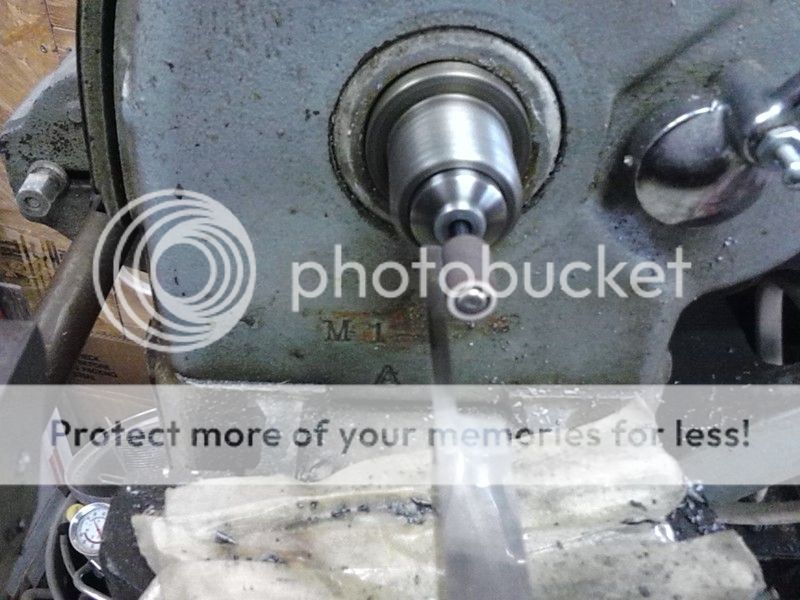
The last step was to turn the peace around, mounted into a threaded tube, so I could use a boring bar and cut the final I.D. of the bore.
Now here's a question for those that know more than I. During the boring process the endcap kept unscrewing. Not a lot, but it was noticeable and I had to re tighten it several times. I've never had this happen before. Normally the cutting action (which is done in a counter-clockwise rotation) makes the endcap get tighter, not loosen. Does anyone know why this could happen?
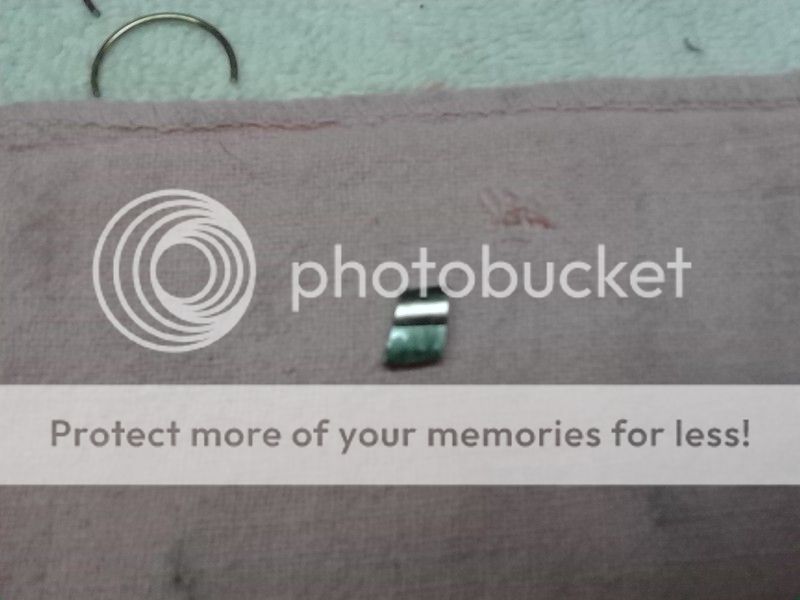
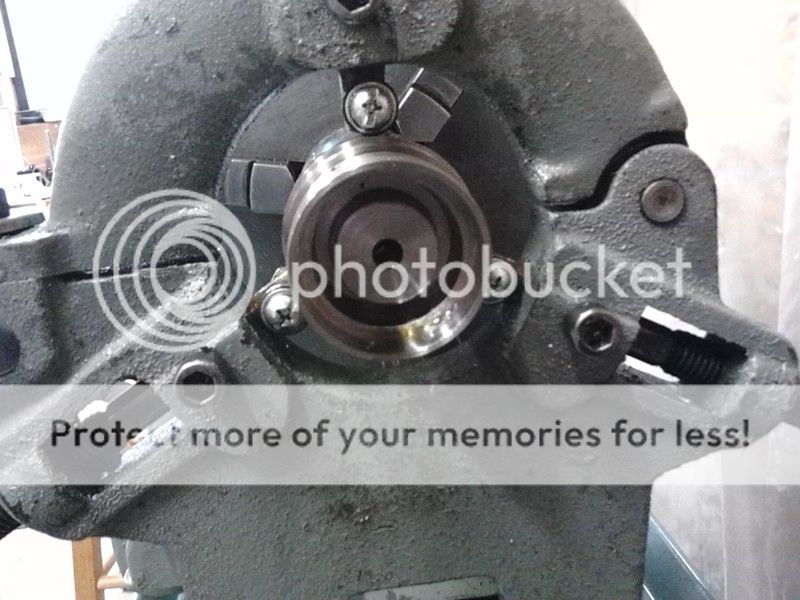
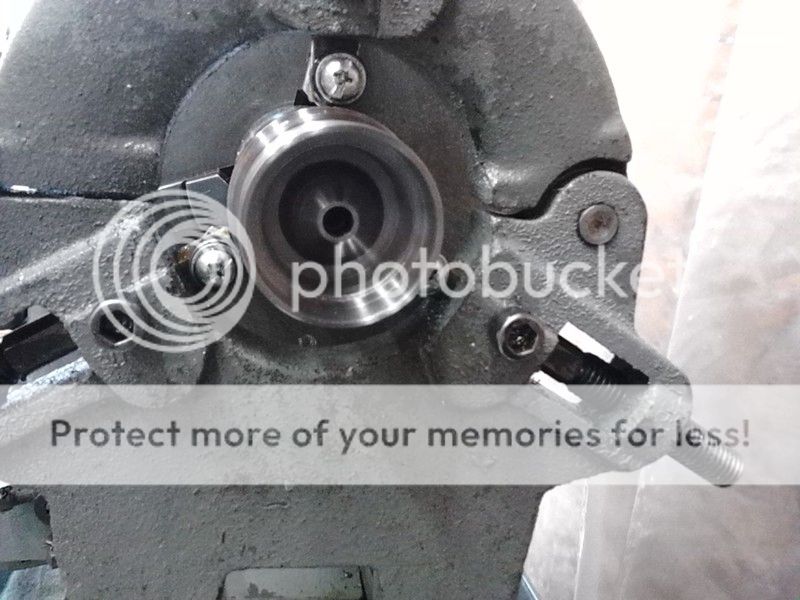
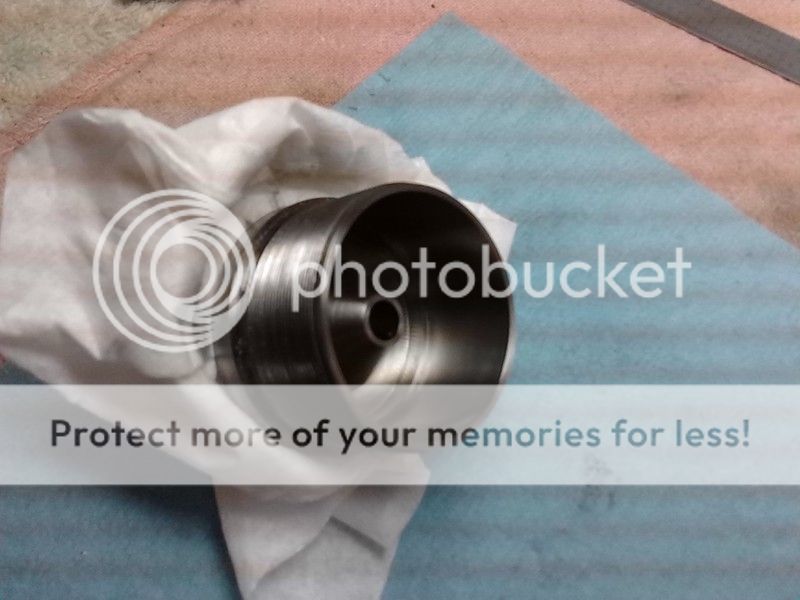
And the finished product:
Here you can really see the roughness of the finish on the cone.
Ok, I've started on my first K-baffle but it is not yet finished, so this is probably a good place to stop. I'm also taking a bit of a break while I consider a couple of options. I'm not set yet on the profile inside the plate of the K-baffle and I'm thinking that with a bit of modification here and there, I can fit another cone baffle up front for a total of 3 cones, and 4 K-baffles.
Please stay tuned, and any suggestions would be most appreciated.
When last we left off I had started on grinding a tool to plunge cut into the end of the round stock making the end cap. I'll be carving a cone here so things get a little "jiggy". Honestly, I didn't know if it was possible with Grade 5 Ti. Ok, here we go, next step was to grind the tool into a roughly correct angle. (note: the tool blank is HSS with 10% cobalt)


Next was to start putting the outside "curve" on the tool. I actually did this by grinding a couple of reducing angles. The pics didn't come out so good but you can at least see the facets reflecting the light.


Then a trip over the the little mill to put the inside curve.

I then gave it a try and it didn't work so good. I was seriously questioning if I would be able to do this. I had cut the tool a bit on the long side and that was intentional. It's easy to cut off some, but a real pain in the tail to try and re-do all the grinding to make it longer. Soooo, I took off about 3/8ths inch.

And it worked!!

It was slow cutting but slow and assuredly, it got deeper

and deeper

Then it was time to cut the cone. I really screwed up here. I decided to grind a tool to carve the cone. I carved it totally wrong with the leading edge knifing into the work. Scratch that, try again. Wouldn't fit in the groove that was cut - how'd I make THAT mistake. Anyhow, after two days of dinking around I just used the same tool I used to do the plunge cutting.

The finish was not very good, but it got the job done.

Then it was time to cut the final I.D. I could get a real boring bar in now and the finish was really nice.


The last step was to turn the peace around, mounted into a threaded tube, so I could use a boring bar and cut the final I.D. of the bore.

Now here's a question for those that know more than I. During the boring process the endcap kept unscrewing. Not a lot, but it was noticeable and I had to re tighten it several times. I've never had this happen before. Normally the cutting action (which is done in a counter-clockwise rotation) makes the endcap get tighter, not loosen. Does anyone know why this could happen?
And the finished product:

Here you can really see the roughness of the finish on the cone.

Ok, I've started on my first K-baffle but it is not yet finished, so this is probably a good place to stop. I'm also taking a bit of a break while I consider a couple of options. I'm not set yet on the profile inside the plate of the K-baffle and I'm thinking that with a bit of modification here and there, I can fit another cone baffle up front for a total of 3 cones, and 4 K-baffles.
Please stay tuned, and any suggestions would be most appreciated.
Last edited:
smokeywolf
Well-Known Member
The "rough" surface finish you point out is called "chatter marks". The cutting edge of your bit is bouncing. Only way I can think of to cut down on chatter in this case is to use a solid carbide bit and grind minimal clearances.
Looks to me like your chatter marks are minimal and won't have any effect on function of the suppressor.
One more thing, I think tool chatter is what's causing your part to loosen from its threaded arbor. A little Locktite may overcome this sort of reverse impact driver effect.
Looks to me like your chatter marks are minimal and won't have any effect on function of the suppressor.
One more thing, I think tool chatter is what's causing your part to loosen from its threaded arbor. A little Locktite may overcome this sort of reverse impact driver effect.
L1A1Rocker
Active Member
The "rough" surface finish you point out is called "chatter marks". The cutting edge of your bit is bouncing. Only way I can think of to cut down on chatter in this case is to use a solid carbide bit and grind minimal clearances.
Looks to me like your chatter marks are minimal and won't have any effect on function of the suppressor.
One more thing, I think tool chatter is what's causing your part to loosen from its threaded arbor. A little Locktite may overcome this sort of reverse impact driver effect.
Thanks for the information. It was really strange, and kind of a pain because I had not smoothed off the sharp edge from parting off the endcap yet.
Ian
Notorious member
I thought a bit about the chatter and had the same explanation, but it seems that it only unthreaded when boring and enlarging the hole...an operation that I didn't think caused any chattering like the inside corners of the endcap. As for the chattering, you can get that on a brake lathe when doing a back-cut and have too much width of the cutting tool biting into the material. It digs in, bounces out, digs in, etc, etc, and on Ammco or Hunter brake lathes the cutting tip's position is fixed and cannot be repositioned to point the back cut. Looks like the same thing going on, too much radius of the cutter in contact at the rear corners. I have no idea how you'd cut an arc with a compound on a lathe unless you were really good at turning two cranks at once, at different speeds.
smokeywolf
Well-Known Member
Common to encounter chatter when plunging a groove or channel into the face of a workpiece (trepanning).
I've turned brake rotors on my engine lathe and had to set up insert tools that were contacting both faces of the rotor and cut identical depths with feed on the cross-slide moving from inboard to outboard; like a brake lathe.
Considering the long narrow trepanning tool he had to use to reach that depth, he didn't really produce much in the way of chatter marks.
minmax
Active Member
That's what I thought, but what part? My parents live in El Paso, I try to get down there as much as possible. Haven't driven through in a long time.
I'm sick of the Michigan winters, but family obligations come first.
I want to build a form 1. However it has to be simple VSR'S and freeze plugs. I want to do it just because. I still would like a commercial can.
I'm sick of the Michigan winters, but family obligations come first.
I want to build a form 1. However it has to be simple VSR'S and freeze plugs. I want to do it just because. I still would like a commercial can.
L1A1Rocker
Active Member
That's what I thought, but what part? My parents live in El Paso, I try to get down there as much as possible. Haven't driven through in a long time.
I'm sick of the Michigan winters, but family obligations come first.
I want to build a form 1. However it has to be simple VSR'S and freeze plugs. I want to do it just because. I still would like a commercial can.
In the Hill country North, north-west of San Antone. Ian is going to do a home build without using a lathe. (he likes doing things the hard way - LOL) I"m looking forward to seeing how he does it.
Sorry I haven't posted much on this. I've been working on K baffles and it's pretty repetitious - but takes a while. I've also got a house full of family so my trips out to the shop have stopped - for now.